Adobe 23101764 Tutorial - Page 10
Delete Layer, Layer
 |
UPC - 718659340025
View all Adobe 23101764 manuals
Add to My Manuals
Save this manual to your list of manuals |
Page 10 highlights
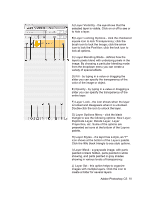
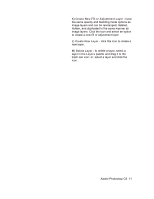
A) Layer Visibility - the eye shows that the selected layer is visible. Click on or off to see or to hide a layer. B) Layer Locking Options - click the checkered square icon to lock Transparency; click the brush icon to lock the Image; click the arrow icon to lock the Position; click the lock icon to lock all options. C) Layer Blending Mode - defines how the layer's pixels blend with underlying pixels in the image. By choosing a particular blending mode from the dropdown menu you can create a variety of special effects. D) Fill - by typing in a value or dragging the slider you can specify the transparency of the color of the image or object. E) Opacity - by typing in a value or dragging a slider you can specify the transparency of the entire layer. F) Layer Lock - the icon shows when the layer is locked and disappears when it is unlocked. Double-click the icon to unlock the layer. G) Layer Options Menu - click the black triangle to see the following options: New Layer, Duplicate Layer, Delete Layer, Layer Properties, etc. Some of the options are presented as icons at the bottom of the Layers palette. H) Layer Styles - if a layer has a style, an "F" icon shows at the bottom of the Layers palette. Click the little black triangle to see style options. I) Layer Mask - a grayscale image, with parts painted in black hidden, parts painted in white showing, and parts painted in gray shades showing in various levels of transparency. J) Layer Set - this option helps to organize images with multiple layers. Click the icon to create a folder for several layers. Adobe Photoshop CS 10


