Alesis PerformancePad Pro User Manual
Alesis PerformancePad Pro Manual
 |
View all Alesis PerformancePad Pro manuals
Add to My Manuals
Save this manual to your list of manuals |
Alesis PerformancePad Pro manual content summary:
- Alesis PerformancePad Pro | User Manual - Page 1
DRUM MACHINE REFERENCE MANUAL - Alesis PerformancePad Pro | User Manual - Page 2
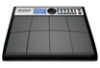
INTRODUCTION WELCOME TO THE PerformancePad Pro MULTI-PAD INSTRUMENT The PerformancePad Pro includes high-fidelity drum, percussion and bass sounds, and is easy to operate. You can easily switch among the different instrument layers in real-time. As you strike the 8 pads (each of which can be - Alesis PerformancePad Pro | User Manual - Page 3
performance or while improvising. Note that a Pattern's A, B and FILL Sub-Patterns have equal lengths and use the same Drum Set (collection of drum, percussion and bass sounds and continue recording through all 8 beats again. The PerformancePad Pro will remain in record mode, and continue to loop, - Alesis PerformancePad Pro | User Manual - Page 4
to the PHONES OUTPUT to practice quietly. 3. Connect a MIDI device, such as a sampler or sound module, to the MIDI OUT of the PerformancePad Pro. 4. If you have 1/4" TS footswitches, connect them to the Hi-Hat and Kick inputs. 5. Plug the included power adapter (12V DC 500mA) into the adapter jack - Alesis PerformancePad Pro | User Manual - Page 5
as you use the PerformancePad Pro. 2. PADS - The 8 pads are used to trigger sounds on the PerformancePad Pro. The pads can address 3 different types of sounds: drums, percussion and bass. To select which sounds are controlled by the pads, press one of the three Pad Play buttons (DRUM, PERC, BASS - Alesis PerformancePad Pro | User Manual - Page 6
the DRUM, PERC or BASS to mute the corresponding instrument layer. To un-mute the layer, press the corresponding button again while MUTE is being held down. NAVIGATION BUTTONS 12. INC / DEC - These buttons are used to increment and decrement through values and settings on the PerformancePad Pro. 13 - Alesis PerformancePad Pro | User Manual - Page 7
or the INC / DEC buttons. To exit Record Setup, press the Record Setup button again. 22. DRUM SET - This button calls up the Drum Set Mode options, where you can select different drum/percussion sounds, bass sounds, change individual pad sounds and modify parameters such as Volume, Tuning, Panning - Alesis PerformancePad Pro | User Manual - Page 8
or a speaker system. For mono sound, you can connect only one output. 5. PHONES - Connect headphones to this output for quiet practicing. 6. MIDI OUT - Use a five-pin MIDI cable to connect the MIDI OUT of the PerformancePad Pro to the MIDI IN of an external MIDI device. 7. STEREO IN - You can - Alesis PerformancePad Pro | User Manual - Page 9
." Each window contains information that helps you monitor the PerformancePad Pro's status, and/or indicates what type of data should Drums / Percussion indicator - These indicators let you know which Pad Play Mode is currently selected (i.e. which sounds the pads are controlling, or which instrument - Alesis PerformancePad Pro | User Manual - Page 10
also be used to directly input values into the PerformancePad Pro. Please note that when using the you at first, but save you from potential problems as you become more familiar with the machine. If Buttons that Toggle Some buttons (SYSTEM SETUP, RECORD SETUP, PATTERN/SONG, PRESET/USER, EFFECTS - Alesis PerformancePad Pro | User Manual - Page 11
the different instrument layers and play the pads. 8. To hear the built-in demo, hold down the PATTERN/SONG button and press PLAY. To stop the demo, press STOP. If you want to play along with the demo, feel free to bash away on the pads. 9. To hear a Preset Pattern, stop the PerformancePad Pro and - Alesis PerformancePad Pro | User Manual - Page 12
THE INSTRUMENT LAYERS The PerformancePad Pro allows you to play three different kinds of sounds with the pads. These sounds are available in three different Play Modes or Banks. These are DRUM, PERC and BASS and are accessible by pressing the corresponding button on the top panel. DRUM - This Pad - Alesis PerformancePad Pro | User Manual - Page 13
use the INC / DEC buttons while holding down TAP TEMPO to increase or decrease by 1 BPM, or hold down to scroll through the tempo values. Note that you can customize how the PerformancePad Pro deals with tempo. In the System Setup the same length, and use the same Drum Set, as the associated Main - Alesis PerformancePad Pro | User Manual - Page 14
The MUTE button can be used to mute the different instrument layers while the PerformancePad Pro is playing. To Mute Parts: 1. Play a Pattern. 2. Press and hold the MUTE button 3. Press one of the Instrument buttons (DRUM, PERC or BASS.) That particular instrument sound will be muted. 4. To un - Alesis PerformancePad Pro | User Manual - Page 15
you will hear the metronome sound, but the PerformancePad Pro will not record what you play on the pads. RECORDING OTHER PARTS (PERCUSSION AND BASS) After recording your Drum part (or if you want to start with a different part) you may want to add more instruments to your Pattern's arrangements. To - Alesis PerformancePad Pro | User Manual - Page 16
. 2. Press the PAGE UP button. The display will show the last pad which was pressed and the pattern number to which it is assigned. 3. Press the pad you wish to modify. The pad number will be displayed on the top line. 4. Use the INC / DEC buttons, the VALUE dial or the number buttons to - Alesis PerformancePad Pro | User Manual - Page 17
Set? The PerformancePad Pro features different "sets" of sounds which you can use in your Patterns and Songs. A Drum Set is a collection of settings that affect the Drums, Percussion and Bass sounds within the set as well as the mix parameters and effects setup. The PerformancePad Pro includes 100 - Alesis PerformancePad Pro | User Manual - Page 18
the instrument layer which you would like to edit by pressing DRUM, PERC or BASS. 2. Adjust the overall volume with the INC / DEC buttons, the VALUE dial or the number buttons (99 = MAXIMUM VOLUME, 0 = OFF) ƒ PAGE 3: ASSIGNING SOUNDS TO PADS You can assign any of the PerformancePad Pro's sounds to - Alesis PerformancePad Pro | User Manual - Page 19
and hard right (7). The display will show when panning position is center. Background The PerformancePad Pro has two pairs of stereo outputs. Drum sounds can be assigned to either pair of outputs (see page 11 of the Drum Set menus), and be placed anywhere within the stereo field of the assigned - Alesis PerformancePad Pro | User Manual - Page 20
time, a short staccato hit. To change a pad's decay envelope: 1. Select the sound set which you would like to edit by pressing DRUM, PERC or BASS. 2. Press the pad (the display will show the pad number). 3. Enter the desired Decay amount for the sound, using the number keypad, INC/DEC buttons, or - Alesis PerformancePad Pro | User Manual - Page 21
, so it's possible to run out of voices if you play a flurry of notes and have lots of pads in the Multi assign mode. If 16 sounds are playing and you ask the PerformancePad Pro to play another one, the sound that's closest to finishing its decay cycle will be "stolen" so that the most recent - Alesis PerformancePad Pro | User Manual - Page 22
: Mono: Plug into one of the output pair jacks; the PerformancePad Pro is smart enough to know that plugging in one plug means you Preset Drum Sets, copy it to a User location first. To name the selected Drum Set: 1. You will see the cursor underneath the letter which is currently selected. Use the - Alesis PerformancePad Pro | User Manual - Page 23
are similar to the Record Setup and Drum Set modes. After you press pad basis. ƒ Page 1 / Reverb Type There are several Reverb types you can choose on this page. You can select the Reverb type for the selected Drum Set by pressing the INC/DEC buttons or using will affect the sound of your drumset - Alesis PerformancePad Pro | User Manual - Page 24
instructions are: 1. Press the RECORD SETUP button. 2. Use drum part, quantize the kick and snare, but try recording the hi-hat in real time (or quantize the hihat, and record the snare in real time). Another trick is to combine both quantized and non-quantized parts. Example: hand claps often sound - Alesis PerformancePad Pro | User Manual - Page 25
PAGE 2: GATE When entering Bass parts in Step Edit Mode, the Gate parameter specifies the duration of notes, as a percentage of the quantization value. For example, if you have selected a gate time of 99 (which is equivalent to 100% of the quantization value) and a quantization value of ¼ note, the - Alesis PerformancePad Pro | User Manual - Page 26
pad; loud response weights the response toward louder sounds. Fixed volume plays back the associated drum sound at one of eight possible volume levels. With Fixed Volume 1, all drums the change. Go to another page or press RECORD SETUP again to cancel. PAGE 8: NOTE VALUE When recording sequences - Alesis PerformancePad Pro | User Manual - Page 27
SETUP buttons to cancel. PAGE 10: OFFSET A PATTERN OR DRUM PART Offset shifts the selected Pattern or individual drum PerformancePad Pro. The display will show OFFSET DONE and will reset the offset counter back to 00. Note: The display counter resets been named). To name, use the PAGE UP/DOWN buttons - Alesis PerformancePad Pro | User Manual - Page 28
to erase more drum sounds while ERASE is held down. ERASE ALL INSTRUMENT EVENTS IN SUB-PATTERN This operation allows you to erase all instrument events (for example, all Drum events) in the selected sub-pattern. The Drum Set's parameters will not be affected. 1. The PerformancePad Pro should be in - Alesis PerformancePad Pro | User Manual - Page 29
any data which may already exist. Please note that you need to save your Patterns if you wish to access them after you power-cycle the unit. 1. The PerformancePad Pro should be in Pattern mode and stopped. 2. Select the Pattern you wish to save. 3. Press and hold the SAVE / COPY button, and keep - Alesis PerformancePad Pro | User Manual - Page 30
PerformancePad Pro should be in Pattern mode. 2. Press and hold BASS. 3. While holding down BASS, press the PAGE UP button. 4. The screen will display PATTRANS on the top line, along with the current transposition setting on the bottom line. 5. Use Pattern that hold drum events.) You can - Alesis PerformancePad Pro | User Manual - Page 31
in "swinged" increments. ADDING A NEW DRUM TO A STEP While in Pattern Step Edit Mode, use the PAGE buttons to select the step where the drum is to be added. Press the pad that corresponds to the sound you want to add. That drum, along with its volume (how hard the pad was hit), will be recorded - Alesis PerformancePad Pro | User Manual - Page 32
use Preset Patterns, User Patterns, or a combination of both to create your Song. There are three ways to create Songs: ƒ In real time. As the PerformancePad Pro the PerformancePad Pro will remember the sequence of Patterns and Fills you select. ƒ Manually. Select Song mode and program a list of - Alesis PerformancePad Pro | User Manual - Page 33
the display should say PATTERN) and select the first Pattern which you would like to use in your Song. Remember to specify A, B or FILL subpattern as well. 2. Press different Patterns, you can press FILL at any time. The PerformancePad Pro will remember where you pressed FILL. As in Pattern mode, - Alesis PerformancePad Pro | User Manual - Page 34
Another way to sequence your Song is to use Step Edit Mode. In this mode, you can manually enter Pattern numbers for each step of the entering a new Pattern. Adding a Fill to Your Song 1. With the PerformancePad Pro in Step Edit Mode, use the PAGE UP / DOWN buttons to select the step where the Fill - Alesis PerformancePad Pro | User Manual - Page 35
step appears, press and hold the FILL button and press ERASE. Inserting a New Step Between Two Existing Song Steps 1. The PerformancePad Pro should be in Step Edit Mode. 2. Use the PAGE UP / DOWN buttons to select the step number that the inserted step should occupy. For example, to insert a step - Alesis PerformancePad Pro | User Manual - Page 36
desired tempo. The LD32 will average the time between taps and derive a tempo. Method 2 1. Alternatively, you can press and hold the TAP TEMPO button and use the INC / DEC buttons or VALUE dial to select a new tempo. INSERTING A TEMPO CHANGE IN A SONG This option allows you to insert a tempo change - Alesis PerformancePad Pro | User Manual - Page 37
In Song Perform mode, pressing and holding FILL until the end of a song step will cause that step to repeat. For example, you can use this feature lost if you turn off the PerformancePad Pro before saving your Song. 1. The PerformancePad Pro should be in Song Mode. 2. Use the INC / DEC buttons, the - Alesis PerformancePad Pro | User Manual - Page 38
for recording, or to drive other sound modules from the PerformancePad Pro. 1. To change an instrument layer's MIDI OUT properties, first select DRUMS, PERC or BASS. 2. To have the PerformancePad Pro output MIDI note data from pad hits or when playing a Pattern/Song, use the INC/DEC buttons or the - Alesis PerformancePad Pro | User Manual - Page 39
controlling the PerformancePad Pro externally, as well as the MIDI Note which will be sent out to other MIDI devices when the associated pad is struck. The display shows the note number/name in the upper left, and the drum pad number in the upper right window. 1. First, select which instrument layer - Alesis PerformancePad Pro | User Manual - Page 40
hear how a Pattern would sound with a different Drum Set (just set one up manually) as opposed to the one stored with the Pattern. Use the INC/DEC buttons or the VALUE dial to select PATT (each Pattern uses its assigned Drum Set) or MANUAL (the PerformancePad Pro will retain the currently selected - Alesis PerformancePad Pro | User Manual - Page 41
's data as described below. Some operations may not be possible even if a small amount of memory is left. This is because the PerformancePad Pro duplicates a Pattern before it is modified (length change, offset change, etc.). If you try to alter a Pattern that takes up more memory than is available - Alesis PerformancePad Pro | User Manual - Page 42
differences to add variety or serve different musical purposes. To save time, use the Copy function to copy the main Pattern to the Fill, and then when mixing different time signatures within the same piece. If some Patterns use a time signature based on quarter notes and others on eighth notes, - Alesis PerformancePad Pro | User Manual - Page 43
also called bars), and each measure is divided into beats. In the PerformancePad Pro, each beat is further sub-divided into 96 sub-beats. Rhythmic quarter note by three results in eighth-note triplets. The reason why we use the term eighth-note triplets is because the eighth note is closest to the - Alesis PerformancePad Pro | User Manual - Page 44
kick or hi-hat sounds • High-quality 24-bit stereo, 1/4" main (L/R) and headphone outputs • AC-powered (power adapter included) • Lightweight, durable enclosure TECHNICAL SPECIFICATIONS Audio Outputs Pads Sample/DAC Bit Resolution Sounds Sounds Accessible via Pads Sounds Accessible via MIDI
-
 1
1 -
 2
2 -
 3
3 -
 4
4 -
 5
5 -
 6
6 -
 7
7 -
8
-
9
-
10
-
11
-
12
-
13
-
14
-
15
-
16
-
17
-
18
-
19
-
20
-
21
-
22
-
23
-
24
-
25
-
26
-
27
-
28
-
29
-
30
-
31
-
32
-
33
-
34
-
35
-
36
-
37
-
38
-
39
-
40
-
41
-
42
-
43
-
44
 |
 |

DRUM MACHINE
REFERENCE MANUAL