Alesis PerformancePad Pro User Manual - Page 38
System Setup
 |
View all Alesis PerformancePad Pro manuals
Add to My Manuals
Save this manual to your list of manuals |
Page 38 highlights
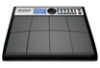
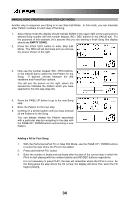
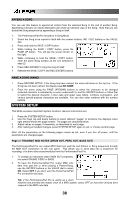
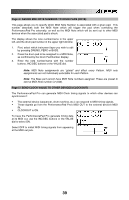
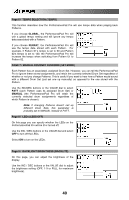
APPEND A SONG You can use this feature to append all content from the selected Song to the end of another Song. Appending a Song to an empty destination will create an identical copy of the Song. Note that you can double the Song sequence by appending a Song to itself. 1. The PerformancePad Pro should be in Song Mode. 2. Select the Song to be copied to itself with the number buttons, INC / DEC buttons or the VALUE dial. 3. Press and hold the SAVE / COPY button. 4. While holding the SAVE / COPY button, press the PAGE UP button. You will see the screen shown on the right. 5. While continuing to hold the SAVE / COPY button, enter the same Song number as the one selected in step (2). 6. Press REC (ENTER) to copy the song to itself. 7. Release the SAVE / COPY and REC (ENTER) buttons. NAME A SONG (NAME) 1. Press RECORD SETUP. If the Song has been named, the name will show on the top line. If the Song has not been named, the display says NO NAME. 2. Enter the name using the PAGE UP/DOWN buttons to select the character to be changed (selected character is indicated by a cursor underneath it), and the INC/DEC buttons or Value Dial to select the desired character. Lower case and upper case letters, numbers, punctuation, and various special-purpose characters are available. You can also enter numbers with the number buttons. SYSTEM SETUP This Mode accesses important System functions. General instructions are: 1. Press the SYSTEM SETUP button. 2. Use the Page (up and down) buttons to select different "pages" of functions; the display's lower right window shows the page number. The pages are described below. 3. Adjust values on pages, if necessary, as described for each page. 4. After making all needed changes, press SYSTEM SETUP again to exit, or choose another page. Note: All the parameters on the following pages remain as set, even if you turn off power, until the parameters are changed again. Page 3 / TRANSMIT MIDI NOTES (DRUM OUT, PERC OUT, BASS OUT) The PerformancePad Pro can output MIDI data from pad hits and Pattern or Song sequences through the MIDI OUT connection on the rear panel. This allows you to send data into a sequencer for recording, or to drive other sound modules from the PerformancePad Pro. 1. To change an instrument layer's MIDI OUT properties, first select DRUMS, PERC or BASS. 2. To have the PerformancePad Pro output MIDI note data from pad hits or when playing a Pattern/Song, use the INC/DEC buttons or the VALUE dial to select ON. Select OFF if you don't want the PerformancePad Pro to transmit note data. Tip: If the PerformancePad Pro is acting as a drum machine and provides the master clock to a MIDI system, select OFF so that other devices don't respond to the MIDI note data. 38
-
 1
1 -
2
-
3
-
4
-
5
-
6
-
7
-
8
-
9
-
10
-
11
-
12
-
13
-
14
-
15
-
16
-
17
-
18
-
19
-
20
-
21
-
22
-
23
-
24
-
25
-
26
-
27
-
28
-
29
-
30
-
31
-
32
-
 33
33 -
 34
34 -
 35
35 -
 36
36 -
 37
37 -
 38
38 -
 39
39 -
 40
40 -
 41
41 -
 42
42 -
 43
43 -
44
 |
 |