Asus Intel BNU31 Quick Start Guide - Page 10
Create a Bootable Host Drive
 |
View all Asus Intel BNU31 manuals
Add to My Manuals
Save this manual to your list of manuals |
Page 10 highlights
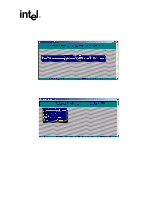
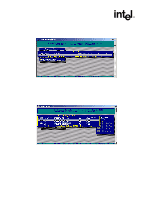
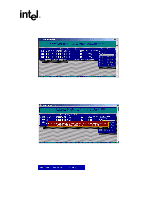
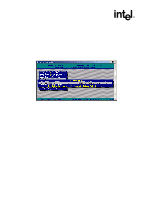
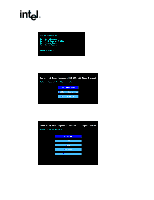
Create a Bootable Host Drive the covers are reinstalled should you reconnect the power cords and power up the computer for the software installation and use. 1. Power off the computer, disconnect power cord(s) and remove the system cover (consult the documentation that came with your computer system). 2. Install the IIR controller into an available PCI slot that is applicable for the product (refer to the accompanying Hardware Guide for more details). 3. Connect one end of the SCSI cable to the internal (68 pin) or external (VHDCI) SCSI connector of the IIR controller or the local host SCSI controller interface, depending on the RAID product being used. Connect the other end of the SCSI cable to the SCSI drives or drive enclosure. Note: Ensure that the end of the SCSI bus is properly terminated. Consult the accompanying Hardware Guide for SCSI bus termination details. 4. Replace the system cover and reconnect power cord(s). 2.3 Create a Bootable Host Drive Storage Console (StorCon) is the software tool used for creating host drives as well as administering the RAID subsystem. This section describes how to create a bootable host drive in a RAID 1 mirrored array configuration via the expansion ROM (XROM) StorCon. See Appendix A for an example of a RAID 5 disk array with hot fix drive configuration. Refer to the Software Guide for further details on StorCon and information about other RAID levels. 2.3.1 Installing a RAID 1 Mirrored Array 1. Power on the computer. 2. Press + when the IIR BIOS message appears to load XROM StorCon. 10 Installation Quick Start Guide
-
 1
1 -
2
-
3
-
4
-
 5
5 -
 6
6 -
 7
7 -
 8
8 -
 9
9 -
 10
10 -
 11
11 -
 12
12 -
 13
13 -
 14
14 -
 15
15 -
16
-
17
-
18
-
19
-
20
-
21
-
22
-
23
-
24
-
25
-
26
-
27
-
28
-
29
 |
 |
