Asus Intel BNU31 Quick Start Guide - Page 20
RAID Software Suite Installation
 |
View all Asus Intel BNU31 manuals
Add to My Manuals
Save this manual to your list of manuals |
Page 20 highlights
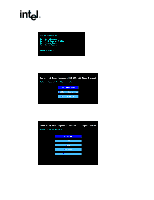
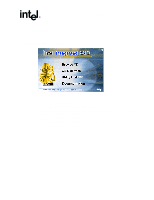
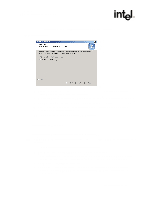
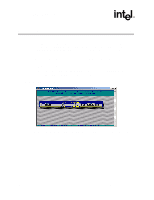
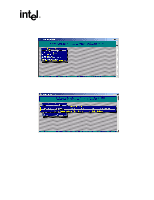
RAID Software Suite Installation - One blank high density floppy diskette† may be required to create the installation diskette • SCO UnixWare* 7.1.1† OS software † Not supplied 2.7.2 OS Installation Procedures Note: When installing UnixWare, create only one RAID device (host drive) on which the operating system is to be installed. 1. Create and configure one RAID device from the BIOS of IIR Storage Console (accessed by pressing +). 2. Insert UnixWare 7.1.1 installation diskette 1 of 2 which was included with your OS user's manual. Installation begins. During the installation UnixWare prompts you to insert a Host Bus Adapter (HBA) diskette. Insert the RAID Software Suite Driver Installation diskette. If you do not have the diskette for the operating system that you are installing, then create it before continuing. See Section 2.4 for instructions to create this disk. 3. During the installation of UnixWare, you will be prompted to install the Network Information Services (NIS) package. By default the installation will configure your system as an NIS client. See your system administrator for configuration of the NIS services. Note: Installation of this service may take an extended period of time. If you do not plan on using the NIS or there is not an NIS server present on your network that you are installing this system onto, defer installation of NIS at this time by pressing at the NIS configuration screen. After completing the OS installation, proceed to Section 2.8 to complete the RAID Software Suite installation. 2.8 RAID Software Suite Installation 2.8.1 Microsoft Windows 2000 and NT 4.0 1. Log into Windows using a user account with administrative rights. 2. Insert the RAID Software Suite CD-ROM in the CD-ROM drive. When the Intel Integrated RAID splash screen (see Figure 2-13) appears, click on the link Install, to launch the Setup program. 20 Installation Quick Start Guide
-
 1
1 -
2
-
3
-
4
-
5
-
6
-
7
-
8
-
9
-
10
-
11
-
12
-
13
-
14
-
 15
15 -
 16
16 -
 17
17 -
 18
18 -
 19
19 -
 20
20 -
 21
21 -
 22
22 -
 23
23 -
 24
24 -
 25
25 -
26
-
27
-
28
-
29
 |
 |
