Asus Intel BNU31 Quick Start Guide - Page 27
A-7, Table 2-1, A-8
 |
View all Asus Intel BNU31 manuals
Add to My Manuals
Save this manual to your list of manuals |
Page 27 highlights
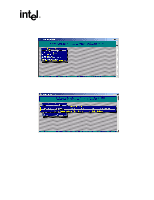
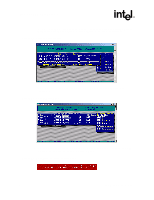
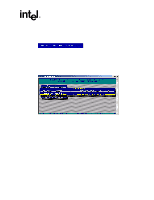
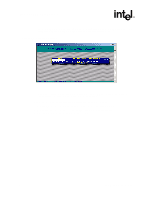
Installing a RAID 5 Disk Array with Hot Fix 9. StorCon asks for the capacity to use for each drive (see Figure A-7). Type in the physical drive capacity that you recorded in Table 2-1 for RAID 5 and press . Figure A-7. Drive Capacity 10. StorCon asks if you want to set the host drive type to 'Cluster'. Refer to your product's Hardware Guide to determine if clustering is supported before pressing or to confirm your choice. The new host drive is created. See Figure A-8. Figure A-8. Newly Created Host Drive 11. Exit StorCon by pressing several times to escape out of the various menus and pressing to quit. Depending on the size of the host drive, the RAID 5 build process may take a considerable amount of time. You may exit out of StorCon without waiting for the Installation Quick Start Guide 27
-
 1
1 -
2
-
3
-
4
-
5
-
6
-
7
-
8
-
9
-
10
-
11
-
12
-
13
-
14
-
15
-
16
-
17
-
18
-
19
-
20
-
21
-
 22
22 -
 23
23 -
 24
24 -
 25
25 -
 26
26 -
 27
27 -
 28
28 -
 29
29
 |
 |
