Asus P3V133 P3V133 User Manual - Page 27
Removing the Processor, Recommended Heatsinks for Slot 1 Processors
 |
View all Asus P3V133 manuals
Add to My Manuals
Save this manual to your list of manuals |
Page 27 highlights
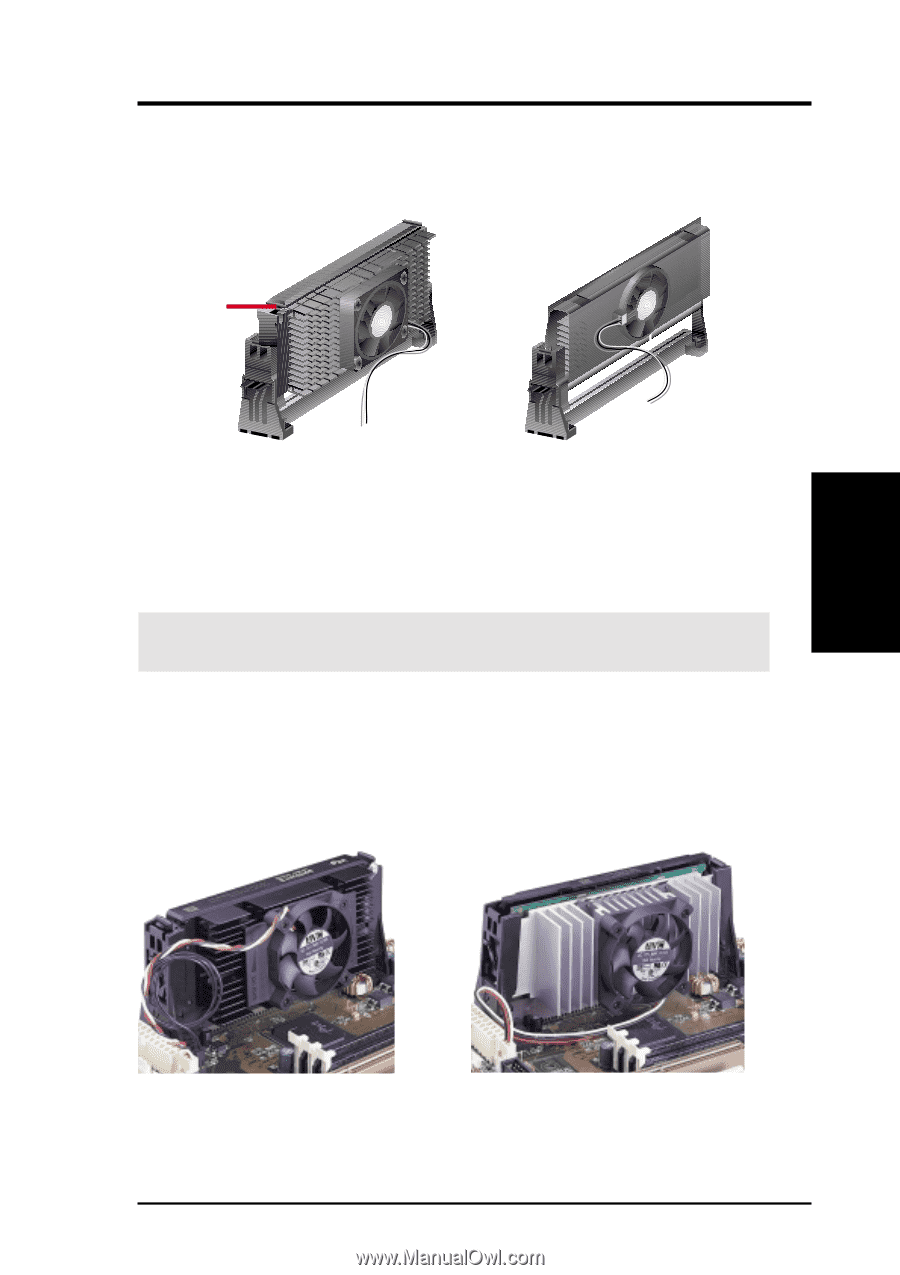
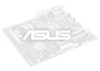
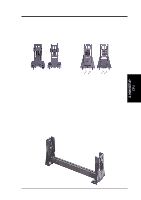
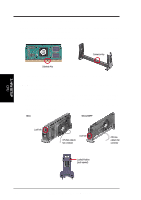
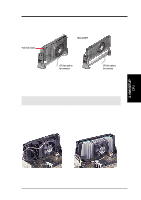
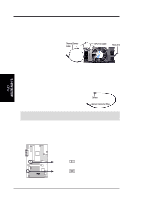
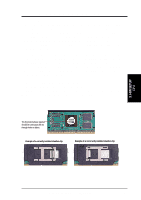
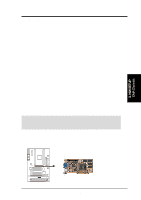
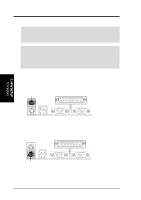
3. HARDWARE SETUP 3.6.5 Removing the Processor SECC: Push the SECC's two locks inward to disengage the latch feature and firmly lift the SECC assembly out of the URM. SECC2/SEPP Push lock inward CPU fan cable to fan connector CPU fan cable to fan connector SECC2/SEPP: URM (A): Unlock the URM by pushing the two locks down and then pull the SECC2/SEPP assembly out. URM (B): Place one hand on the heatsink and your other thumb on the top of one of the URMs. Push the URM away from the assembly with your thumb while you rotate the processor out of the slot 1 connector with the other. CAUTION! You may wear gloves to protect your hands from the sharp edges when removing SECC2/SEPP processors. 3.6.6 Recommended Heatsinks for Slot 1 Processors The recommended heatsinks for the Slot 1 processors are those with three-pin fans, such as the ASUS Smart Fan, that can be connected to the motherboard's CPU fan connector. These heatsinks dissipate heat more efficiently and with an optional hardware monitor, they can monitor the fan's RPM and use the alert function with the Intel LANDesk Client Manager (LDCM) or the ASUS PC Probe software. 3. H/W SETUP CPU SECC Heatsink & Fan SECC2 Heatsink & Fan NOTE: The SEPP heatsink and fan (for Intel Celeron processors) is similar to the SECC2 heatsink and fan except that the clamping design is different. ASUS P3V133 User's Manual 27
-
 1
1 -
2
-
3
-
4
-
5
-
6
-
7
-
8
-
9
-
10
-
11
-
12
-
13
-
14
-
15
-
16
-
17
-
18
-
19
-
20
-
21
-
 22
22 -
 23
23 -
 24
24 -
 25
25 -
 26
26 -
 27
27 -
 28
28 -
 29
29 -
 30
30 -
 31
31 -
 32
32 -
33
-
34
-
35
-
36
-
37
-
38
-
39
-
40
-
41
-
42
-
43
-
44
-
45
-
46
-
47
-
48
-
49
-
50
-
51
-
52
-
53
-
54
-
55
-
56
-
57
-
58
-
59
-
60
-
61
-
62
-
63
-
64
-
65
-
66
-
67
-
68
-
69
-
70
-
71
-
72
-
73
-
74
-
75
-
76
-
77
-
78
-
79
-
80
-
81
-
82
-
83
-
84
-
85
-
86
-
87
-
88
-
89
-
90
-
91
-
92
-
93
-
94
-
95
-
96
 |
 |