Asus P3V133 P3V133 User Manual - Page 42
Bios Setup - bios update
 |
View all Asus P3V133 manuals
Add to My Manuals
Save this manual to your list of manuals |
Page 42 highlights
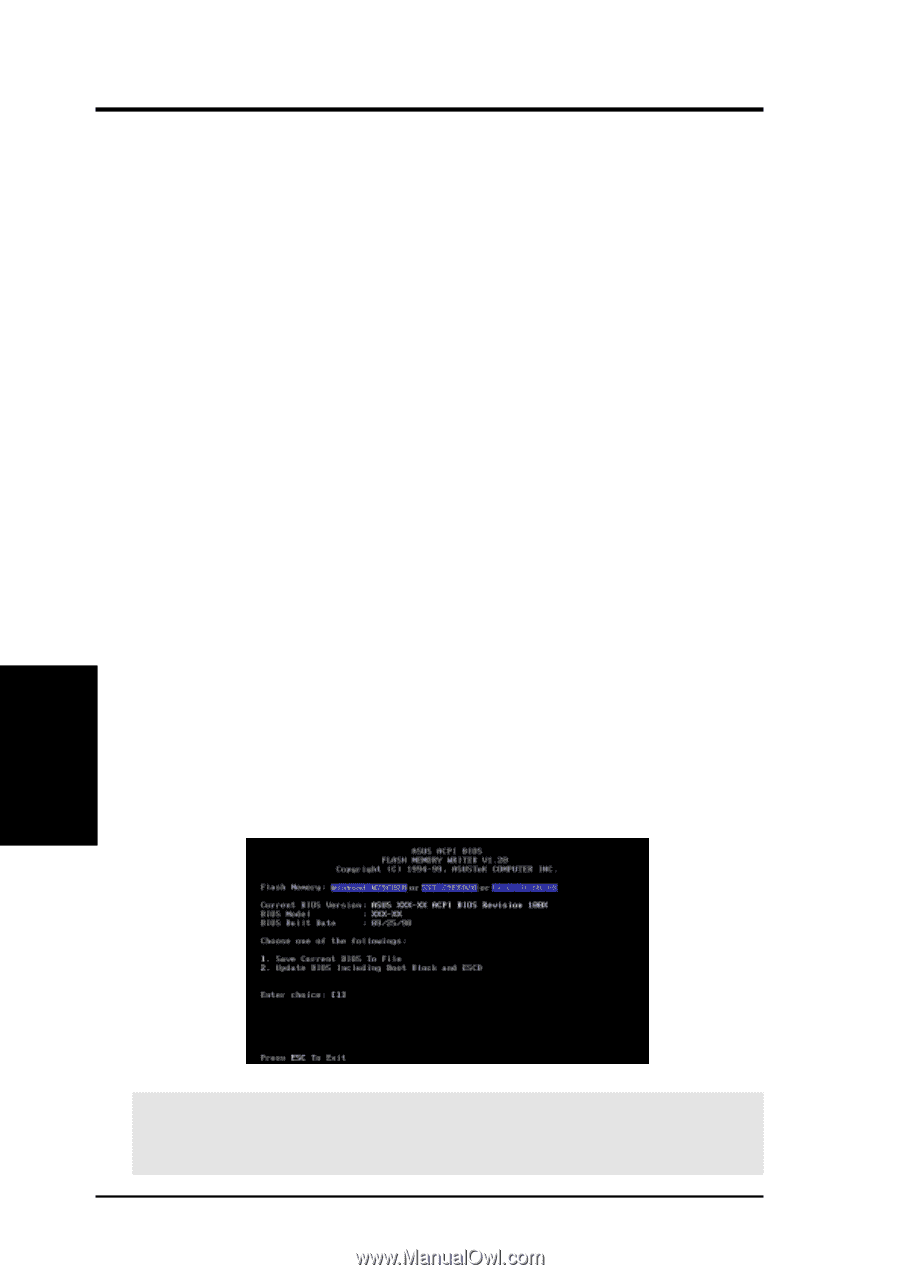
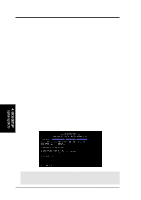
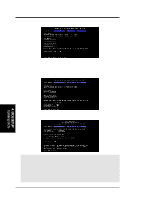
4. BIOS SETUP 4.1 Managing and Updating Your BIOS 4.1.1 Upon First Use of the Computer System It is recommended that you save a copy of the original motherboard BIOS along with a Flash Memory Writer utility (AFLASH.EXE) to a bootable floppy disk in case you need to reinstall the BIOS later. AFLASH.EXE is a Flash Memory Writer utility that updates the BIOS by uploading a new BIOS file to the programmable flash ROM on the motherboard. This file works only in DOS mode. To determine the BIOS version of your motherboard, check the last four numbers of the code displayed on the upper lefthand corner of your screen during bootup. Larger numbers represent a newer BIOS file. 1. Type FORMAT A:/S at the DOS prompt to create a bootable system floppy disk. DO NOT copy AUTOEXEC.BAT & CONFIG.SYS to the disk. 2. Type COPY D:\AFLASH\AFLASH.EXE A:\ (assuming D is your CDROM drive) to copy AFLASH.EXE to the just created boot disk. NOTE: AFLASH works only in DOS mode. It will not work with DOS prompt in Windows and will not work with certain memory drivers that may be loaded when you boot from your hard drive. It is recommended that you reboot using a floppy. 3. Reboot your computer from the floppy disk. NOTE: BIOS setup must specify "Floppy" as the first item in the boot sequence. 4. In DOS mode, type A:\AFLASH to run AFLASH. 4. BIOS SETUP Updating BIOS IMPORTANT! If "unknown" is displayed after Flash Memory:, the memory chip is either not programmable or is not supported by the ACPI BIOS and therefore, cannot be programmed by the Flash Memory Writer utility. 42 ASUS P3V133 User's Manual
-
 1
1 -
2
-
3
-
4
-
5
-
6
-
7
-
8
-
9
-
10
-
11
-
12
-
13
-
14
-
15
-
16
-
17
-
18
-
19
-
20
-
21
-
22
-
23
-
24
-
25
-
26
-
27
-
28
-
29
-
30
-
31
-
32
-
33
-
34
-
35
-
36
-
 37
37 -
 38
38 -
 39
39 -
 40
40 -
 41
41 -
 42
42 -
 43
43 -
 44
44 -
 45
45 -
 46
46 -
 47
47 -
48
-
49
-
50
-
51
-
52
-
53
-
54
-
55
-
56
-
57
-
58
-
59
-
60
-
61
-
62
-
63
-
64
-
65
-
66
-
67
-
68
-
69
-
70
-
71
-
72
-
73
-
74
-
75
-
76
-
77
-
78
-
79
-
80
-
81
-
82
-
83
-
84
-
85
-
86
-
87
-
88
-
89
-
90
-
91
-
92
-
93
-
94
-
95
-
96
 |
 |