Asus PIKE 2108 PIKE 2108 user's manual - Page 34
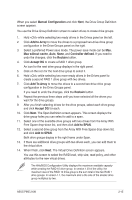
Using Manual Configuration: RAID 50, Manual Configuration, Add To Array, Max without cache
 |
View all Asus PIKE 2108 manuals
Add to My Manuals
Save this manual to your list of manuals |
Page 34 highlights
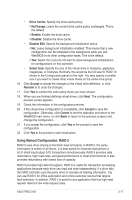
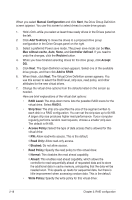
12. If the virtual drive configuration is acceptable, click Accept to save the configuration. Otherwise, click Back to return to the previous screens and change the configuration. 13. If you accept the configuration, click Yes at the prompt to save the configuration. 14. Click Yes at the prompt to start initialization. Using Manual Configuration: RAID 50 RAID 50 provides the features of both RAID 0 and RAID 5. RAID 50 uses both distributed parity and drive striping across multiple drive groups. It provides high data throughput, data redundancy, and very good performance. It is best implemented on two RAID 5 drive groups with data striped across both drive groups. Though multiple drive failures can be tolerated, only one drive failure can be tolerated in each RAID 5 level drive group. RAID 50 is appropriate when used with data that requires high reliability, high request rates, high data transfer, and medium to large capacity. When you select Manual Configuration and click Next, the Drive Group Definition screen appears. You use this screen to select drives to create drive groups. 1. Hold while selecting at least three ready drives in the Drives panel on the left. 2. Click Add To Array to move the drives to a proposed drive group configuration in the Drive Groups panel on the right. 3. Select a preferred Power save mode. The power save mode can be Max, Max without cache, Auto, None, and Controller defined. If you need to undo the changes, click the Reclaim button. 4. Click Accept DG to create a RAID 5 drive group. An icon for a second drive group displays in the right panel. 5. Click on the icon for the second drive group to select it. 6. Hold while selecting at least three more ready drives in the Drives panel to create a second drive group. 7. Click Add To Array to move the drives to a proposed drive group configuration in the Drive Groups panel on the right. If you need to undo the changes, click the Reclaim button. 8. After you finish selecting drives for the drive groups, select each drive group and click Accept DG for each. 9. Click Next. The Span Definition screen appears. This screen displays the drive group holes you can select to add to a span. 10. Select one of the available drive groups from the Array With Free Space drop-down list, and then click Add to SPAN. 2-20 Chapter 2: RAID configuration
-
 1
1 -
2
-
3
-
4
-
5
-
6
-
7
-
8
-
9
-
10
-
11
-
12
-
13
-
14
-
15
-
16
-
17
-
18
-
19
-
20
-
21
-
22
-
23
-
24
-
25
-
26
-
27
-
28
-
 29
29 -
 30
30 -
 31
31 -
 32
32 -
 33
33 -
 34
34 -
 35
35 -
 36
36 -
 37
37 -
 38
38 -
 39
39 -
40
-
41
-
42
-
43
-
44
-
45
-
46
-
47
-
48
-
49
-
50
-
51
-
52
-
53
-
54
-
55
-
56
-
57
-
58
-
59
-
60
-
61
-
62
-
63
-
64
-
65
-
66
-
67
-
68
-
69
-
70
-
71
-
72
-
73
-
74
-
75
-
76
-
77
-
78
-
79
-
80
-
81
-
82
-
83
-
84
 |
 |
