Asus Pundit P2-PE2 Pundit-PE2 User''s Manual for English Edition
Asus Pundit P2-PE2 Manual
 |
View all Asus Pundit P2-PE2 manuals
Add to My Manuals
Save this manual to your list of manuals |
Asus Pundit P2-PE2 manual content summary:
- Asus Pundit P2-PE2 | Pundit-PE2 User''s Manual for English Edition - Page 1
Pundit Barebone System Model PE2 - Asus Pundit P2-PE2 | Pundit-PE2 User''s Manual for English Edition - Page 2
Product warranty or service will not be extended if: (1) the product is repaired, modified or altered, unless such repair, modification of alteration is authorized in writing by ASUS; or (2) the serial number of the product is defaced or missing. ASUS PROVIDES THIS MANUAL "AS IS" WITHOUT WARRANTY - Asus Pundit P2-PE2 | Pundit-PE2 User''s Manual for English Edition - Page 3
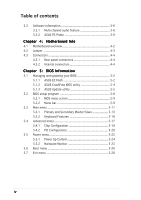
Table of contents Notices vi Safety information vii About this guide viii System package contents x Chapter 1: System Introduction 1.1 Welcome 3-2 3.2 Support CD information 3-2 3.2.1 Running the support CD 3-2 3.2.2 Drivers menu 3-3 3.2.3 Utilities menu 3-4 3.2.4 ASUS contact information - Asus Pundit P2-PE2 | Pundit-PE2 User''s Manual for English Edition - Page 4
Software information 3-6 3.3.1 Multi-channel audio feature 3-6 3.3.2 ASUS PC Probe 3-9 Chapter 4: Motherboard Info 4.1 Motherboard overview Managing and updating your BIOS 5-2 5.1.1 ASUS EZ Flash 5-2 5.1.2 ASUS CrashFree BIOS utility 5-4 5.1.3 ASUS Update utility 5-5 5.2 BIOS setup program - Asus Pundit P2-PE2 | Pundit-PE2 User''s Manual for English Edition - Page 5
. This equipment generates, uses and can radiate radio frequency energy and, if not installed and used in accordance with manufacturer's instructions, may cause harmful interference to radio communications. However, there is no guarantee that interference will not occur in a particular installation - Asus Pundit P2-PE2 | Pundit-PE2 User''s Manual for English Edition - Page 6
in any area where it may become wet. Place the product on a stable surface. • If you encounter technical problems with the product, contact a qualified service technician or your retailer. Lithium-Ion Battery Warning C A U T I O N: Danger of explosion if battery is incorrectly replaced. Replace only - Asus Pundit P2-PE2 | Pundit-PE2 User''s Manual for English Edition - Page 7
About this guide Audience This guide provides general information and installation instructions about the ASUS Pundit-PE2 barebone system. This guide is intended for experienced users and integrators with hardware knowledge of personal computers. How this guide is organized This guide contains the - Asus Pundit P2-PE2 | Pundit-PE2 User''s Manual for English Edition - Page 8
Conventions used in this guide W A R N I N G : Information to prevent injury to yourself when trying to complete a task. C A U T I O N : Information to prevent damage to the components when trying to complete a task. I M P O R T A N T : Instructions that you MUST follow to complete a task. N O T E : - Asus Pundit P2-PE2 | Pundit-PE2 User''s Manual for English Edition - Page 9
, contact your retailer immediately. 1 . ASUS Pundit-PE2 barebone system with • ASUS motherboard • CPU fan and heatsink assembly • IDE cable 2. Accessories • AC adapter and power plug • Screws 3. Cables • DC IN power cable and plug 4. Support CD 5. User guide 6. Optional items • Slim optical disk - Asus Pundit P2-PE2 | Pundit-PE2 User''s Manual for English Edition - Page 10
x - Asus Pundit P2-PE2 | Pundit-PE2 User''s Manual for English Edition - Page 11
System introduction Chapter 1 This chapter gives a general description of the barebone system. The chapter lists the system features including introduction on the front and rear panel, and internal components. ASUS Pundit-PE2 - Asus Pundit P2-PE2 | Pundit-PE2 User''s Manual for English Edition - Page 12
ASUS Pundit-PE2! The ASUS Pundit-PE2 is a smart personal computer. Powered by an ASUS motherboard, the Pundit-PE2 delivers the cutting edge technology for your computing needs. The Pundit-PE2 system supports software problems. Insert the emergency eject pin or a paper clip into this hole to manually - Asus Pundit P2-PE2 | Pundit-PE2 User''s Manual for English Edition - Page 13
(pink) port connects a microphone. 1 3 . U S B 2 . 0 p o r t s . These Universal Serial Bus 2.0 (USB 2.0) ports are available for connecting USB 2.0 devices such as a mouse, printer, scanner, camera, PDA, and others. ASUS Pundit-PE2 1-3 - Asus Pundit P2-PE2 | Pundit-PE2 User''s Manual for English Edition - Page 14
1.4 Rear panel The system rear panel includes the power connector and several I/O ports that allow convenient connection of devices. 1 23 4 5 9 8 7 6 1 . L i n e I n p o r t . This Line In (light blue) port connects a tape player or other audio sources. In 6-channel mode, the function of - Asus Pundit P2-PE2 | Pundit-PE2 User''s Manual for English Edition - Page 15
Proceed to Chapter 2 for instructions on installing other system components. 23 4 1 5 6 7 8 1. Standby power LED 2 . HDD power plug (to HDD power connector) 3. IDE cable (to HDD connector) 4. Chassis fan 5. CPU fan 6. DIMM sockets 7. HDD metal tray 8. Optical drive shield ASUS Pundit-PE2 1-5 - Asus Pundit P2-PE2 | Pundit-PE2 User''s Manual for English Edition - Page 16
1-6 Chapter 1: System introduction - Asus Pundit P2-PE2 | Pundit-PE2 User''s Manual for English Edition - Page 17
Basic installation Chapter 2 This chapter provides step-by-step instructions on how to install components in the system. ASUS Pundit-PE2 - Asus Pundit P2-PE2 | Pundit-PE2 User''s Manual for English Edition - Page 18
components to install 1. Hard disk drive (HDD) 2. Central processing unit (CPU) 3. DDR Dual Inline Memory Module (DIMM) Tool Phillips (cross) screw driver 2.2 Before you proceed Take note of the following precautions before you install the system components. • Unplug the AC adapter cable from the - Asus Pundit P2-PE2 | Pundit-PE2 User''s Manual for English Edition - Page 19
) screw driver to remove the top cover screws. Keep the screws for later use. 3. Pull the top cover slightly toward the rear panel until the side tabs are disengaged from the chassis. 3 2 3 2 4. Hold the center edge of the top cover, then lift. Set the top cover aside. 4 ASUS Pundit-PE2 2-3 - Asus Pundit P2-PE2 | Pundit-PE2 User''s Manual for English Edition - Page 20
2.4 Installing a hard disk drive (HDD) The system supports one UltraATA133 IDE hard disk drive (HDD). To install a hard disk drive: 1. Remove the two metal cover screws. Keep the screws for later use. 1 2. Use - Asus Pundit P2-PE2 | Pundit-PE2 User''s Manual for English Edition - Page 21
tabs (A), then slide the metal cover toward the front panel until it fits in place (B). B A 8. Secure the metal cover with screws that you removed earlier. 8 ASUS Pundit-PE2 2-5 - Asus Pundit P2-PE2 | Pundit-PE2 User''s Manual for English Edition - Page 22
2.5 Installing a CPU The system motherboard has a surface mount 478-pin Zero Insertion Force (ZIF) socket. This socket is specifically designed for the Intel® Pentium® 4 processor in the 478-pin package. 2.5.1 Removing the CPU fan and heatsink assembly You must remove the CPU fan and heatsink - Asus Pundit P2-PE2 | Pundit-PE2 User''s Manual for English Edition - Page 23
is in place, push down the socket lever to secure the CPU. The lever clicks on the side tab to indicate that it is locked. ASUS Pundit-PE2 2-7 - Asus Pundit P2-PE2 | Pundit-PE2 User''s Manual for English Edition - Page 24
2.5.3 Reinstalling the CPU fan and heatsink assembly To reinstall the CPU fan and heatsink assembly: 1. Place the chassis fan and heatsink assembly on top of the installed CPU. Make sure that the CPU heatsink sits properly on top of the CPU. 2. Connect the chassis fan 1 cable to the chassis - Asus Pundit P2-PE2 | Pundit-PE2 User''s Manual for English Edition - Page 25
system motherboard comes with two Double Data Rate (DDR) Dual Inline Memory Module (DIMM) sockets. These sockets support up to 2 GB system memory using unbuffered non-ECC PC2700/2100/1600 DIMMs. To install a DDR DIMM clips snap back in place and the DIMM is properly seated. 4 4 ASUS Pundit-PE2 2-9 - Asus Pundit P2-PE2 | Pundit-PE2 User''s Manual for English Edition - Page 26
2.7 Replacing the top cover Replace the top cover after installing the components. To replace the top cover: 1. Position the front edge of the top cover at least two inches from the front panel cover. 2. Fit the top cover hooks with the chassis side tabs and the front panel cover tabs. 3. Lower - Asus Pundit P2-PE2 | Pundit-PE2 User''s Manual for English Edition - Page 27
power plug 1 3 Power LED Power adapter 2 Power cable Use an outlet adapter if the power plug does not fit the power outlet in your area. ASUS Pundit-PE2 2-11 - Asus Pundit P2-PE2 | Pundit-PE2 User''s Manual for English Edition - Page 28
2.9 Connecting external devices To the front panel HDD Mic To the rear panel Line In Line Out Mic Camera Headphone Scanner Hub or Router PS/2 Mouse 2-12 VGA Monitor USB Mouse PS/2 KB Chapter 2: Basic installation - Asus Pundit P2-PE2 | Pundit-PE2 User''s Manual for English Edition - Page 29
Getting started Chapter 3 This chapter helps you power up the system and install drivers and utilities from the support CD. ASUS Pundit-PE2 - Asus Pundit P2-PE2 | Pundit-PE2 User''s Manual for English Edition - Page 30
detailed information. • Make sure that you install Windows® 2000 Service Pack 4 or the Windows® XP Service Pack 1 or later versions before installing the drivers for better compatibility and system stability. 3.2 Support CD information The support CD that came with the system package contains the - Asus Pundit P2-PE2 | Pundit-PE2 User''s Manual for English Edition - Page 31
. See page 3-1X for details. SiS PCI LAN Driver Installs the SiS PCI LAN driver. SiS Mini IDE Driver Installs the SiS Mini IDE driver. USB 2.0 Driver Installs the USB 2.0 driver. The screen display and drivers option may not be the same for different operating system versions. ASUS Pundit-PE2 3-3 - Asus Pundit P2-PE2 | Pundit-PE2 User''s Manual for English Edition - Page 32
Utilities menu shows the applications and other software that the motherboard supports. ASUS PC Probe This smart utility monitors the fan speed, CPU temperature, and system voltages, and alerts you of any detected problems. This utility helps you keep your computer in healthy operating condition - Asus Pundit P2-PE2 | Pundit-PE2 User''s Manual for English Edition - Page 33
find this information on the inside front cover of this user guide. 3.2.5 Other information The icons on the top right corner of the screen give additional information on the motherboard and the contents of the support CD. Click an icon to display the specified information. ASUS Pundit-PE2 3-5 - Asus Pundit P2-PE2 | Pundit-PE2 User''s Manual for English Edition - Page 34
rear panel. Refer to the A u d i o p o r t s f u n c t i o n v a r i a t i o n table on page 1-4. 2. Install the AD1980 SoundMAX Audio Driver from the support CD. Refer to page 3-3 for details. 3. After installing the driver, the SoundMAX icon appears on the taskbar. Double-click the icon to display - Asus Pundit P2-PE2 | Pundit-PE2 User''s Manual for English Edition - Page 35
the M I D I M u s i c S y n t h e s i z e r tab. 2. From the C h o o s e D e f a u l t S e t option, click , then select the default synthesizer setting from the drop-down list box. 3. Click O K when finished, then restart the computer. ASUS Pundit-PE2 3-7 - Asus Pundit P2-PE2 | Pundit-PE2 User''s Manual for English Edition - Page 36
Enabling the SPDIF options To enable the SPDIF options: 1. After restart, click on the volume control icon on the taskbar to display the Volume Control window. 2. Click the Volume Control A d v a n c e d button. 3. Check the options A C 3 S P D I F and P C M S P D I F to achieve 6-channel audio - Asus Pundit P2-PE2 | Pundit-PE2 User''s Manual for English Edition - Page 37
ASUS ASUS PC Probe The ASUS PC Probe is available from the support CD that came with the system package. Refer to page 3-4 for installation details. Starting ASUS The PC Probe icon appears on the taskbar to indicate that the ASUS PC Probe is running. Pointing the mouse on the icon allows you - Asus Pundit P2-PE2 | Pundit-PE2 User''s Manual for English Edition - Page 38
Using ASUS PC Probe Monitoring tab Monitor Summary Shows a summary of items that are being monitored. Temperature Monitor Shows the CPU (for supported processors only) and motherboard temperatures. Temperature Warning threshold a d j u s t m e n t (Move the slider up to increase the threshold level - Asus Pundit P2-PE2 | Pundit-PE2 User''s Manual for English Edition - Page 39
. Information tab Hard Drives Shows the used and free space of the system hard disk drives and the file allocation table or file system used. ASUS Pundit-PE2 3-11 - Asus Pundit P2-PE2 | Pundit-PE2 User''s Manual for English Edition - Page 40
, such as CPU type, CPU speed, internal/external frequencies, and memory size. ASUS PC Probe taskbar icon Right click the PC Probe icon to open a menu. all system monitoring. When the ASUS PC Probe senses a problem with your PC, portions of the ASUS PC Probe icon change to red, the PC speaker - Asus Pundit P2-PE2 | Pundit-PE2 User''s Manual for English Edition - Page 41
Motherboard info Chapter 4 This chapter gives information about the motherboard that comes with the system. This chapter includes the motherboard layout, jumper settings, and connector locations. ASUS Pundit-PE2 - Asus Pundit P2-PE2 | Pundit-PE2 User''s Manual for English Edition - Page 42
4.1 Motherboard overview Motherboard layout 27.2cm (10.7in) ADAPTER DDR DIMM2 (64/72-bit, 184-pin module) DDR DIMM1 (64/72-bit, 184-pin module) Socket 478 SiS 651 Host Memory Controller USB34 AD1980 FONT MIC PWRSW AUD_CON CD AUX FONT LOUT IE1394_2 IE1394_1 VIA VT6307 VGA CHA_FAN RTL - Asus Pundit P2-PE2 | Pundit-PE2 User''s Manual for English Edition - Page 43
the cap on CLRTC jumper default position. Removing the cap will cause system boot failure! Clear RTC RAM CLRTC 12 23 Normal (Default) Clear CMOS ASUS Pundit-PE2 4-3 - Asus Pundit P2-PE2 | Pundit-PE2 User''s Manual for English Edition - Page 44
4.3 Connectors 4.3.1 Rear panel connectors Refer to section "1.3 Rear panel" for a description of the rear panel I/O ports. 4.3.2 Internal connectors 1 . Primary IDE connector (40-1 pin PRI_IDE) This connector is for an Ultra DMA 133/100/66 signal cable. The Ultra DMA 133/100/66 signal cable has - Asus Pundit P2-PE2 | Pundit-PE2 User''s Manual for English Edition - Page 45
2. CPU and Chassis Fan connectors (3-pin CPU_FAN, CHA_FAN) The fan connectors support cooling fans of 350 mA~740 mA (8.88 W max.) or a total of 1 A~2.22 A (26.64 W max.) White) Internal audio connectors Enable the CD-IN function in the audio utility when using these connectors. ASUS Pundit-PE2 4-5 - Asus Pundit P2-PE2 | Pundit-PE2 User''s Manual for English Edition - Page 46
+5V GND GND +12V 4 . IDE power connector (4-pin IDEPWR) The IDE power connector is for the IDE power cable. This connector supplies power to the hard disk drive and the slim optical drive. IDEPWR IDE power connector 5 . Power switch connector (2-pin PWRSW) This connects to the the system power - Asus Pundit P2-PE2 | Pundit-PE2 User''s Manual for English Edition - Page 47
audio board that supports the rear panel audio I/O ports. 1 AUD_CON Rear panel audio connector 7 . Front panel LED connector (6-pin LED_CON) The connector is for the power and HDD activity LED in the system front panel. Front panel LED connector LED_CON HDD LED Power LED 1 ASUS Pundit-PE2 4-7 - Asus Pundit P2-PE2 | Pundit-PE2 User''s Manual for English Edition - Page 48
4-8 Chapter 4: Motherboard info - Asus Pundit P2-PE2 | Pundit-PE2 User''s Manual for English Edition - Page 49
Chapter 5 This chapter tells how to change system settings through the BIOS Setup menus and describes the BIOS parameters. ASUS Pundit-PE2 BIOS setup - Asus Pundit P2-PE2 | Pundit-PE2 User''s Manual for English Edition - Page 50
U S C r a s h F r e e B I O S (Updates the BIOS using the motherboard support CD when the BIOS file fails or gets corrupted.) 3. A S U S U p d a t e (Updates . 5.1.1 ASUS EZ Flash To update the BIOS file using ASUS EZ Flash: 1. Download the latest BIOS file from the ASUS website (www.asus.com), - Asus Pundit P2-PE2 | Pundit-PE2 User''s Manual for English Edition - Page 51
while updating the BIOS area! Doing so may cause system boot failure. 8. When the update process is finished, press any key to restart the system. ASUS Pundit-PE2 5-3 - Asus Pundit P2-PE2 | Pundit-PE2 User''s Manual for English Edition - Page 52
before using this utility. To recover the BIOS using the ASUS CrashFree BIOS Utility: 1. Turn on the system. 2. Place the support CD to the optical drive. 3. The utility displays the following message and automatically checks the motherboard support CD for the original/updated BIOS file. Bad BIOS - Asus Pundit P2-PE2 | Pundit-PE2 User''s Manual for English Edition - Page 53
network or an Internet Service Provider (ISP). Installing ASUS Update To install ASUS Update: 1. Place the support CD in the optical s screen menu. 3. The ASUS Update utility is copied to your system. Quit all Windows® applications before you update the BIOS using this utility. ASUS Pundit-PE2 5-5 - Asus Pundit P2-PE2 | Pundit-PE2 User''s Manual for English Edition - Page 54
utility from the Windows® desktop by clicking S t a r t > P r o g r a m s > A S U S > A S U S U p d a t e > A S U S U p d a t e. The ASUS Update main window appears. 2. Select U p d a t e B I O S f r o m 3. Select the ASUS FTP site t h e I n t e r n e t option from the nearest you to avoid - Asus Pundit P2-PE2 | Pundit-PE2 User''s Manual for English Edition - Page 55
t e. The ASUS Update main window appears. 2. Select U p d a t e B I O S f r o m a f i l e option from the drop-down menu, then click N e x t. 3. Locate the BIOS file from the O p e n window, then click S a v e. 4. Follow the screen instructions to complete the update process. ASUS Pundit-PE2 5-7 - Asus Pundit P2-PE2 | Pundit-PE2 User''s Manual for English Edition - Page 56
5.2 BIOS setup program This motherboard supports a programmable firmware chip that you can update using the provided utility not exactly match what you see on your screen. • Visit the ASUS website (www.asus.com) to download the latest BIOS file for this motherboard. 5-8 Chapter 5: BIOS setup - Asus Pundit P2-PE2 | Pundit-PE2 User''s Manual for English Edition - Page 57
settings To select an item on the menu bar, press the right or left arrow key on the keyboard until the desired item is highlighted. ASUS Pundit-PE2 5-9 - Asus Pundit P2-PE2 | Pundit-PE2 User''s Manual for English Edition - Page 58
5.2.3 Legend bar At the bottom of the Setup screen is a legend bar. The keys in the legend bar allow you to navigate through the various setup menus. The following table lists the keys found in the legend bar with their corresponding functions. Navigation Key(s) Function < F 1 > o r < A l t + H > - Asus Pundit P2-PE2 | Pundit-PE2 User''s Manual for English Edition - Page 59
press . 3. When prompted, re-type the same password, then press to confirm. When the password is activated, the password item value now shows S e t. ASUS Pundit-PE2 5-11 - Asus Pundit P2-PE2 | Pundit-PE2 User''s Manual for English Edition - Page 60
the password information is powered by the onboard button cell battery. If you need to erase the CMOS RAM, refer to section "4.2 Jumper" for instructions. Halt On [All Errors] Specifies the type of error that will cause the system to halt. Configuration options: [All Errors] [No Error] [All but - Asus Pundit P2-PE2 | Pundit-PE2 User''s Manual for English Edition - Page 61
incorrect parameters. In these cases, select [User Type HDD] to manually enter the IDE hard disk drive parameters. Refer to the next section per block to the highest number that the drive supports. When this field is automatically configured, the set [32 Sectors] [Maximum] ASUS Pundit-PE2 5-13 - Asus Pundit P2-PE2 | Pundit-PE2 User''s Manual for English Edition - Page 62
normally disabled because the resources used in the SMART monitoring feature may decrease system performance. Configuration options: [Disabled] [Enabled] Manual HDD configuration You can manually enter the number of cylinders, heads and sectors per track for the drive when you set the Type item to - Asus Pundit P2-PE2 | Pundit-PE2 User''s Manual for English Edition - Page 63
to determine the correct value. To make changes to this field, set the IDE Primary Master field to [Manual] and the Access Mode to [CHS]. Sector Configures the number of sectors per track. Refer to the drive to set the partition of the Primary IDE hard disk drives to active. ASUS Pundit-PE2 5-15 - Asus Pundit P2-PE2 | Pundit-PE2 User''s Manual for English Edition - Page 64
5.3.2 Keyboard Features Boot Up NumLock Status [On] Enables users to activate the Number Lock function upon system boot. Configuration options: [Off] [On] Keyboard Auto-Repeat Rate [12/Sec] Controls the speed at which the system registers repeated keystrokes. Options range from 6 to 30 characters - Asus Pundit P2-PE2 | Pundit-PE2 User''s Manual for English Edition - Page 65
the preset speeds, [2000MHz] or [2667MHz], or select [Manual] if you wish to adjust the setting manually. Configuration options: [Manual] [2000MHz] [2667MHz] The CPU speed parameter is non-configurable a PS/2 mouse is detected at startup. Configuration options: [Auto] [Enabled] ASUS Pundit-PE2 5-17 - Asus Pundit P2-PE2 | Pundit-PE2 User''s Manual for English Edition - Page 66
USB Legacy Support [Auto] Setting to [Auto] allows the system to detect a USB device at startup. If detected, the USB controller legacy mode is enabled. If not detected, - Asus Pundit P2-PE2 | Pundit-PE2 User''s Manual for English Edition - Page 67
size. Note that the more system memory you share with VGA, the less memory space is left for other system devices. Configuration options: [32M] [64M] ASUS Pundit-PE2 5-19 - Asus Pundit P2-PE2 | Pundit-PE2 User''s Manual for English Edition - Page 68
5.4.2 PCI Configuration PCI Latency Timer [32] Leave this field to the default setting [32] for optimum system performance and stability. USB Function [Enabled] Allows you to enable or disable the southbridge USB 1.1 controller. Configuration options: [Enabled] [Disabled] USB 2.0 Function [Enabled] - Asus Pundit P2-PE2 | Pundit-PE2 User''s Manual for English Edition - Page 69
[Disabled]. Configuration options: [Auto] [Disabled] Onboard IEEE 1394 Controller [Enabled] Allows you to enable or disable the onboard IEEE 1394 controller. Configuration options: [Enabled] [Disabled] ASUS Pundit-PE2 5-21 - Asus Pundit P2-PE2 | Pundit-PE2 User''s Manual for English Edition - Page 70
5.5 Power menu The Power menu items allow you to change the system power saving, power up control, and hardware monitor settings. Select an item, then press to display the configuration options. Power Management [User Defined] Allows you to activate or deactivate the automatic power saving - Asus Pundit P2-PE2 | Pundit-PE2 User''s Manual for English Edition - Page 71
ACPI Suspend To RAM [Enabled] Allows you to enable or disable the ACPI Suspend-to-RAM feature. To support this feature, the +5VSB of the power supply should provide more than 720 mA current. Configuration options: off the system. Configuration options: [Soft off] [Suspend] ASUS Pundit-PE2 5-23 - Asus Pundit P2-PE2 | Pundit-PE2 User''s Manual for English Edition - Page 72
not work if the system is powered down by an operating system, such Windows® 98, that has an enabled Advanced Configuration and Power Interface (ACPI) support. 5-24 Chapter 5: BIOS setup - Asus Pundit P2-PE2 | Pundit-PE2 User''s Manual for English Edition - Page 73
Function [Enabled] Chassis Q-Fan Function [Enabled] Allows you to enable or disable the ASUS Q-Fan feature that smartly adjusts the CPU or chassis fan speed for more efficient system operation automatically detects the voltage output through the onboard voltage regulators. ASUS Pundit-PE2 5-25 - Asus Pundit P2-PE2 | Pundit-PE2 User''s Manual for English Edition - Page 74
5.6 Boot menu The B o o t menu allows you to select among the four possible types of boot devices listed using the up and down arrow keys. By using the or key, you can promote devices and by using the key, you can demote devices. Promotion or demotion of devices alters the priority - Asus Pundit P2-PE2 | Pundit-PE2 User''s Manual for English Edition - Page 75
feature. Configuration options: [Disabled] [Enabled] Set this item to [Enabled] to use the ASUS MyLogo™ feature. Interrupt Mode [APIC] The Advanced Programmable Interrupt Controller (APIC) setting allows allows you to use only the 16 IRQs. Configuration options: [APIC] [PIC] ASUS Pundit-PE2 5-27 - Asus Pundit P2-PE2 | Pundit-PE2 User''s Manual for English Edition - Page 76
5.7 Exit menu When you have made all of your selections from the various menus in the Setup program, save your changes and exit Setup. Select Exit from the menu bar to display the following menu. Pressing does not immediately exit this menu. Select one of the options from this menu, or press
-
 1
1 -
 2
2 -
 3
3 -
 4
4 -
 5
5 -
 6
6 -
 7
7 -
8
-
9
-
10
-
11
-
12
-
13
-
14
-
15
-
16
-
17
-
18
-
19
-
20
-
21
-
22
-
23
-
24
-
25
-
26
-
27
-
28
-
29
-
30
-
31
-
32
-
33
-
34
-
35
-
36
-
37
-
38
-
39
-
40
-
41
-
42
-
43
-
44
-
45
-
46
-
47
-
48
-
49
-
50
-
51
-
52
-
53
-
54
-
55
-
56
-
57
-
58
-
59
-
60
-
61
-
62
-
63
-
64
-
65
-
66
-
67
-
68
-
69
-
70
-
71
-
72
-
73
-
74
-
75
-
76
 |
 |
Pundit
Barebone System
Model PE2