Asus Pundit P2-PE2 Pundit-PE2 User''s Manual for English Edition - Page 50
Managing and updating your BIOS
 |
View all Asus Pundit P2-PE2 manuals
Add to My Manuals
Save this manual to your list of manuals |
Page 50 highlights
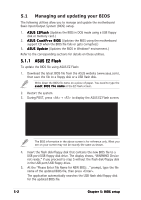
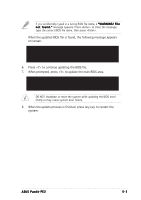
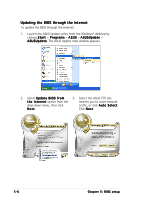
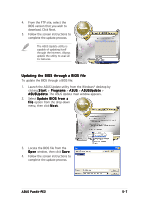
5.1 Managing and updating your BIOS The following utilities allow you to manage and update the motherboard Basic Input/Output System (BIOS) setup. 1. A S U S E Z F l a s h (Updates the BIOS in DOS mode using a USB floppy disk or memory card.) 2. A S U S C r a s h F r e e B I O S (Updates the BIOS using the motherboard support CD when the BIOS file fails or gets corrupted.) 3. A S U S U p d a t e (Updates the BIOS in Windows® environment.) Refer to the corresponding sections for details on these utilities. 5.1.1 ASUS EZ Flash To update the BIOS file using ASUS EZ Flash: 1. Download the latest BIOS file from the ASUS website (www.asus.com), then save the file to a floppy disk or a USB flash disk. Write down the BIOS file name on a piece of paper. You need to type the e x a c t B I O S f i l e n a m e at the EZ Flash screen. 2. Restart the system. 3. During POST, press + to display the ASUS EZ Flash screen. ASUS EZ Flash V1.00 Copyright (C) 2002, ASUSTeK COMPUTER INC. [Onboard BIOS Information] BIOS Version : ASUS P4SQ-X ACPI BIOS Revision 1002 BIOS Model : P4SQ-X BIOS Built Date : 01/20/05 Please Enter File Name for NEW BIOS: _ *Note: EZ Flash will copy file from A:\, Press [ESC] to reboot The BIOS information in the above screen is for reference only. What you see on your screen may not be exactly the same as shown. 4. Insert the flash disk/floppy disk that contains the new BIOS file to a USB port/USB floppy disk drive. The display shows, "WARNING! Device not ready." if you proceed to step 5 without the flash disk/floppy disk in the USB port/USB floppy drive. 5. At the "Please Enter File Name for NEW BIOS: _" prompt, type the file name of the updated BIOS file, then press . The application automatically searches the USB flash disk/floppy disk for the updated BIOS file. 5-2 Chapter 5: BIOS setup
-
 1
1 -
2
-
3
-
4
-
5
-
6
-
7
-
8
-
9
-
10
-
11
-
12
-
13
-
14
-
15
-
16
-
17
-
18
-
19
-
20
-
21
-
22
-
23
-
24
-
25
-
26
-
27
-
28
-
29
-
30
-
31
-
32
-
33
-
34
-
35
-
36
-
37
-
38
-
39
-
40
-
41
-
42
-
43
-
44
-
 45
45 -
 46
46 -
 47
47 -
 48
48 -
 49
49 -
 50
50 -
 51
51 -
 52
52 -
 53
53 -
 54
54 -
 55
55 -
56
-
57
-
58
-
59
-
60
-
61
-
62
-
63
-
64
-
65
-
66
-
67
-
68
-
69
-
70
-
71
-
72
-
73
-
74
-
75
-
76
 |
 |