Asus TS300-E4 PX4 User Guide - Page 173
Matrix Storage Console from the Start Menu or click the Intel Matrix Storage
 |
View all Asus TS300-E4 PX4 manuals
Add to My Manuals
Save this manual to your list of manuals |
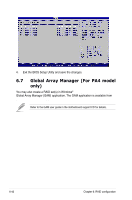
Page 173 highlights
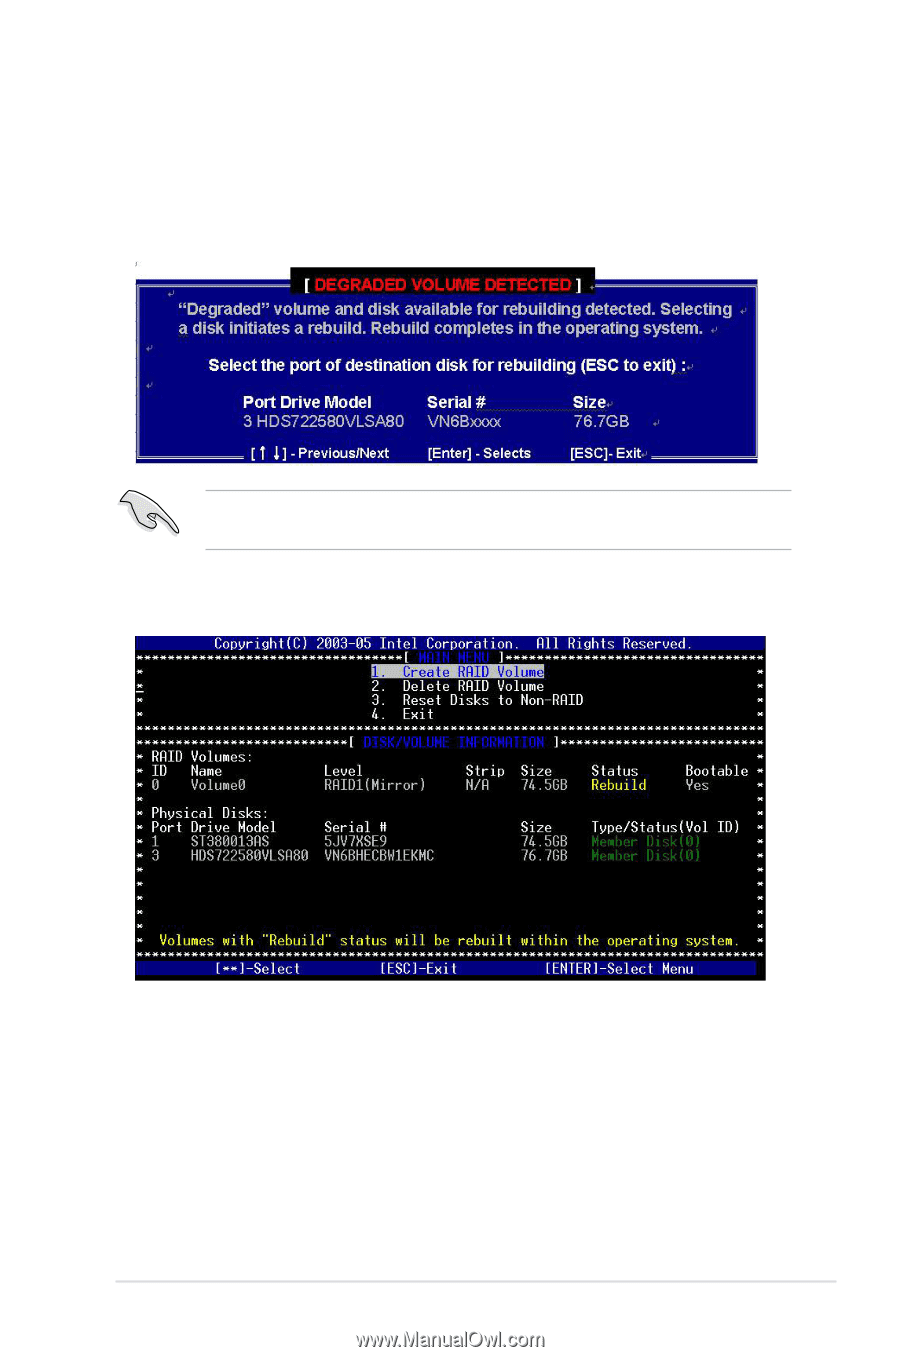
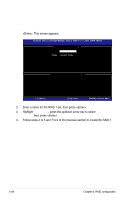
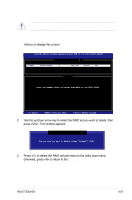
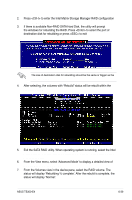
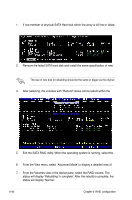
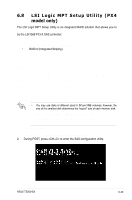
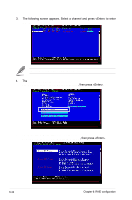
2. Press to enter the Intel Matrix Storage Manager RAID configuration utility after POST. 3. If there is available Non-RAID SATA Hard Disk, the utility will prompt the windows for rebuilding the RAID. Press to select the port of destination disk for rebuilding or press to exit The size of destination disk for rebuilding should be the same or bigger as the original hard disk. 4. After selecting, the volumes with "Rebuild" status will be rebuilt within the operating system. 5. Exit the SATA RAID utility. When operating system is running, select the Intel Matrix Storage Console from the Start Menu or click the Intel Matrix Storage Manager tray icon. 6. From the View menu, select 'Advanced Mode' to display a detailed view of the Intel Matrix Storage Console. 7. From the Volumes view in the device pane, select the RAID volume. The status will display 'Rebuilding % complete'. After the rebuild is complete, the status will display 'Normal'. ASUS TS300-E4 6-39
-
 1
1 -
2
-
3
-
4
-
5
-
6
-
7
-
8
-
9
-
10
-
11
-
12
-
13
-
14
-
15
-
16
-
17
-
18
-
19
-
20
-
21
-
22
-
23
-
24
-
25
-
26
-
27
-
28
-
29
-
30
-
31
-
32
-
33
-
34
-
35
-
36
-
37
-
38
-
39
-
40
-
41
-
42
-
43
-
44
-
45
-
46
-
47
-
48
-
49
-
50
-
51
-
52
-
53
-
54
-
55
-
56
-
57
-
58
-
59
-
60
-
61
-
62
-
63
-
64
-
65
-
66
-
67
-
68
-
69
-
70
-
71
-
72
-
73
-
74
-
75
-
76
-
77
-
78
-
79
-
80
-
81
-
82
-
83
-
84
-
85
-
86
-
87
-
88
-
89
-
90
-
91
-
92
-
93
-
94
-
95
-
96
-
97
-
98
-
99
-
100
-
101
-
102
-
103
-
104
-
105
-
106
-
107
-
108
-
109
-
110
-
111
-
112
-
113
-
114
-
115
-
116
-
117
-
118
-
119
-
120
-
121
-
122
-
123
-
124
-
125
-
126
-
127
-
128
-
129
-
130
-
131
-
132
-
133
-
134
-
135
-
136
-
137
-
138
-
139
-
140
-
141
-
142
-
143
-
144
-
145
-
146
-
147
-
148
-
149
-
150
-
151
-
152
-
153
-
154
-
155
-
156
-
157
-
158
-
159
-
160
-
161
-
162
-
163
-
164
-
165
-
166
-
167
-
 168
168 -
 169
169 -
 170
170 -
 171
171 -
 172
172 -
 173
173 -
 174
174 -
 175
175 -
 176
176 -
 177
177 -
 178
178 -
179
-
180
-
181
-
182
-
183
-
184
-
185
-
186
-
187
-
188
-
189
-
190
-
191
-
192
-
193
-
194
-
195
-
196
-
197
-
198
-
199
-
200
-
201
-
202
-
203
-
204
-
205
-
206
-
207
-
208
-
209
-
210
-
211
-
212
-
213
-
214
-
215
-
216
-
217
-
218
-
219
-
220
-
221
-
222
-
223
-
224
 |
 |