BenQ WDC20 User Manual - Page 29
Starting and stopping presentations, Getting ready, Starting presentation
 |
View all BenQ WDC20 manuals
Add to My Manuals
Save this manual to your list of manuals |
Page 29 highlights
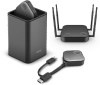
Starting and stopping presentations This section will guide you on how to start and stop a presentation using the product. Getting ready Make sure that all the connected devices have been powered on and ready for the presentation. As the product could work with different projectors, IFPs, TVs, or monitors with standard HDMI ports, the steps required to start a presentation may vary according to the actual environment and your display specifications. Follow the procedures below and refer to the specified sections for details. 1. To start a presentation, see Starting presentation on page 29 for details. 2. To stop a presentation, see Idle presentation on page 30 for details. 3. To start a split-screen presentation, see Split screen presentations on page 31 for details. 4. To start a presentation with a mobile device, see Presenting with mobile devices on page 32 for details. 5. To control presentations via a touchscreen displays or mouse/keyboard see Touch back on page 34 for details. Starting presentation 1. Make sure power is supplied to the Host. See Connecting the HDMI cable and power on page 17 for more information. 2. Choose the HDMI source corresponding to the Host on the display. You will see the Guide screen. Guide Screen 3. Please follow the instruction on the Guide screen to supply power to the Button. You can also see Setting up and powering a Button on page 20 for more information. The LED indicator on the Button is static green when the Button is connected and working properly. 4. To start a presentation, press the Present key. Starting and stopping presentations 29
-
 1
1 -
2
-
3
-
4
-
5
-
6
-
7
-
8
-
9
-
10
-
11
-
12
-
13
-
14
-
15
-
16
-
17
-
18
-
19
-
20
-
21
-
22
-
23
-
 24
24 -
 25
25 -
 26
26 -
 27
27 -
 28
28 -
 29
29 -
 30
30 -
 31
31 -
 32
32 -
 33
33 -
 34
34 -
35
-
36
-
37
-
38
-
39
-
40
-
41
-
42
-
43
-
44
-
45
-
46
-
47
-
48
-
49
-
50
-
51
-
52
-
53
-
54
-
55
-
56
-
57
-
58
-
59
-
60
-
61
-
62
-
63
-
64
-
65
-
66
-
67
-
68
-
69
-
70
-
71
 |
 |
