Bosch HGI8056UC Use and Care Manual - Page 17
Before Using the Oven for, the First Time, Operation
 |
View all Bosch HGI8056UC manuals
Add to My Manuals
Save this manual to your list of manuals |
Page 17 highlights
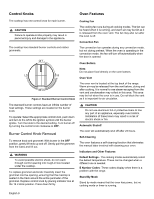
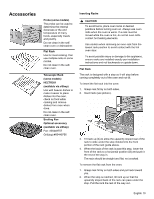
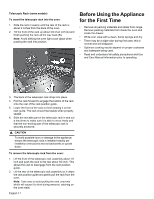
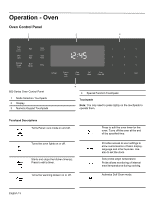
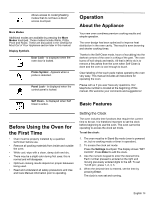
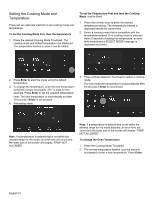
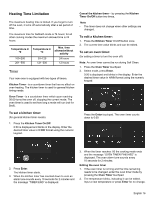
Allows access to cooking/heating modes that do not have a direct access touchpad. More Modes Additional modes are available by pressing the More Modes touchpad. These modes include Warm, Pizza, Proof and Roast. These are discussed in the Getting the Most Out of Your Appliance section later in this manual. Display Symbols Door Lock - Is displayed when the oven door is locked. Probe Symbol - Appears when a probe is detected. Panel Lock - Is displayed when the control panel is locked. Operation About the Appliance Your new oven combines premium cooking results and simple operation. The oven design has been optimized to improve heat distribution in the oven cavity. The result is even browning and shorter cooking times. Thanks to the Self-Clean mode, hours of scrubbing into the darkest corners of the oven is a thing of the past. The oven burns off soil simply and easily. All that is left to do is to remove a few ashes from the oven when Self-Clean is done and the oven is cool enough to touch. Clear labeling of the touch pads makes operating the oven very easy. This manual includes all instructions for operating the oven. Please call us if you ever have any questions. Our telephone number is located at the beginning of this manual. We welcome your comments and suggestions! Self Clean - Is displayed when Self Clean is active. Basic Features Before Using the Oven for the First Time • Oven must be properly installed by a qualified technician before use. • Remove all packing materials from inside and outside the oven. • While cool, wipe with a clean, damp cloth and dry. • There may be a slight odor during first uses; this is normal and will disappear. • Optimum cooking results depend on proper bakeware being used. • Read and understand all safety precautions and Use and Care Manual information prior to operating. Setting the Clock The oven includes time functions that require the current time to be set. It is therefore important to set the clock before beginning to use the oven. The oven cannot be operating to access the clock set mode. To set the clock: 1. The oven must be in Stand-By mode (oven is powered on, but no cooking mode or timer in operation). 2. To access the clock set mode: Press the Settings touchpad. The display shows "SET CLOCK". Press Enter to edit the clock. 3. Use the numeric keypad to enter the desired time. Each number pressed is entered at the right and moving previously entered digits to the left. To set "12:45 pm", press 1, 2, 4, 5. 4. When the desired time is entered, set the time by pressing Enter. The clock is now set and running. English 14
-
 1
1 -
2
-
3
-
4
-
5
-
6
-
7
-
8
-
9
-
10
-
11
-
 12
12 -
 13
13 -
 14
14 -
 15
15 -
 16
16 -
 17
17 -
 18
18 -
 19
19 -
 20
20 -
 21
21 -
 22
22 -
23
-
24
-
25
-
26
-
27
-
28
-
29
-
30
-
31
-
32
-
33
-
34
-
35
-
36
-
37
-
38
-
39
-
40
-
41
-
42
-
43
-
44
-
45
-
46
-
47
-
48
-
49
-
50
-
51
-
52
-
53
-
54
-
55
-
56
-
57
-
58
-
59
-
60
-
61
-
62
-
63
-
64
-
65
-
66
-
67
-
68
-
69
-
70
-
71
-
72
-
73
-
74
-
75
-
76
-
77
-
78
-
79
-
80
-
81
-
82
-
83
-
84
-
85
-
86
-
87
-
88
-
89
-
90
-
91
-
92
-
93
-
94
-
95
-
96
-
97
-
98
-
99
-
100
-
101
-
102
-
103
-
104
 |
 |
