Brother International BES Lettering Users Manual - English - Page 44
Text Frames - an Overview
 |
View all Brother International BES Lettering manuals
Add to My Manuals
Save this manual to your list of manuals |
Page 44 highlights
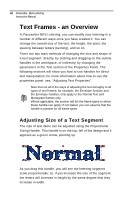
42 Pacesetter BES Lettering Instruction Manual Text Frames - an Overview In Pacesetter BES Lettering, you can modify your lettering in a number of different ways once you have created it. You can change the overall size of the text, the height, the slant, the spacing between letters (kerning), and so on. There are two main methods of changing the size and shape of a text segment: directly, by clicking and dragging on the outline handles in the workspace, or indirectly, by changing the parameters in the Text section of the Properties Panel. The following sections will show you how to use handles for direct text manipulation; for more information about how to use the properties panel, see, "Adjusting Text Properties". Note that not all of the ways of adjusting the text will apply to all types of text frames; for example, the Envelope function and the Envelope handles, only apply to the Normal Text and Monogram frames only. Where applicable, the section will list the frame types to which these handle can apply; if not stated, you can assume that the handle is present for all frame types. Adjusting Size of a Text Segment The size of text items can be adjusted using the Proportional Sizing Handle. This handle is on the top, left of the design and it appears as a green arrow, pointing up. As you drag this handle, you will see the lettering segment scale proportionally; so, if you increase the size of the segment, the letters will increase in height by the same degree that they increase in width.
-
 1
1 -
2
-
3
-
4
-
5
-
6
-
7
-
8
-
9
-
10
-
11
-
12
-
13
-
14
-
15
-
16
-
17
-
18
-
19
-
20
-
21
-
22
-
23
-
24
-
25
-
26
-
27
-
28
-
29
-
30
-
31
-
32
-
33
-
34
-
35
-
36
-
37
-
38
-
 39
39 -
 40
40 -
 41
41 -
 42
42 -
 43
43 -
 44
44 -
 45
45 -
 46
46 -
 47
47 -
 48
48 -
 49
49 -
50
-
51
-
52
-
53
-
54
-
55
-
56
-
57
-
58
-
59
-
60
-
61
-
62
-
63
-
64
-
65
-
66
-
67
-
68
-
69
-
70
-
71
-
72
-
73
-
74
-
75
-
76
-
77
-
78
-
79
-
80
-
81
-
82
-
83
-
84
-
85
-
86
-
87
-
88
-
89
-
90
-
91
-
92
-
93
-
94
-
95
-
96
-
97
-
98
-
99
-
100
-
101
-
102
-
103
-
104
-
105
-
106
-
107
-
108
-
109
-
110
-
111
-
112
-
113
-
114
-
115
-
116
-
117
-
118
-
119
-
120
-
121
-
122
-
123
-
124
-
125
-
126
-
127
-
128
-
129
-
130
-
131
-
132
 |
 |
