Brother International BES Lettering Users Manual - English - Page 72
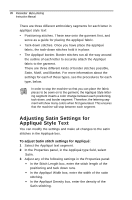
Adjusting Satin Settings for, Appliqué Style Text
 |
View all Brother International BES Lettering manuals
Add to My Manuals
Save this manual to your list of manuals |
Page 72 highlights
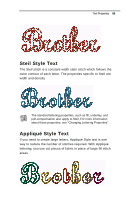
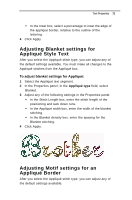
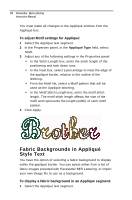
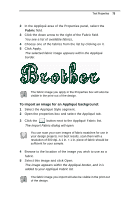
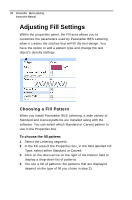
70 Pacesetter BES Lettering Instruction Manual There are three different embroidery segments for each letter in appliqué style text: • Positioning stitches. These sew onto the garment first, and serve as a guide for placing the appliqué fabric. • Tack-down stitches. Once you have place the appliqué fabric, the tack-down stitches hold it in place. • The Appliqué border. Border stitches run all the way around the outline of each letter to securely attach the Appliqué fabric to the garment. There are three different kinds of border stitches possible, Satin, Motif, and Blanket. For more information about the settings for each of these types, see the procedures for each type, below. In order to stop the machine so that you can place the fabric pieces to be sewn on to the garment, the Appliqué Style lettering segment inserts a color change between each positioning, tack-down, and border segment. Therefore, the lettering segment will show many colors when first generated. This ensures that the machine will stop between each segment. Adjusting Satin Settings for Appliqué Style Text You can modify the settings and make all changes to the satin stitches in the Appliqué box. To adjust Satin stitch settings for Appliqué: 1 Select the Appliqué text segment. 2 In the Properties panel, in the Appliqué type field, select Satin. 3 Adjust any of the following settings in the Properties panel: Š In the Stitch Length box, enter the stitch length of the positioning and tack down runs. Š In the Appliqué Width box, enter the width of the satin stitching. Š In the Appliqué Density box, enter the density of the Satin stitching.
-
 1
1 -
2
-
3
-
4
-
5
-
6
-
7
-
8
-
9
-
10
-
11
-
12
-
13
-
14
-
15
-
16
-
17
-
18
-
19
-
20
-
21
-
22
-
23
-
24
-
25
-
26
-
27
-
28
-
29
-
30
-
31
-
32
-
33
-
34
-
35
-
36
-
37
-
38
-
39
-
40
-
41
-
42
-
43
-
44
-
45
-
46
-
47
-
48
-
49
-
50
-
51
-
52
-
53
-
54
-
55
-
56
-
57
-
58
-
59
-
60
-
61
-
62
-
63
-
64
-
65
-
66
-
 67
67 -
 68
68 -
 69
69 -
 70
70 -
 71
71 -
 72
72 -
 73
73 -
 74
74 -
 75
75 -
 76
76 -
 77
77 -
78
-
79
-
80
-
81
-
82
-
83
-
84
-
85
-
86
-
87
-
88
-
89
-
90
-
91
-
92
-
93
-
94
-
95
-
96
-
97
-
98
-
99
-
100
-
101
-
102
-
103
-
104
-
105
-
106
-
107
-
108
-
109
-
110
-
111
-
112
-
113
-
114
-
115
-
116
-
117
-
118
-
119
-
120
-
121
-
122
-
123
-
124
-
125
-
126
-
127
-
128
-
129
-
130
-
131
-
132
 |
 |
