Brother International HE-800A Instruction Manual - English - Page 74
If the thread breaks during sewing
 |
View all Brother International HE-800A manuals
Add to My Manuals
Save this manual to your list of manuals |
Page 74 highlights
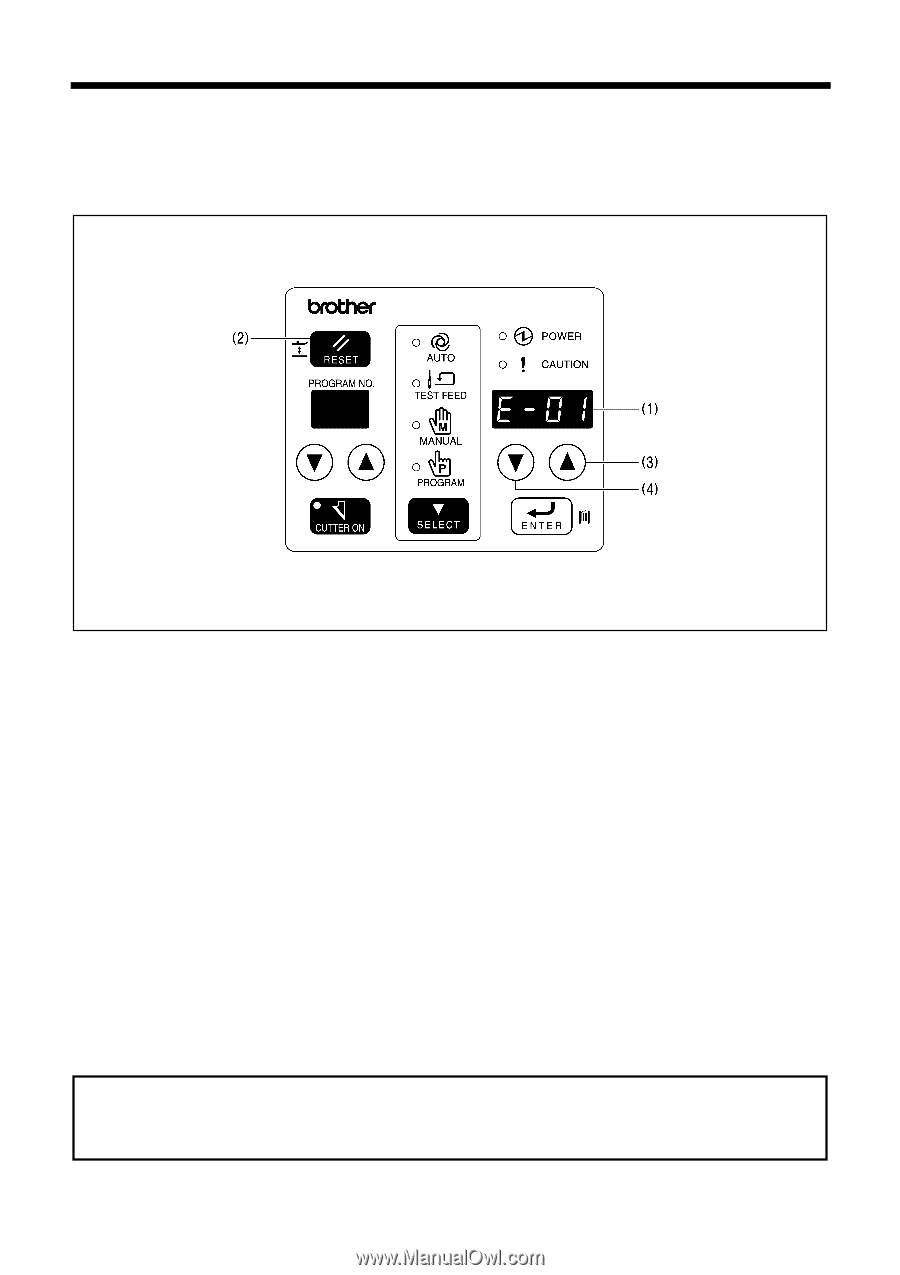
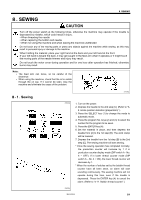
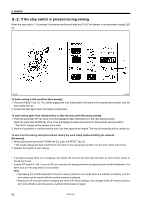
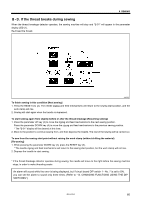
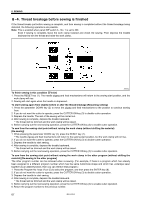
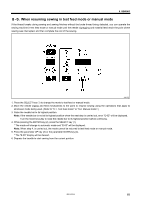
8. SEWING 8-3. If the thread breaks during sewing When the thread breakage detector operates, the sewing machine will stop and "E-01" will appear in the parameter display LED (1). Re-thread the thread. 3965Q To finish sewing in this condition [Next sewing] 1. Press the RESET key (2). The needle zigzag and feed mechanisms will return to the sewing start position, and the work clamp will rise. 2. Sewing will start again when the treadle is depressed. To start sewing again from slightly before or after the thread breakage [Resuming sewing] 1. Press the parameter UP key (3) to move the zigzag and feed mechanisms to the next sewing position. Press the parameter DOWN key (4) to move the zigzag and feed mechanisms to the previous sewing position. * The "E-01" display will be cleared at this time. 2. Move to the position to continue sewing from, and then depress the treadle. The rest of the sewing will be carried out. To sew from the sewing start point without raising the work clamp (without shifting the material) [Re-sewing] 1. While pressing the parameter DOWN key (4), press the RESET key (2). * The needle zigzag and feed mechanisms will return to the sewing start position, but the work clamp will not rise. 2. Depress the treadle to start sewing. * If the thread breakage detector operates during sewing, the needle will move to the right before the sewing machine stops, in order to make threading easier. An alarm will sound while the error is being displayed, but if circuit board DIP switch 1 - No. 7 is set to ON, you can set the alarm to sound only three times. (Refer to "13. CHANGING FUNCTIONS USING THE DIP SWITCHES".) HE-800A 66
-
 1
1 -
2
-
3
-
4
-
5
-
6
-
7
-
8
-
9
-
10
-
11
-
12
-
13
-
14
-
15
-
16
-
17
-
18
-
19
-
20
-
21
-
22
-
23
-
24
-
25
-
26
-
27
-
28
-
29
-
30
-
31
-
32
-
33
-
34
-
35
-
36
-
37
-
38
-
39
-
40
-
41
-
42
-
43
-
44
-
45
-
46
-
47
-
48
-
49
-
50
-
51
-
52
-
53
-
54
-
55
-
56
-
57
-
58
-
59
-
60
-
61
-
62
-
63
-
64
-
65
-
66
-
67
-
68
-
 69
69 -
 70
70 -
 71
71 -
 72
72 -
 73
73 -
 74
74 -
 75
75 -
 76
76 -
 77
77 -
 78
78 -
 79
79 -
80
-
81
-
82
-
83
-
84
-
85
-
86
-
87
-
88
-
89
-
90
-
91
-
92
-
93
-
94
-
95
-
96
-
97
-
98
-
99
-
100
-
101
-
102
-
103
-
104
-
105
-
106
-
107
-
108
-
109
-
110
-
111
-
112
-
113
-
114
-
115
-
116
-
117
-
118
 |
 |