Brother International HE-800A Instruction Manual - English - Page 80
Standard Adjustments
 |
View all Brother International HE-800A manuals
Add to My Manuals
Save this manual to your list of manuals |
Page 80 highlights
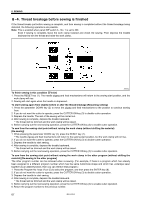
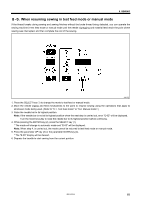
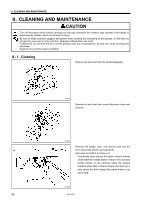
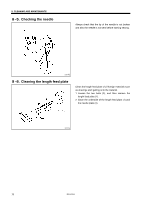
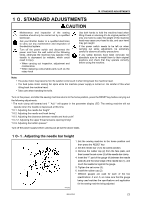
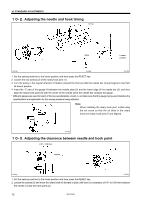
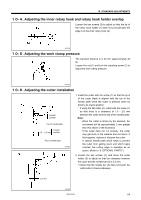
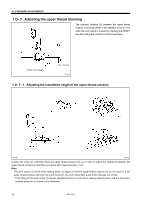
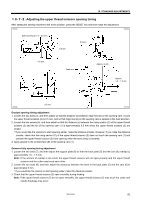
10. STANDARD ADJUSTMENTS 10. STANDARD ADJUSTMENTS CAUTION Maintenance and inspection of the sewing machine should only be carried out by a qualified technician. Ask your Brother dealer or a qualified electrician to carry out any maintenance and inspection of the electrical system. Turn off the power switch and disconnect the power cord from the wall outlet at the following times, otherwise the machine may operate if the treadle is depressed by mistake, which could result in injury. • When carrying out inspection, adjustment and maintenance • When replacing consumable parts such as the rotary hook Use both hands to hold the machine head when tilting it back or returning it to its original position. If only one hand is used, the weight of the machine head may cause your hand to slip, and your hand may get caught. If the power switch needs to be left on when carrying out some adjustment, be extremely careful to observe all safety precautions. If any safety devices have been removed, be absolutely sure to re-install them to their original positions and check that they operate correctly before using the machine. Note: • The pulse motor may become hot. Be careful not to touch it when tilting back the machine head. • The feed pulse motor cooling fan spins while the machine power supply is turned on. Be careful of this when tilting back the machine head. • Take care when handling the knife. Turn on the power, and after the sewing machine returns to the home position, press the RESET key before carrying out the following adjustments. * The work clamp will lowered and " ¯ AdJ " will appear in the parameter display LED. The sewing machine will not operate when the treadle is depressed at this time. "10-1. Adjusting the needle bar height" "10-2. Adjusting the needle and hook timing" "10-3. Adjusting the clearance between needle and hook point" "10-7-2. Adjusting the upper thread scissors opening timing" "10-9. Adjusting the bobbin presser" Turn off the power supply before carrying out all but the above tasks. 10-1. Adjusting the needle bar height 3972Q 1. Set the sewing machine to the home position and then press the RESET key. 2. Set the needle bar (1) to its lowest position. 3. Remove the rubber cap (2) from the face plate, and then loosen the set screw (3) of the needle bar clamp. 4. Insert the "1" part of the gauge (4) between the needle plate (5) and the lower edge of the needle bar (1), and touch the needle bar against the gauge. 5. Tighten the set screw (3). 6. Install the rubber cap (2). * Different gauges are used for each of the two specifications -2 and -3, so make sure that the gauge being used matches the specifications and application for the sewing machine being adjusted. HE-800A 72
-
 1
1 -
2
-
3
-
4
-
5
-
6
-
7
-
8
-
9
-
10
-
11
-
12
-
13
-
14
-
15
-
16
-
17
-
18
-
19
-
20
-
21
-
22
-
23
-
24
-
25
-
26
-
27
-
28
-
29
-
30
-
31
-
32
-
33
-
34
-
35
-
36
-
37
-
38
-
39
-
40
-
41
-
42
-
43
-
44
-
45
-
46
-
47
-
48
-
49
-
50
-
51
-
52
-
53
-
54
-
55
-
56
-
57
-
58
-
59
-
60
-
61
-
62
-
63
-
64
-
65
-
66
-
67
-
68
-
69
-
70
-
71
-
72
-
73
-
74
-
 75
75 -
 76
76 -
 77
77 -
 78
78 -
 79
79 -
 80
80 -
 81
81 -
 82
82 -
 83
83 -
 84
84 -
 85
85 -
86
-
87
-
88
-
89
-
90
-
91
-
92
-
93
-
94
-
95
-
96
-
97
-
98
-
99
-
100
-
101
-
102
-
103
-
104
-
105
-
106
-
107
-
108
-
109
-
110
-
111
-
112
-
113
-
114
-
115
-
116
-
117
-
118
 |
 |
