Brother International HL 1850 Users Manual - English - Page 106
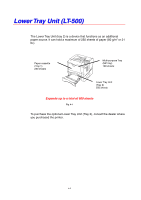
Installing the Lower Tray Unit
 |
UPC - 012502603900
View all Brother International HL 1850 manuals
Add to My Manuals
Save this manual to your list of manuals |
Page 106 highlights
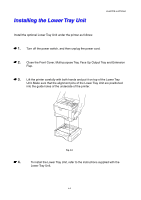
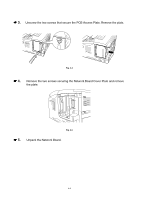
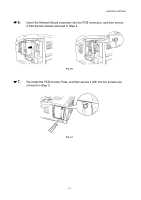
Installing the Lower Tray Unit CHAPTER 4 OPTIONS Install the optional Lower Tray Unit under the printer as follows: ☛ 1. Turn off the power switch, and then unplug the power cord. ☛ 2. Close the Front Cover, Multi-purpose Tray, Face Up Output Tray and Extension Flap. ☛ 3. Lift the printer carefully with both hands and put it on top of the Lower Tray Unit. Make sure that the alignment pins of the Lower Tray Unit are positioned into the guide holes of the underside of the printer. Fig. 4-2 ☛ 4. To install the Lower Tray Unit, refer to the instructions supplied with the Lower Tray Unit. 4-3
-
 1
1 -
2
-
3
-
4
-
5
-
6
-
7
-
8
-
9
-
10
-
11
-
12
-
13
-
14
-
15
-
16
-
17
-
18
-
19
-
20
-
21
-
22
-
23
-
24
-
25
-
26
-
27
-
28
-
29
-
30
-
31
-
32
-
33
-
34
-
35
-
36
-
37
-
38
-
39
-
40
-
41
-
42
-
43
-
44
-
45
-
46
-
47
-
48
-
49
-
50
-
51
-
52
-
53
-
54
-
55
-
56
-
57
-
58
-
59
-
60
-
61
-
62
-
63
-
64
-
65
-
66
-
67
-
68
-
69
-
70
-
71
-
72
-
73
-
74
-
75
-
76
-
77
-
78
-
79
-
80
-
81
-
82
-
83
-
84
-
85
-
86
-
87
-
88
-
89
-
90
-
91
-
92
-
93
-
94
-
95
-
96
-
97
-
98
-
99
-
100
-
 101
101 -
 102
102 -
 103
103 -
 104
104 -
 105
105 -
 106
106 -
 107
107 -
 108
108 -
 109
109 -
 110
110 -
 111
111 -
112
-
113
-
114
-
115
-
116
-
117
-
118
-
119
-
120
-
121
-
122
-
123
-
124
-
125
-
126
-
127
-
128
-
129
-
130
-
131
-
132
-
133
-
134
-
135
-
136
-
137
-
138
-
139
-
140
-
141
-
142
-
143
-
144
-
145
-
146
-
147
-
148
-
149
-
150
-
151
-
152
-
153
-
154
-
155
-
156
-
157
-
158
-
159
-
160
-
161
-
162
-
163
-
164
-
165
-
166
-
167
-
168
-
169
-
170
-
171
-
172
-
173
-
174
-
175
-
176
-
177
-
178
-
179
-
180
-
181
-
182
-
183
-
184
-
185
-
186
-
187
-
188
-
189
-
190
-
191
-
192
-
193
-
194
-
195
-
196
-
197
-
198
-
199
-
200
-
201
-
202
-
203
-
204
 |
 |
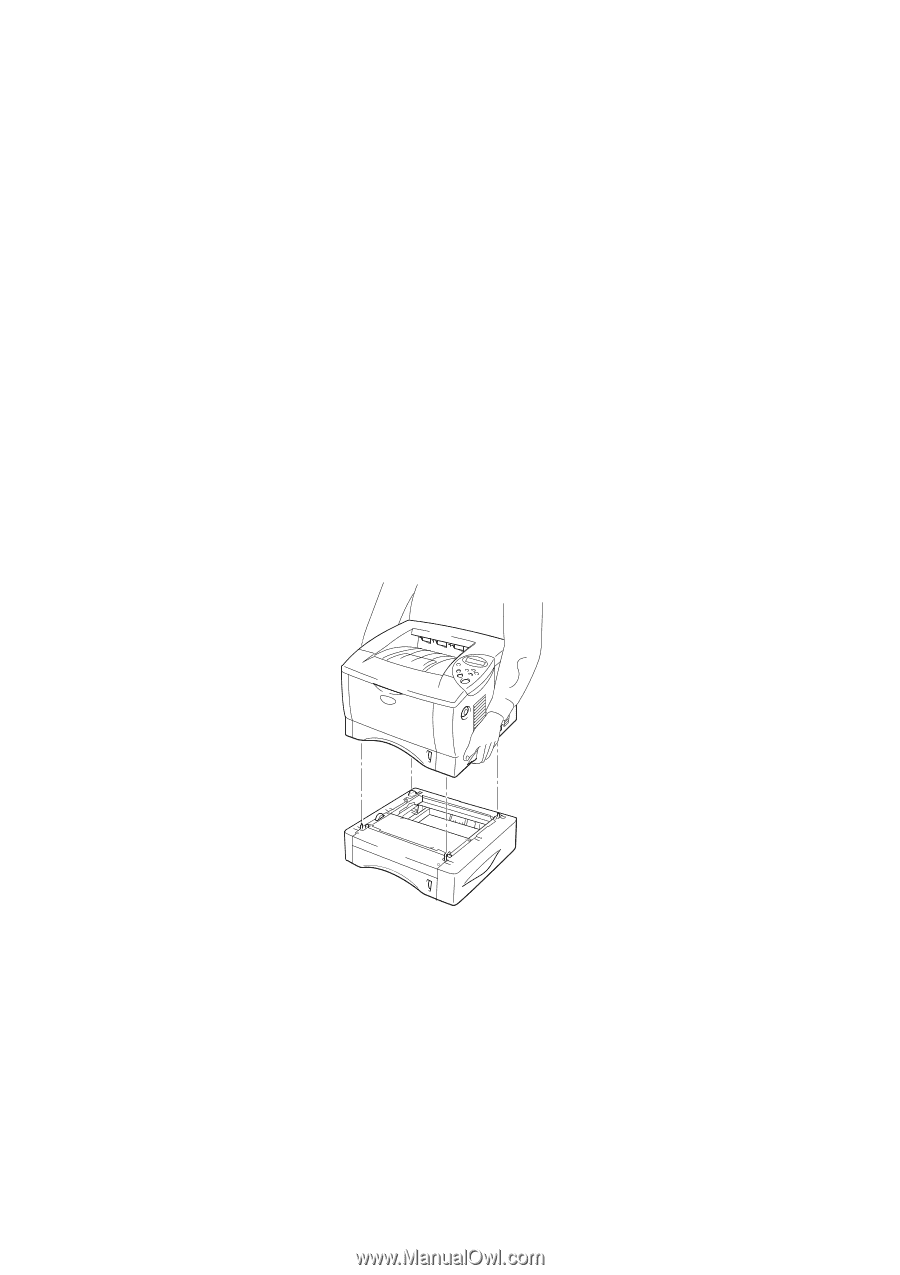
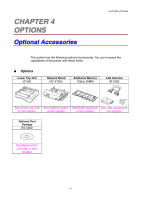
CHAPTER 4 OPTIONS
4-3
Installing the Lower Tray Unit
Install the optional Lower Tray Unit under the printer as follows:
☛
1.
Turn off the power switch, and then unplug the power cord.
☛
2.
Close the Front Cover, Multi-purpose Tray, Face Up Output Tray and Extension
Flap.
☛
3.
Lift the printer carefully with both hands and put it on top of the Lower Tray
Unit. Make sure that the alignment pins of the Lower Tray Unit are positioned
into the guide holes of the underside of the printer.
Fig. 4-2
☛
4.
To install the Lower Tray Unit, refer to the instructions supplied with the
Lower Tray Unit.