Brother International HL 1850 Users Manual - English - Page 166
Printed s are stained with toner, or have vertical stripes.
 |
UPC - 012502603900
View all Brother International HL 1850 manuals
Add to My Manuals
Save this manual to your list of manuals |
Page 166 highlights
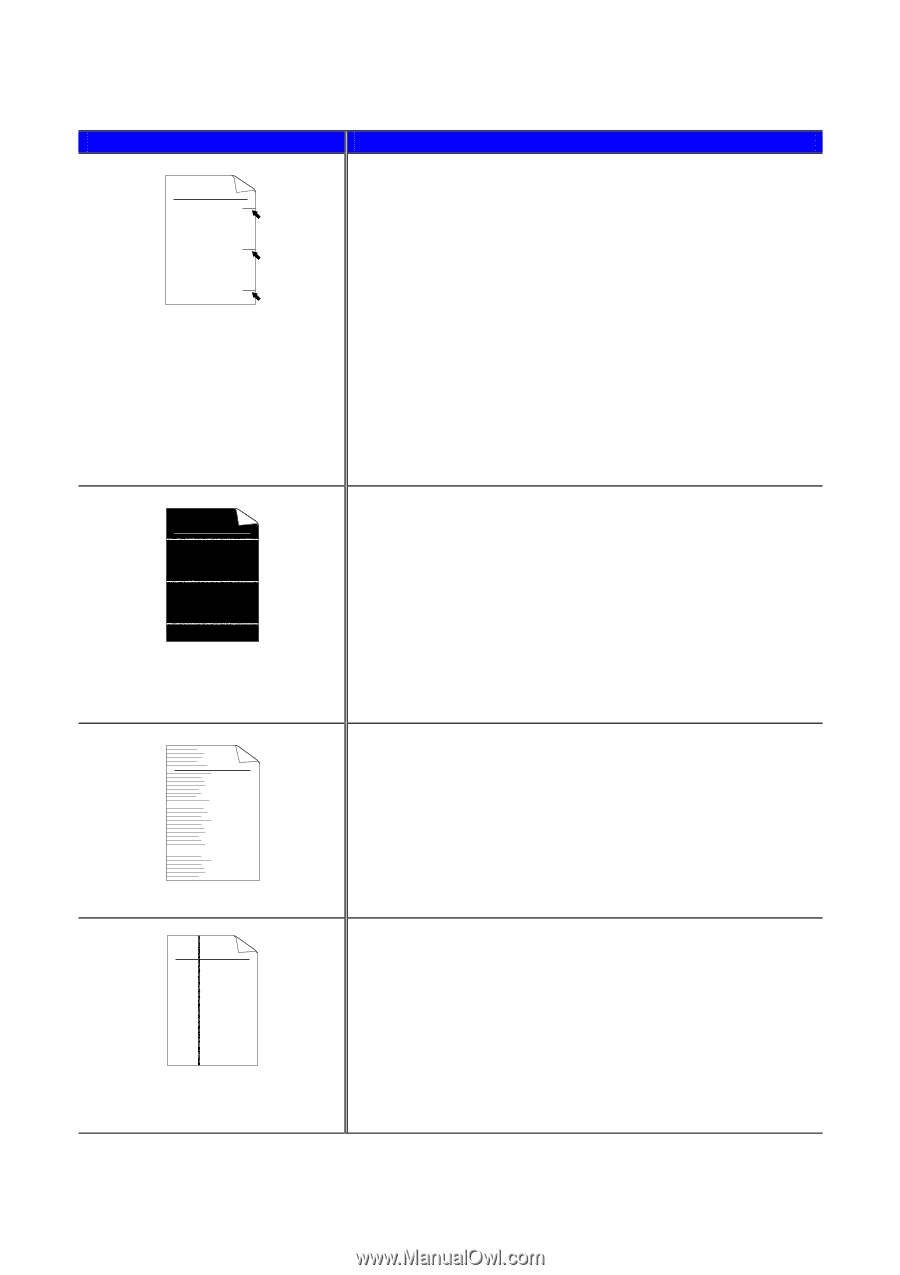
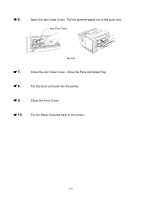
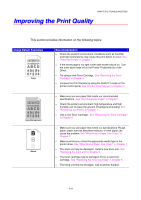
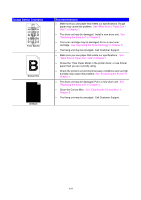
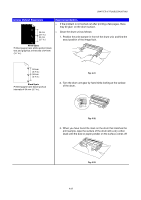
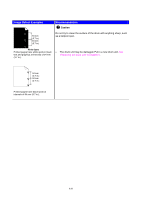
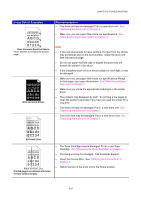
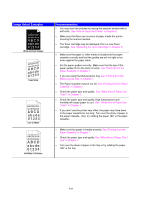
CHAPTER 6 TROUBLESHOOTING Image Defect Examples ABCDEFGH abcdefghijk ABCD abcde 01234 Black Horizontal Repetitive Defects Toner scatters and stains the printed page. ABCDEFGH abcdefghijk ABCD abcde 01234 White Horizontal Stripes ABCDEFGH abcdefghijk ABCD abcde 01234 Horizontal Lines Recommendation • The drum unit may be damaged. Put in a new drum unit. See "Replacing the drum unit" in Chapter 5. • Make sure you use paper that meets our specifications. See "What Kind of Paper Can I Use?" in Chapter 1. Note • If you use label sheets for laser printers, the glue from the sheets may sometimes stick to the drum surface. Clean the drum unit. See the previous page. • Do not use paper that has clips or staples because they will scratch the surface of the drum. • If the unpacked drum unit is in direct sunlight or room light, it may be damaged. • Make sure you use paper that meets our specifications. Rough or thick paper can cause the problem. See "What Kind of Paper Can I Use" in Chapter 1. • Make sure you chose the appropriate media type in the printer driver. • The problem may disappear by itself. Try printing a few pages to clear this problem especially if you have not used the printer for a long time. • The drum unit may be damaged. Put in a new drum unit. See "Replacing the drum unit" in Chapter 5. • The Drum Unit may be damaged. Put in a new Drum Unit. See "Replacing the drum unit" in Chapter 5. ABCDEFGH abcdefghijk ABCD abcde 01234 Black Vertical Lines Printed pages are stained with toner or have vertical stripes. • The Toner Cartridge may be damaged. Put in a new Toner Cartridge. See "Replacing the Toner Cartridge" in Chapter 5. • The fixing unit may be smudged. Call Customer Support. • Clean the Corona Wire. See "Cleaning the Corona Wire" in Chapter 5. • Return the tab on the drum unit to the Home position. 6-27
-
 1
1 -
2
-
3
-
4
-
5
-
6
-
7
-
8
-
9
-
10
-
11
-
12
-
13
-
14
-
15
-
16
-
17
-
18
-
19
-
20
-
21
-
22
-
23
-
24
-
25
-
26
-
27
-
28
-
29
-
30
-
31
-
32
-
33
-
34
-
35
-
36
-
37
-
38
-
39
-
40
-
41
-
42
-
43
-
44
-
45
-
46
-
47
-
48
-
49
-
50
-
51
-
52
-
53
-
54
-
55
-
56
-
57
-
58
-
59
-
60
-
61
-
62
-
63
-
64
-
65
-
66
-
67
-
68
-
69
-
70
-
71
-
72
-
73
-
74
-
75
-
76
-
77
-
78
-
79
-
80
-
81
-
82
-
83
-
84
-
85
-
86
-
87
-
88
-
89
-
90
-
91
-
92
-
93
-
94
-
95
-
96
-
97
-
98
-
99
-
100
-
101
-
102
-
103
-
104
-
105
-
106
-
107
-
108
-
109
-
110
-
111
-
112
-
113
-
114
-
115
-
116
-
117
-
118
-
119
-
120
-
121
-
122
-
123
-
124
-
125
-
126
-
127
-
128
-
129
-
130
-
131
-
132
-
133
-
134
-
135
-
136
-
137
-
138
-
139
-
140
-
141
-
142
-
143
-
144
-
145
-
146
-
147
-
148
-
149
-
150
-
151
-
152
-
153
-
154
-
155
-
156
-
157
-
158
-
159
-
160
-
 161
161 -
 162
162 -
 163
163 -
 164
164 -
 165
165 -
 166
166 -
 167
167 -
 168
168 -
 169
169 -
 170
170 -
 171
171 -
172
-
173
-
174
-
175
-
176
-
177
-
178
-
179
-
180
-
181
-
182
-
183
-
184
-
185
-
186
-
187
-
188
-
189
-
190
-
191
-
192
-
193
-
194
-
195
-
196
-
197
-
198
-
199
-
200
-
201
-
202
-
203
-
204
 |
 |