Brother International MFC 8500 Users Manual - English - Page 204
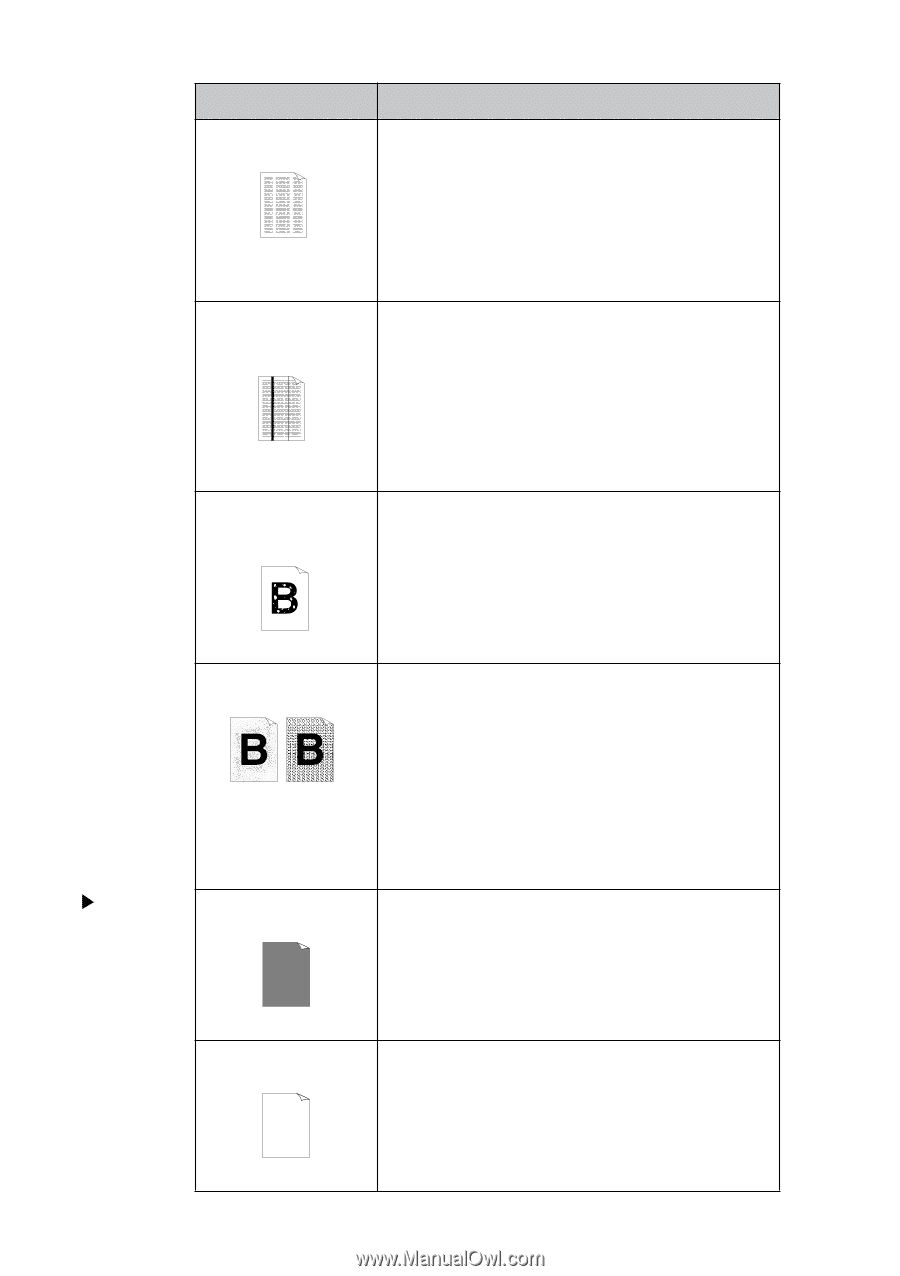
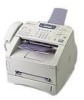
White Stripes or, Faint lmages, Dark Stripes or, Toner Stains, White Spots, Scattering Toner, Print - drum replacement
 |
UPC - 012502603832
View all Brother International MFC 8500 manuals
Add to My Manuals
Save this manual to your list of manuals |
Page 204 highlights
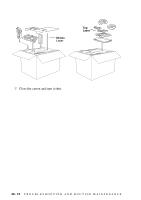
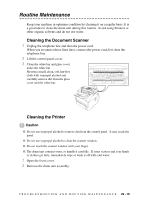
Difficulty Suggestions Printed pages contain white stripes. White Stripes or Faint lmages You may fix this by wiping the scanner windows with a clean soft cloth. (See Routine Maintenance and Cleaning the Drum Unit, on Pages 22-16 and 22-17.) If you still see white stripes or faint images and the LCD shows CHANGE DRUM SOON, replace the drum unit with a new one. Check the machine's environment. Conditions such as humidity, high temperatures, etc. may cause this print defect to occur. Printed pages are stained corona with toner or have vertical stripes. Dark Stripes or Toner Stains Clean the machine's interior and the primary wire of the drum unit. (See Routine Maintenance and Cleaning the Drum Unit, on Pages 22-16 and 22-17.) Make sure that the tab of the corona wire is at the home position. If after cleaning, you still see dark stripes or toner stains and the LCD shows CHANGE DRUM SOON, replace the drum unit with a new one. Printed pages have white sports in black text and graphic areas. White Spots Make sure that you use paper that meets the specifications. Rough surface or thick media can cause the problem. If you still see white spots and the LCD shows CHANGE DRUM SOON, replace the drum unit with a new one. Check the machine's environment; conditions such as high humidity may cause this situation to occur. Toner scatters and stains the printed page. Scattering Toner Adjust the print conditions by setting the Print Density function. Remove the drum unit and clean the machine's interior. (See Routine Maintenance, Cleaning the Printer and Cleaning the Drum Unit, on Pages 22-16 and 22-17.) Make sure that you use paper that meets specifications. (See Page 2-6.) If you still have scattered toner and the LCD shows CHANGE DRUM SOON, replace the drum unit with a new one. Check the machine's environment; high temperature and high humidity conditions may cause this condition to occur. Print Quality Difficulties (Cont.) The whole page is printed black. Black Page Clean the machine's interior and the primary corona wire of the drum unit. (See Pages 22-16~17.) Also, do not use heat-sensitive paper as it will cause this problem. After cleaning, if the printed pages are still black or the display shows CHANGE DRUM SOON, replace the drum unit with a new one. The drum unit may be damaged. Nothing is printed on the page. Make sure that the toner cartridge is not empty. Wipe electric terminals referring to Routine Maintenance, Cleaning the Printer and Cleaning the Drum Unit, on Pages 22-16 and 22-17. Make sure that a torn piece of paper does not remain on the scanner window. White Page 22 - 11 T R O U B L E S H O O T I N G A N D R O U T I N E M A I N T E N A N C E
-
 1
1 -
2
-
3
-
4
-
5
-
6
-
7
-
8
-
9
-
10
-
11
-
12
-
13
-
14
-
15
-
16
-
17
-
18
-
19
-
20
-
21
-
22
-
23
-
24
-
25
-
26
-
27
-
28
-
29
-
30
-
31
-
32
-
33
-
34
-
35
-
36
-
37
-
38
-
39
-
40
-
41
-
42
-
43
-
44
-
45
-
46
-
47
-
48
-
49
-
50
-
51
-
52
-
53
-
54
-
55
-
56
-
57
-
58
-
59
-
60
-
61
-
62
-
63
-
64
-
65
-
66
-
67
-
68
-
69
-
70
-
71
-
72
-
73
-
74
-
75
-
76
-
77
-
78
-
79
-
80
-
81
-
82
-
83
-
84
-
85
-
86
-
87
-
88
-
89
-
90
-
91
-
92
-
93
-
94
-
95
-
96
-
97
-
98
-
99
-
100
-
101
-
102
-
103
-
104
-
105
-
106
-
107
-
108
-
109
-
110
-
111
-
112
-
113
-
114
-
115
-
116
-
117
-
118
-
119
-
120
-
121
-
122
-
123
-
124
-
125
-
126
-
127
-
128
-
129
-
130
-
131
-
132
-
133
-
134
-
135
-
136
-
137
-
138
-
139
-
140
-
141
-
142
-
143
-
144
-
145
-
146
-
147
-
148
-
149
-
150
-
151
-
152
-
153
-
154
-
155
-
156
-
157
-
158
-
159
-
160
-
161
-
162
-
163
-
164
-
165
-
166
-
167
-
168
-
169
-
170
-
171
-
172
-
173
-
174
-
175
-
176
-
177
-
178
-
179
-
180
-
181
-
182
-
183
-
184
-
185
-
186
-
187
-
188
-
189
-
190
-
191
-
192
-
193
-
194
-
195
-
196
-
197
-
198
-
 199
199 -
 200
200 -
 201
201 -
 202
202 -
 203
203 -
 204
204 -
 205
205 -
 206
206 -
 207
207 -
 208
208 -
 209
209 -
210
-
211
-
212
-
213
-
214
-
215
-
216
-
217
-
218
-
219
-
220
-
221
-
222
-
223
-
224
-
225
-
226
-
227
-
228
-
229
-
230
-
231
-
232
-
233
-
234
 |
 |