Brother International MFC 8500 Users Manual - English - Page 55
Setting Volume Amplify (For the Hearing-Impaired), Memory Storage
 |
UPC - 012502603832
View all Brother International MFC 8500 manuals
Add to My Manuals
Save this manual to your list of manuals |
Page 55 highlights
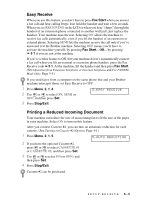
Setting Volume Amplify (For the Hearing-Impaired) Please carefully read Choosing the Handset Volume (For Volume Amplify), on page 4-6 before you do the following steps: 1 Press Menu, 1, 4, 5. 5.VOLUME AMPLIFY 2 If none of the users are hearing-impaired, press or to select VOL AMPLIFY:OFF? and then press Set, and then go to Step 4-OR- If some or all of the users are hearingimpaired, select VOL AMPLIFY:ON? and then press Set. 3 If all the users are hearing-impaired, press or to select PERMANENT? and then press Set -OR-If only some of the users are hearing-impaired, select TEMPORARY? and then press Set. 4 Press Stop/Exit. VOL AMPLIFY:ON? SELECT & SET PERMANENT? SELECT & SET TEMPORARY? SELECT & SET Memory Storage In the event of a power failure, all settings in the GENERAL SETUP, SETUP RECEIVE, SET AUTO DIAL and REMOTE FAX OPTIONS, plus the COVERPG SETUP and COVERPG MSG (from SETUP SEND) operations are stored permanently. You may have to reset the date and time. Turning On Automatic Daylight Savings Time You can set the machine to change automatically for Daylight Savings Time. It will reset itself forward one hour in the Spring and back one hour in the Fall. 1 Press Menu, 1, 6. 6.AUTO DAYLIGHT 2 Press or to select ON (or OFF), and then press Set. 3 Press Stop/Exit. INITIAL SETUP 4-7
-
 1
1 -
2
-
3
-
4
-
5
-
6
-
7
-
8
-
9
-
10
-
11
-
12
-
13
-
14
-
15
-
16
-
17
-
18
-
19
-
20
-
21
-
22
-
23
-
24
-
25
-
26
-
27
-
28
-
29
-
30
-
31
-
32
-
33
-
34
-
35
-
36
-
37
-
38
-
39
-
40
-
41
-
42
-
43
-
44
-
45
-
46
-
47
-
48
-
49
-
 50
50 -
 51
51 -
 52
52 -
 53
53 -
 54
54 -
 55
55 -
 56
56 -
 57
57 -
 58
58 -
 59
59 -
 60
60 -
61
-
62
-
63
-
64
-
65
-
66
-
67
-
68
-
69
-
70
-
71
-
72
-
73
-
74
-
75
-
76
-
77
-
78
-
79
-
80
-
81
-
82
-
83
-
84
-
85
-
86
-
87
-
88
-
89
-
90
-
91
-
92
-
93
-
94
-
95
-
96
-
97
-
98
-
99
-
100
-
101
-
102
-
103
-
104
-
105
-
106
-
107
-
108
-
109
-
110
-
111
-
112
-
113
-
114
-
115
-
116
-
117
-
118
-
119
-
120
-
121
-
122
-
123
-
124
-
125
-
126
-
127
-
128
-
129
-
130
-
131
-
132
-
133
-
134
-
135
-
136
-
137
-
138
-
139
-
140
-
141
-
142
-
143
-
144
-
145
-
146
-
147
-
148
-
149
-
150
-
151
-
152
-
153
-
154
-
155
-
156
-
157
-
158
-
159
-
160
-
161
-
162
-
163
-
164
-
165
-
166
-
167
-
168
-
169
-
170
-
171
-
172
-
173
-
174
-
175
-
176
-
177
-
178
-
179
-
180
-
181
-
182
-
183
-
184
-
185
-
186
-
187
-
188
-
189
-
190
-
191
-
192
-
193
-
194
-
195
-
196
-
197
-
198
-
199
-
200
-
201
-
202
-
203
-
204
-
205
-
206
-
207
-
208
-
209
-
210
-
211
-
212
-
213
-
214
-
215
-
216
-
217
-
218
-
219
-
220
-
221
-
222
-
223
-
224
-
225
-
226
-
227
-
228
-
229
-
230
-
231
-
232
-
233
-
234
 |
 |