Brother International MFC-J4710DW Mobile Print and Scan (iPrint&Scan) Guid - Page 71
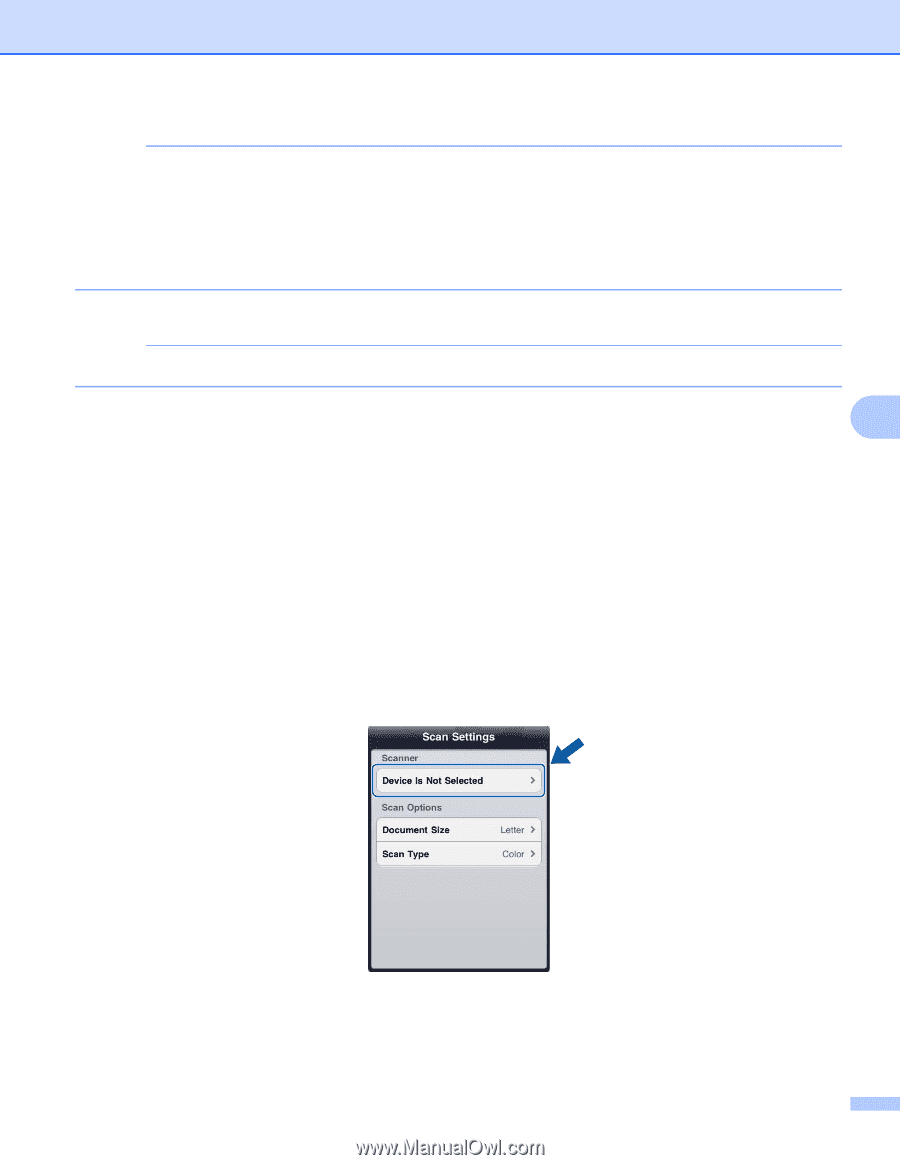
The Scan Settings screen appears., If your machine is selected, go to step
 |
View all Brother International MFC-J4710DW manuals
Add to My Manuals
Save this manual to your list of manuals |
Page 71 highlights
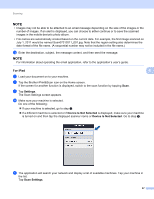
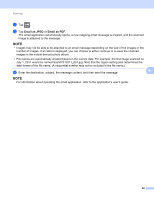
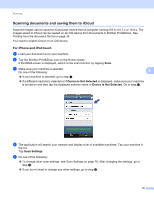
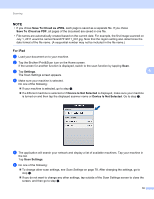
Scanning NOTE • Images may not be able to be attached to an email message depending on the size of the images or the number of images. If an alert is displayed, you can choose to either continue or to save the scanned images in the mobile device's photo album. • File names are automatically created based on the current date. For example, the first image scanned on July 1, 2011 would be named Scan07012011_001.jpg. Note that the region setting also determines the date format of the file name. (A sequential number may not be included in the file name.) l Enter the destination, subject, the message content, and then send the message. NOTE For information about operating the email application, refer to the application's user's guide. For iPad 6 6 a Load your document on to your machine. b Tap the Brother iPrint&Scan icon on the Home screen. If the screen for another function is displayed, switch to the scan function by tapping Scan. c Tap Settings. The Scan Settings screen appears. d Make sure your machine is selected. Do one of the following: If your machine is selected, go to step f. If a different machine is selected or if Device Is Not Selected is displayed, make sure your machine is turned on and then tap the displayed scanner name or Device Is Not Selected. Go to step e. e The application will search your network and display a list of available machines. Tap your machine in the list. Tap Scan Settings. 67
-
 1
1 -
2
-
3
-
4
-
5
-
6
-
7
-
8
-
9
-
10
-
11
-
12
-
13
-
14
-
15
-
16
-
17
-
18
-
19
-
20
-
21
-
22
-
23
-
24
-
25
-
26
-
27
-
28
-
29
-
30
-
31
-
32
-
33
-
34
-
35
-
36
-
37
-
38
-
39
-
40
-
41
-
42
-
43
-
44
-
45
-
46
-
47
-
48
-
49
-
50
-
51
-
52
-
53
-
54
-
55
-
56
-
57
-
58
-
59
-
60
-
61
-
62
-
63
-
64
-
65
-
 66
66 -
 67
67 -
 68
68 -
 69
69 -
 70
70 -
 71
71 -
 72
72 -
 73
73 -
 74
74 -
 75
75 -
 76
76 -
77
-
78
-
79
-
80
-
81
-
82
-
83
-
84
-
85
-
86
-
87
-
88
-
89
-
90
-
91
-
92
-
93
-
94
-
95
-
96
-
97
-
98
-
99
-
100
 |
 |