Brother International PEDESIGN 5.0 Users Manual - English - Page 185
Input – from Portrait, Operation, Purpose, Shortcut key, Toolbar
 |
View all Brother International PEDESIGN 5.0 manuals
Add to My Manuals
Save this manual to your list of manuals |
Page 185 highlights
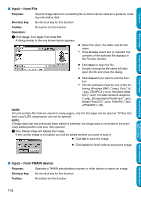
Contents Before Using Getting Started Operation: 1 Check that the scanner or other device is correctly connected. 2 Click Image, then Input, then from TWAIN device. The driver interface set in the Select TWAIN device dialog is displayed. Operate that interface, make the settings for importing an image, and import the image. NOTE: For information on using the interface, see the help manual for that interface, or contact the manufacturers of the interface. 3 When the image transfer between the scanner (or other device) and the driver is complete, the imported image will be pasted in Design Page. If the current image is not saved, you will be asked whether you want to save it. N Click OK to save the image. N Click Cancel to finish without saving the image. NOTE: TWAIN is an application interface (API) standardization for software controlling scanners, etc. Also, the software itself is called TWAIN. This software supports TWAIN standardized devices, so you can control the scanner and import the image directly. Before using this function, you must go to the Select TWAIN device dialog to select a TWAIN device. I Input - from Portrait Purpose: Combine images of facial features that are built in to the program to create an original portrait. Shortcut key: No shortcut key for this function Toolbar: No button for this function Operation: 1 Click Image, then Input, then from Portrait. A dialog similar to the one shown below appears. Design Center Layout & Editing Programmable Stitch Creator Quick Reference Alphabetic Index 177
-
 1
1 -
2
-
3
-
4
-
5
-
6
-
7
-
8
-
9
-
10
-
11
-
12
-
13
-
14
-
15
-
16
-
17
-
18
-
19
-
20
-
21
-
22
-
23
-
24
-
25
-
26
-
27
-
28
-
29
-
30
-
31
-
32
-
33
-
34
-
35
-
36
-
37
-
38
-
39
-
40
-
41
-
42
-
43
-
44
-
45
-
46
-
47
-
48
-
49
-
50
-
51
-
52
-
53
-
54
-
55
-
56
-
57
-
58
-
59
-
60
-
61
-
62
-
63
-
64
-
65
-
66
-
67
-
68
-
69
-
70
-
71
-
72
-
73
-
74
-
75
-
76
-
77
-
78
-
79
-
80
-
81
-
82
-
83
-
84
-
85
-
86
-
87
-
88
-
89
-
90
-
91
-
92
-
93
-
94
-
95
-
96
-
97
-
98
-
99
-
100
-
101
-
102
-
103
-
104
-
105
-
106
-
107
-
108
-
109
-
110
-
111
-
112
-
113
-
114
-
115
-
116
-
117
-
118
-
119
-
120
-
121
-
122
-
123
-
124
-
125
-
126
-
127
-
128
-
129
-
130
-
131
-
132
-
133
-
134
-
135
-
136
-
137
-
138
-
139
-
140
-
141
-
142
-
143
-
144
-
145
-
146
-
147
-
148
-
149
-
150
-
151
-
152
-
153
-
154
-
155
-
156
-
157
-
158
-
159
-
160
-
161
-
162
-
163
-
164
-
165
-
166
-
167
-
168
-
169
-
170
-
171
-
172
-
173
-
174
-
175
-
176
-
177
-
178
-
179
-
 180
180 -
 181
181 -
 182
182 -
 183
183 -
 184
184 -
 185
185 -
 186
186 -
 187
187 -
 188
188 -
 189
189 -
 190
190 -
191
-
192
-
193
-
194
-
195
-
196
-
197
-
198
-
199
-
200
-
201
-
202
-
203
-
204
-
205
-
206
-
207
-
208
-
209
-
210
-
211
-
212
-
213
-
214
-
215
-
216
-
217
-
218
-
219
-
220
-
221
-
222
-
223
-
224
-
225
-
226
-
227
-
228
-
229
-
230
-
231
-
232
-
233
-
234
-
235
-
236
-
237
-
238
-
239
-
240
-
241
-
242
-
243
-
244
-
245
-
246
-
247
-
248
-
249
-
250
-
251
-
252
-
253
-
254
-
255
-
256
-
257
-
258
-
259
-
260
-
261
-
262
-
263
-
264
-
265
-
266
-
267
-
268
-
269
-
270
-
271
-
272
-
273
-
274
 |
 |
