Brother International SE725 Operation Manual - Page 15
LCD Operation
 |
View all Brother International SE725 manuals
Add to My Manuals
Save this manual to your list of manuals |
Page 15 highlights
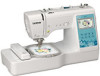
LCD Operation LCD Operation Viewing the LCD An opening movie may be displayed when the power is turned on. When the opening movie is displayed, the screen will be displayed if you touch the LCD with your finger. Touch a key with your finger to select the stitch pattern, to select a machine function, or to select an operation indicated on the key. The screen below appears when you touch on the operation panel. 43 1 Utility stitch 1 2 Decorative stitch 3 Wireless LAN key 2 Set the wireless LAN connection. (page 17) If is displayed, update the software. (page 97) 4 Pattern retrieve key (page 59) GETTING READY 1 ■ Utility stitch screen 678 5 9 4 0 3 2 1E D BA ■ Decorative stitch screen 67 8 5 9 4 0 J 3 2 1E D CBA ■ Utility stitch editing screen F G H A ■ Decorative stitch editing screen I H G F J A Note • Some editing functions cannot be used with certain stitch patterns. Only the functions for the displayed keys are available when a stitch pattern is selected. No. Display Key Name 1 - Stitches 2 Stitch pattern display size Explanation Touch the key for the stitch you want to sew. Shows the approximate size of the stitch pattern selected. Page 31 - 3 - Stitch preview 4 Presser foot Shows a preview of the selected stitch. - Shows presser foot to be used. Before sewing, install the presser foot indicated here. 29 Zigzag foot "J" Blind stitch foot "R" Monogramming foot "N" Button fitting foot "M" Overcasting foot "G" Side cutter "S" (sold separately) Buttonhole foot "A" * The symbols for certain presser feet, such as zipper foot "I" and the quilting foot, may not appear in the screen. 13
-
 1
1 -
2
-
3
-
4
-
5
-
6
-
7
-
8
-
9
-
 10
10 -
 11
11 -
 12
12 -
 13
13 -
 14
14 -
 15
15 -
 16
16 -
 17
17 -
 18
18 -
 19
19 -
 20
20 -
21
-
22
-
23
-
24
-
25
-
26
-
27
-
28
-
29
-
30
-
31
-
32
-
33
-
34
-
35
-
36
-
37
-
38
-
39
-
40
-
41
-
42
-
43
-
44
-
45
-
46
-
47
-
48
-
49
-
50
-
51
-
52
-
53
-
54
-
55
-
56
-
57
-
58
-
59
-
60
-
61
-
62
-
63
-
64
-
65
-
66
-
67
-
68
-
69
-
70
-
71
-
72
-
73
-
74
-
75
-
76
-
77
-
78
-
79
-
80
-
81
-
82
-
83
-
84
-
85
-
86
-
87
-
88
-
89
-
90
-
91
-
92
-
93
-
94
-
95
-
96
-
97
-
98
-
99
-
100
-
101
-
102
-
103
-
104
 |
 |
