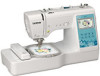
Brother International SE725 Operation Manual - Page 77
Editing Patterns Pattern Editing, Screen
 |
View all Brother International SE725 manuals
Add to My Manuals
Save this manual to your list of manuals |
Page 77 highlights
Editing Patterns (Pattern Editing Screen) Split embroidery patterns Split embroidery patterns created with PE-DESIGN Ver.7 or later can be embroidered. With split embroidery patterns, embroidery designs larger than the embroidery hoop are divided into multiple sections, which combine to create a single pattern after each section is embroidered. For details on creating split embroidery patterns and for more detailed embroidery instructions, refer to the Instruction manual included with PE-DESIGN Ver.7 or later. Insert the USB flash drive containing the created split a embroidery pattern, and then select the split embroidery pattern to be embroidered. • For details, refer to "Retrieving embroidery patterns" on page 80. Select section to be embroidered and touch . b • Select the sections in alphabetical order. Touch and touch . c Editing Patterns (Pattern Editing Screen) When a pattern is selected in the pattern selection screen and is touched, the pattern editing screen appears. After touching any of the keys to edit the pattern, touch to return to the previous screen. To finish all the editing, touch screen. to continue to the embroidery settings CAUTION • When you have revised the pattern, check the display of available embroidery frames and use an appropriate frame. If you use an embroidery frame not displayed as available for use, the presser foot may strike the frame, possibly causing injuries or damage. ■ Pattern editing screen 12 34 E 5 D 6 C 7 8 B A09 Memo • If a key display is light gray, you cannot use that function with the selected pattern. EMBROIDERY 4 Press the "Start/Stop" button to embroider the pattern d section. When embroidering is finished, the following screen e appears. Touch . Display No. Key Name Explanation 1 Shows the embroidery frames that can be used (page 67). In addition, after Embroidery frame touching the key for the embroidery frame to be used, [Embroidery Frame Identification View] can be set to [ON]. When setting [Embroidery Frame Identification View] to [OFF], touch . 2 Shows the size of the entire combined pattern. Pattern size A screen appears so that a section of the split embroidery pattern can be selected. Repeat steps b through e to embroider the f remaining sections of the pattern. 75
-
 1
1 -
2
-
3
-
4
-
5
-
6
-
7
-
8
-
9
-
10
-
11
-
12
-
13
-
14
-
15
-
16
-
17
-
18
-
19
-
20
-
21
-
22
-
23
-
24
-
25
-
26
-
27
-
28
-
29
-
30
-
31
-
32
-
33
-
34
-
35
-
36
-
37
-
38
-
39
-
40
-
41
-
42
-
43
-
44
-
45
-
46
-
47
-
48
-
49
-
50
-
51
-
52
-
53
-
54
-
55
-
56
-
57
-
58
-
59
-
60
-
61
-
62
-
63
-
64
-
65
-
66
-
67
-
68
-
69
-
70
-
71
-
 72
72 -
 73
73 -
 74
74 -
 75
75 -
 76
76 -
 77
77 -
 78
78 -
 79
79 -
 80
80 -
 81
81 -
 82
82 -
83
-
84
-
85
-
86
-
87
-
88
-
89
-
90
-
91
-
92
-
93
-
94
-
95
-
96
-
97
-
98
-
99
-
100
-
101
-
102
-
103
-
104
 |
 |
