Canon 1692B002 Service Manual - Page 108
Carriage unit
 |
View all Canon 1692B002 manuals
Add to My Manuals
Save this manual to your list of manuals |
Page 108 highlights
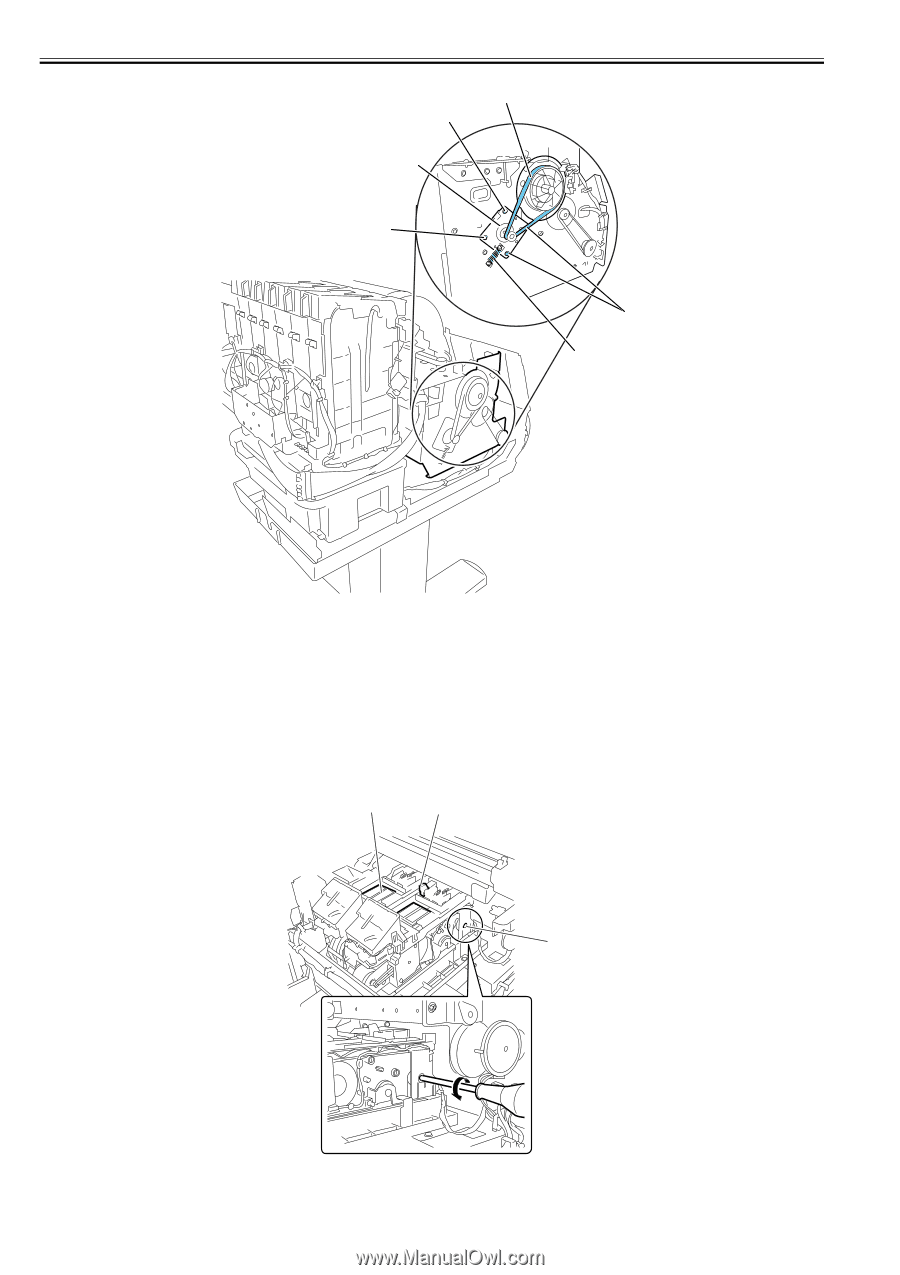
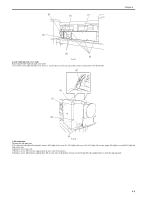
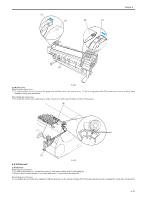
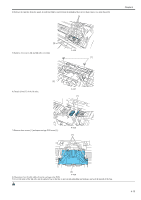
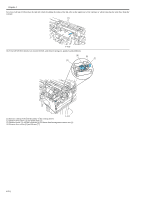
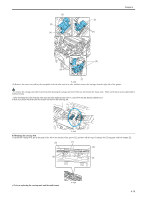
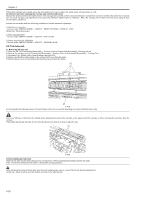
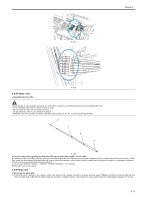
Chapter 4 [3] [2] [1] [2] [2] [4] F-4-24 b) Action to take after replacing the feed roller HP sensor, feed roller encoder and feed roller This printer as shipped has the feed roller eccentricity (that is, variations in the rate of paper feed from rotation to rotation) corrected for enhanced media feed accuracy. When the feed roller HP sensor or feed roller encoder and feed roller pertaining to the correction of eccentricity variations has been replaced, therefore, they should require adjustment. Execute service mode under the following conditions to launch automatic adjustment: Service mode: SERVICE MODE > ADJUST > PRINT PATTERN > LF TUNING Media type: Glossy photo paper 4.3.6 Carriage unit 0014-8964 a) Removing the carriage unit 1) Drain the ink. See Disassembly/Reassembly > Points to Note on Disassembly/Reassembly > Draining the ink. 2) Turn off the power and move the carriage to above the platen. If the carriage is locked at its home position, insert a Phillips screwdriver from the right side into hole [1] in the shaft of the lifting unit in the purge unit and turn it counterclockwise. This will lower cap [2] and lock pin [3], allowing the carriage to be moved. [2] [3] [1] 3) Remove the printheads. 4-12 F-4-25
-
 1
1 -
2
-
3
-
4
-
5
-
6
-
7
-
8
-
9
-
10
-
11
-
12
-
13
-
14
-
15
-
16
-
17
-
18
-
19
-
20
-
21
-
22
-
23
-
24
-
25
-
26
-
27
-
28
-
29
-
30
-
31
-
32
-
33
-
34
-
35
-
36
-
37
-
38
-
39
-
40
-
41
-
42
-
43
-
44
-
45
-
46
-
47
-
48
-
49
-
50
-
51
-
52
-
53
-
54
-
55
-
56
-
57
-
58
-
59
-
60
-
61
-
62
-
63
-
64
-
65
-
66
-
67
-
68
-
69
-
70
-
71
-
72
-
73
-
74
-
75
-
76
-
77
-
78
-
79
-
80
-
81
-
82
-
83
-
84
-
85
-
86
-
87
-
88
-
89
-
90
-
91
-
92
-
93
-
94
-
95
-
96
-
97
-
98
-
99
-
100
-
101
-
102
-
 103
103 -
 104
104 -
 105
105 -
 106
106 -
 107
107 -
 108
108 -
 109
109 -
 110
110 -
 111
111 -
 112
112 -
 113
113 -
114
-
115
-
116
-
117
-
118
-
119
-
120
-
121
-
122
-
123
-
124
-
125
-
126
-
127
-
128
-
129
-
130
-
131
-
132
-
133
-
134
-
135
-
136
-
137
-
138
-
139
-
140
-
141
-
142
-
143
-
144
-
145
-
146
-
147
-
148
-
149
-
150
-
151
-
152
-
153
-
154
-
155
-
156
-
157
-
158
-
159
-
160
-
161
-
162
-
163
-
164
-
165
-
166
-
167
-
168
-
169
-
170
-
171
-
172
-
173
-
174
-
175
-
176
-
177
-
178
-
179
-
180
-
181
-
182
-
183
-
184
-
185
-
186
-
187
-
188
-
189
-
190
-
191
-
192
-
193
-
194
-
195
-
196
-
197
-
198
-
199
-
200
 |
 |