Canon BJC 70 Product Setup, User Guides & Manuals - Page 27
Installation, Make sure the parallel interface cable and the AC adapter are, attached. - instructions
 |
UPC - 750845720846
View all Canon BJC 70 manuals
Add to My Manuals
Save this manual to your list of manuals |
Page 27 highlights
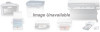
Installation To install the BJ cartridge, follow the steps below. The following instructions show the BC-10 Black BJ cartridge being installed in the printer. You install the BC-11 Color BJ cartridge using the same steps. 1. Make sure the parallel interface cable and the AC adapter are attached. 2. Open the paper support. t Lift the cover to the open position. Setting Up the Printer 3. Press the POWER button. t The current settings appear in the display. t When you turn on the printer for the first time, the BJ cartridge holder moves to the center of the printer so you can install the BJ cartridge. The ON LINE light blinks. Chapter 2 Setting Up the Printer 17
-
 1
1 -
2
-
3
-
4
-
5
-
6
-
7
-
8
-
9
-
10
-
11
-
12
-
13
-
14
-
15
-
16
-
17
-
18
-
19
-
20
-
21
-
 22
22 -
 23
23 -
 24
24 -
 25
25 -
 26
26 -
 27
27 -
 28
28 -
 29
29 -
 30
30 -
 31
31 -
 32
32 -
33
-
34
-
35
-
36
-
37
-
38
-
39
-
40
-
41
-
42
-
43
-
44
-
45
-
46
-
47
-
48
-
49
-
50
-
51
-
52
-
53
-
54
-
55
-
56
-
57
-
58
-
59
-
60
-
61
-
62
-
63
-
64
-
65
-
66
-
67
-
68
-
69
-
70
-
71
-
72
-
73
-
74
-
75
-
76
-
77
-
78
-
79
-
80
-
81
-
82
-
83
-
84
-
85
-
86
-
87
-
88
-
89
-
90
-
91
-
92
-
93
-
94
-
95
-
96
-
97
-
98
-
99
-
100
-
101
-
102
-
103
-
104
-
105
-
106
-
107
-
108
-
109
-
110
-
111
-
112
-
113
-
114
-
115
-
116
-
117
-
118
-
119
-
120
-
121
-
122
-
123
-
124
-
125
-
126
-
127
-
128
-
129
-
130
-
131
-
132
-
133
-
134
-
135
-
136
-
137
-
138
-
139
-
140
-
141
-
142
-
143
-
144
-
145
-
146
-
147
-
148
-
149
-
150
-
151
-
152
-
153
-
154
-
155
-
156
-
157
-
158
-
159
-
160
-
161
-
162
-
163
-
164
-
165
-
166
-
167
-
168
-
169
-
170
-
171
-
172
-
173
-
174
-
175
-
176
-
177
-
178
-
179
-
180
-
181
-
182
-
183
-
184
-
185
-
186
-
187
-
188
-
189
-
190
-
191
-
192
-
193
-
194
-
195
-
196
-
197
-
198
-
199
-
200
-
201
-
202
-
203
-
204
-
205
-
206
-
207
-
208
-
209
-
210
-
211
-
212
-
213
-
214
-
215
-
216
-
217
-
218
-
219
-
220
-
221
 |
 |

Chapter 2
Setting Up the Printer
17
Setting Up the
Printer
Installation
To install the BJ cartridge, follow the steps below. The following
instructions show the BC-10 Black BJ cartridge being installed in the
printer. You install the BC-11 Color BJ cartridge using the same steps.
1.
Make sure the parallel interface cable and the AC adapter are
attached.
2.
Open the paper support.
Lift the cover to the open position.
3.
Press the
POWER
button.
The current settings appear in the display.
When you turn on the printer for the first time, the BJ cartridge
holder moves to the center of the printer so you can install the
BJ cartridge. The
ON LINE
light blinks.