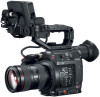
Canon EOS C200 EOS C200 EOS C200B Instruction Manual - Page 77
White Balance, Custom White Balance
 |
View all Canon EOS C200 manuals
Add to My Manuals
Save this manual to your list of manuals |
Page 77 highlights
White Balance White Balance The camera uses an electronic white balance process to calibrate the picture and produce accurate colors under different lighting conditions. There are 4 methods of setting the white balance. You can also perform this function remotely using Browser Remote on a connected network device (A 170). 77 Custom white balance: You can use a gray card or white object with no pattern to establish the white balance and set it to one of two custom white balance positions, ÅA or ÅB. When recording under fluorescent lights, we recommend setting the custom white balance. Preset white balance: Set the white balance to ¼ (daylight) or É (incandescent lamp). You can further adjust the color temperature (K) value and the color compensation (CC) value. Set color temperature: Allows you to set the color temperature between 2,000 K and 15,000 K, and further adjust the color compensation (CC) value, which adjusts the color along the green/magenta gradation. Auto white balance (AWB): The camera automatically adjusts the white balance to the optimal level. Operating modes: NOTES • The [White Balance] and [Color Matrix Tuning] settings in the custom picture file (A 136) take precedence over the white balance set with these procedures. • You can use the > [v # Camera Setup] > [Shockless WB] setting to make the transition look smoother when you change the white balance settings. • You can use the > [v # Camera Setup] > [C. Temp. Increment] setting to change the units for the color temperature increment to [Mired] (5-mired increments) or [Kelvin] (100-kelvin increments). Even when [Mired] is selected, the color temperature is converted to and displayed in kelvins. Changing this setting may change the white balance setting. • When an optional RC-V100 Remote Controller is connected to the camera, you can adjust the white balance with the remote controller's AWB button, A button, B button, PRESET button and Å button. • The color temperatures displayed on the screen are approximate. Use them only as a reference. Custom White Balance 1 Press the WB button. • The white balance mode icon will be highlighted in orange. • You can also use the FUNC button and joystick to enter the direct setting mode. 2 Push the joystick up/down to select the ÅA or ÅB icon and then press the joystick. • If a custom white balance has been stored previously, pressing the joystick will apply the stored custom white balance. You do not need to perform the rest of the procedure. 3 Point the camera at a gray card or white object so that it fills the whole screen. • Use the same lighting conditions you plan to use when recording.
-
 1
1 -
2
-
3
-
4
-
5
-
6
-
7
-
8
-
9
-
10
-
11
-
12
-
13
-
14
-
15
-
16
-
17
-
18
-
19
-
20
-
21
-
22
-
23
-
24
-
25
-
26
-
27
-
28
-
29
-
30
-
31
-
32
-
33
-
34
-
35
-
36
-
37
-
38
-
39
-
40
-
41
-
42
-
43
-
44
-
45
-
46
-
47
-
48
-
49
-
50
-
51
-
52
-
53
-
54
-
55
-
56
-
57
-
58
-
59
-
60
-
61
-
62
-
63
-
64
-
65
-
66
-
67
-
68
-
69
-
70
-
71
-
 72
72 -
 73
73 -
 74
74 -
 75
75 -
 76
76 -
 77
77 -
 78
78 -
 79
79 -
 80
80 -
 81
81 -
 82
82 -
83
-
84
-
85
-
86
-
87
-
88
-
89
-
90
-
91
-
92
-
93
-
94
-
95
-
96
-
97
-
98
-
99
-
100
-
101
-
102
-
103
-
104
-
105
-
106
-
107
-
108
-
109
-
110
-
111
-
112
-
113
-
114
-
115
-
116
-
117
-
118
-
119
-
120
-
121
-
122
-
123
-
124
-
125
-
126
-
127
-
128
-
129
-
130
-
131
-
132
-
133
-
134
-
135
-
136
-
137
-
138
-
139
-
140
-
141
-
142
-
143
-
144
-
145
-
146
-
147
-
148
-
149
-
150
-
151
-
152
-
153
-
154
-
155
-
156
-
157
-
158
-
159
-
160
-
161
-
162
-
163
-
164
-
165
-
166
-
167
-
168
-
169
-
170
-
171
-
172
-
173
-
174
-
175
-
176
-
177
-
178
-
179
-
180
-
181
-
182
-
183
-
184
-
185
-
186
-
187
-
188
-
189
-
190
-
191
-
192
-
193
-
194
-
195
-
196
-
197
-
198
-
199
-
200
-
201
-
202
-
203
-
204
-
205
-
206
-
207
-
208
-
209
-
210
-
211
-
212
-
213
-
214
-
215
-
216
-
217
-
218
-
219
-
220
-
221
-
222
-
223
-
224
-
225
-
226
-
227
-
228
-
229
-
230
-
231
-
232
-
233
-
234
-
235
-
236
-
237
 |
 |
