Canon PC740 Service Manual - Page 156
count/ratio
 |
View all Canon PC740 manuals
Add to My Manuals
Save this manual to your list of manuals |
Page 156 highlights
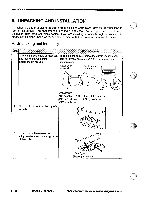
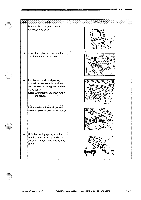
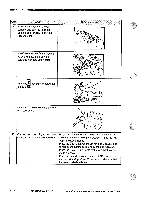
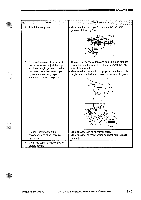
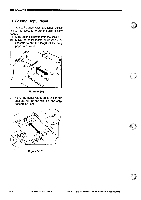
INSTALLATION Step Work 9 Place the cartridge on a level surface, and peel the tip of the opening seal, and pull it fully out (about 50 cm). 10 Hold the cartridge with the warning label facing up, and insert the cartridge with care until it stops. Checks/remarks 11 Push the icon on the copier's top f unit to close. 12 Connect the power cord to the power cord connector. --------1 ------„, 0 13 Connect the power plug to the power • Make sure that the AE and DIRECT indicators turn on, outlet, and turn on the power switch. the copy count/ratio indicator indicates 'P', and the Add Paper message flashes. • Press the Copy Count/Zoom Set key and Clear/Stop key to make sure that the correct copy count is indicated. • Press the Default Ratio key to make sure that the ratio mode changes. • Press the Zoom key to make sure that 'Yo' is indicated, and press the Copy Count/Zoom key to make sure that the correct ratio is indicated. 5 - 4 COPYRIGHT © 1994 CANONINC. CANON PC720/740501170 REV.0 AUG. 1994 PRINTED IN JAPAN (IMPRIME AU JAPON)
-
 1
1 -
2
-
3
-
4
-
5
-
6
-
7
-
8
-
9
-
10
-
11
-
12
-
13
-
14
-
15
-
16
-
17
-
18
-
19
-
20
-
21
-
22
-
23
-
24
-
25
-
26
-
27
-
28
-
29
-
30
-
31
-
32
-
33
-
34
-
35
-
36
-
37
-
38
-
39
-
40
-
41
-
42
-
43
-
44
-
45
-
46
-
47
-
48
-
49
-
50
-
51
-
52
-
53
-
54
-
55
-
56
-
57
-
58
-
59
-
60
-
61
-
62
-
63
-
64
-
65
-
66
-
67
-
68
-
69
-
70
-
71
-
72
-
73
-
74
-
75
-
76
-
77
-
78
-
79
-
80
-
81
-
82
-
83
-
84
-
85
-
86
-
87
-
88
-
89
-
90
-
91
-
92
-
93
-
94
-
95
-
96
-
97
-
98
-
99
-
100
-
101
-
102
-
103
-
104
-
105
-
106
-
107
-
108
-
109
-
110
-
111
-
112
-
113
-
114
-
115
-
116
-
117
-
118
-
119
-
120
-
121
-
122
-
123
-
124
-
125
-
126
-
127
-
128
-
129
-
130
-
131
-
132
-
133
-
134
-
135
-
136
-
137
-
138
-
139
-
140
-
141
-
142
-
143
-
144
-
145
-
146
-
147
-
148
-
149
-
150
-
 151
151 -
 152
152 -
 153
153 -
 154
154 -
 155
155 -
 156
156 -
 157
157 -
 158
158 -
 159
159 -
 160
160 -
 161
161 -
162
-
163
-
164
-
165
-
166
-
167
-
168
-
169
-
170
-
171
-
172
-
173
-
174
-
175
-
176
-
177
-
178
-
179
-
180
-
181
-
182
-
183
-
184
-
185
-
186
-
187
-
188
-
189
-
190
-
191
-
192
-
193
-
194
-
195
-
196
-
197
-
198
-
199
-
200
 |
 |
