Canon PIXMA SELPHY DS810 DS810 Photo Printing Guide - Page 27
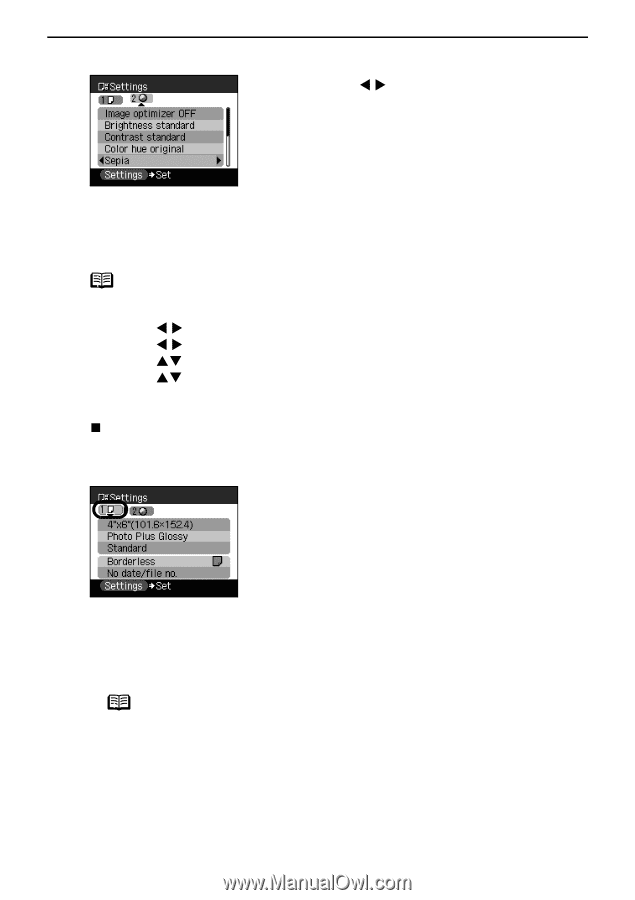
size, Media type, Print quality, Sepia
 |
View all Canon PIXMA SELPHY DS810 manuals
Add to My Manuals
Save this manual to your list of manuals |
Page 27 highlights
4 Display the selected item. Preparation When Using the Printer Press the W X buttons to display the selected item. Change to Sepia here. 5 Complete setting. Press the Settings button. Note You can save the print settings. 1 Press the Menu button on the operation panel. 2 Use the W X buttons to select Tool box and then press the OK button. 3 Use the W X buttons to select Device settings and then press the OK button. 4 Use the ST buttons to select Save settings and then press the OK button. 5 Use the ST buttons to select Yes and press the OK button. You can print photos applying the saved print settings when you select Load settings. „ Print Setting Items The Settings tab contains the following setting items. Tab1 • Page size Select the page size for the print job. • Media type Select the media type. Note For information on available media types and on setting Page size and Media type, refer to "Media Types for Card Direct Printing" on page 23. • Print quality Standard Gives priority to speed over quality when printing. High Gives priority to quality over speed when printing. 25
-
 1
1 -
2
-
3
-
4
-
5
-
6
-
7
-
8
-
9
-
10
-
11
-
12
-
13
-
14
-
15
-
16
-
17
-
18
-
19
-
20
-
21
-
 22
22 -
 23
23 -
 24
24 -
 25
25 -
 26
26 -
 27
27 -
 28
28 -
 29
29 -
 30
30 -
 31
31 -
 32
32 -
33
-
34
-
35
-
36
-
37
-
38
-
39
-
40
-
41
-
42
-
43
-
44
-
45
-
46
-
47
-
48
-
49
-
50
-
51
-
52
-
53
-
54
-
55
-
56
-
57
-
58
-
59
-
60
-
61
-
62
-
63
-
64
-
65
-
66
-
67
-
68
-
69
-
70
-
71
-
72
-
73
-
74
-
75
-
76
-
77
-
78
-
79
-
80
-
81
-
82
-
83
-
84
-
85
-
86
-
87
-
88
-
89
-
90
-
91
-
92
-
93
-
94
-
95
-
96
 |
 |