Canon PIXMA iP2600 Quick Start Guide - Page 26
Print Head Cleaning, Open the Paper Output Tray and extend the Output Tray Extension. - empty ink absorber
 |
View all Canon PIXMA iP2600 manuals
Add to My Manuals
Save this manual to your list of manuals |
Page 26 highlights
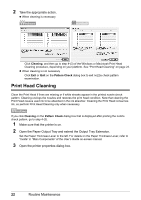
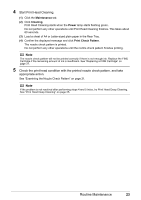
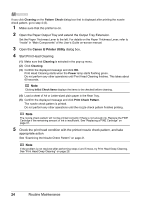
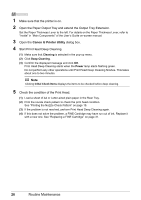
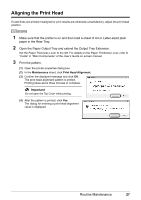
2 Take the appropriate action. z When cleaning is necessary Click Cleaning, and then go to step 4-(3) of the Windows or Macintosh Print Head Cleaning procedure, depending on your platform. See "Print Head Cleaning" on page 22. z When cleaning is not necessary Click Exit or Quit on the Pattern Check dialog box to exit nozzle check pattern examination. Print Head Cleaning Clean the Print Head if lines are missing or if white streaks appear in the printed nozzle check pattern. Cleaning unclogs the nozzles and restores the print head condition. Note that cleaning the Print Head causes used ink to be absorbed in the ink absorber. Cleaning the Print Head consumes ink, so perform Print Head Cleaning only when necessary. If you click Cleaning on the Pattern Check dialog box that is displayed after printing the nozzle check pattern, go to step 4-(3). 1 Make sure that the printer is on. 2 Open the Paper Output Tray and extend the Output Tray Extension. Set the Paper Thickness Lever to the left. For details on the Paper Thickness Lever, refer to "Inside" in "Main Components" of the User's Guide on-screen manual. 3 Open the printer properties dialog box. 22 Routine Maintenance
-
 1
1 -
2
-
3
-
4
-
5
-
6
-
7
-
8
-
9
-
10
-
11
-
12
-
13
-
14
-
15
-
16
-
17
-
18
-
19
-
20
-
 21
21 -
 22
22 -
 23
23 -
 24
24 -
 25
25 -
 26
26 -
 27
27 -
 28
28 -
 29
29 -
 30
30 -
 31
31 -
32
-
33
-
34
-
35
-
36
-
37
-
38
-
39
-
40
-
41
-
42
-
43
-
44
-
45
-
46
-
47
-
48
-
49
-
50
-
51
-
52
-
53
-
54
-
55
-
56
-
57
-
58
-
59
-
60
-
61
-
62
-
63
-
64
-
65
-
66
-
67
-
68
-
69
-
70
-
71
-
72
 |
 |
