Canon PIXMA iP6000D iP6000D Quick Start Guide - Page 26
Click Print or OK. - program
 |
View all Canon PIXMA iP6000D manuals
Add to My Manuals
Save this manual to your list of manuals |
Page 26 highlights
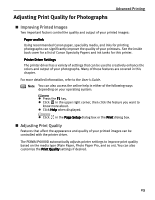
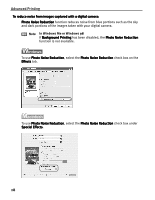
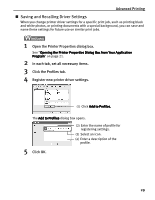
Advanced Printing To manually adjust Print Quality settings: 1 Open the Printer Properties dialog box. See "Opening the Printer Properties Dialog Box from Your Application Program" on page 21. 2 On the Main tab, select Custom from Print Quality, then click Set to open the Set Print Quality dialog box. 3 Move the slide bar to adjust the print quality. 4 When the process is complete, click OK. 5 Click Print or OK. 24
-
 1
1 -
2
-
3
-
4
-
5
-
6
-
7
-
8
-
9
-
10
-
11
-
12
-
13
-
14
-
15
-
16
-
17
-
18
-
19
-
20
-
 21
21 -
 22
22 -
 23
23 -
 24
24 -
 25
25 -
 26
26 -
 27
27 -
 28
28 -
 29
29 -
 30
30 -
 31
31 -
32
-
33
-
34
-
35
-
36
-
37
-
38
-
39
-
40
-
41
-
42
-
43
-
44
-
45
-
46
-
47
-
48
-
49
-
50
-
51
-
52
-
53
-
54
-
55
-
56
-
57
-
58
-
59
-
60
-
61
-
62
-
63
-
64
-
65
-
66
-
67
-
68
-
69
-
70
-
71
-
72
-
73
-
74
-
75
-
76
-
77
-
78
-
79
-
80
-
81
-
82
-
83
-
84
-
85
-
86
-
87
-
88
-
89
-
90
-
91
-
92
 |
 |

Advanced Printing
24
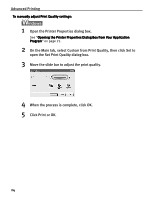
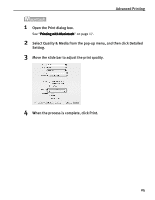
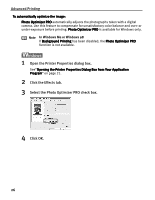
To manually adjust Print Quality settings:
To manually adjust Print Quality settings:
To manually adjust Print Quality settings:
To manually adjust Print Quality settings:
1
Open the Printer Properties dialog box.
See “Opening the Printer Properties Dialog Box from Your Application
Opening the Printer Properties Dialog Box from Your Application
Opening the Printer Properties Dialog Box from Your Application
Opening the Printer Properties Dialog Box from Your Application
Program
Program
Program
Program” on page 21.
2
On the Main tab, select Custom from Print Quality, then click Set to
open the Set Print Quality dialog box.
3
Move the slide bar to adjust the print quality.
4
When the process is complete, click OK.
5
Click Print or OK.