Cisco SPA1001 Administration Guide - Page 53
Configuring Linksys ATAs - linksys setup
 |
View all Cisco SPA1001 manuals
Add to My Manuals
Save this manual to your list of manuals |
Page 53 highlights
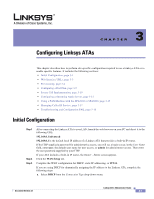
CH A P T E R 3 Configuring Linksys ATAs This chapter describes how to perform site-specific configuration required to use a Linksys ATA or to enable specific features. It includes the following sections: • Initial Configuration, page 3-1 • Web Interface URLs, page 3-3 • Provisioning, page 3-4 • Configuring a Dial Plan, page 3-5 • Secure Call Implementation, page 3-10 • Configuring a Streaming Audio Server, page 3-12 • Using a FAX Machine with the SPA2102 or SPA8000, page 3-15 • Managing Caller ID Service, page 3-17 • Troubleshooting and Configuration FAQ, page 3-18 Initial Configuration Step 1 Step 2 Step 3 After connecting the Linksys ATA to your LAN, launch the web browser on your PC and direct it to the following URL: 192.168.0.1/advanced 192.168.0.1 is the default local IP address of a Linksys ATA that provides a built-in IP router. If the ITSP supplied a password for administrative access, you will see a login screen. In the User Name field, enter user, the default user name for user access, or admin for administrator access. Then enter the user password supplied by your ITSP. If your ATA includes a built-in IP router, the Router - Status screen appears. Click the WAN Setup tab. Complete the WAN configuration for DHCP, static IP addressing, or PPPoE. If you are using DHCP for dynamically assigning the IP address to the Linksys ATA, complete the following steps: a. Select DHCP from the Connection Type drop-down menu. Document Version 3.1 Linksys ATA Administrator Guide 3-1
-
 1
1 -
2
-
3
-
4
-
5
-
6
-
7
-
8
-
9
-
10
-
11
-
12
-
13
-
14
-
15
-
16
-
17
-
18
-
19
-
20
-
21
-
22
-
23
-
24
-
25
-
26
-
27
-
28
-
29
-
30
-
31
-
32
-
33
-
34
-
35
-
36
-
37
-
38
-
39
-
40
-
41
-
42
-
43
-
44
-
45
-
46
-
47
-
 48
48 -
 49
49 -
 50
50 -
 51
51 -
 52
52 -
 53
53 -
 54
54 -
 55
55 -
 56
56 -
 57
57 -
 58
58 -
59
-
60
-
61
-
62
-
63
-
64
-
65
-
66
-
67
-
68
-
69
-
70
-
71
-
72
-
73
-
74
-
75
-
76
-
77
-
78
-
79
-
80
-
81
-
82
-
83
-
84
-
85
-
86
-
87
-
88
-
89
-
90
-
91
-
92
-
93
-
94
-
95
-
96
-
97
-
98
-
99
-
100
-
101
-
102
-
103
-
104
-
105
-
106
-
107
-
108
-
109
-
110
-
111
-
112
-
113
-
114
-
115
-
116
-
117
-
118
-
119
-
120
-
121
-
122
-
123
-
124
-
125
-
126
-
127
-
128
-
129
-
130
-
131
-
132
-
133
-
134
-
135
-
136
-
137
-
138
-
139
-
140
-
141
-
142
-
143
-
144
-
145
-
146
-
147
-
148
-
149
-
150
-
151
-
152
-
153
-
154
-
155
-
156
-
157
-
158
-
159
-
160
-
161
-
162
-
163
-
164
-
165
-
166
-
167
-
168
-
169
-
170
-
171
-
172
-
173
-
174
-
175
-
176
-
177
-
178
-
179
-
180
-
181
-
182
-
183
-
184
-
185
-
186
 |
 |