Cisco WAP4410N Administration Guide - Page 29
Configuring Device Setup Settings, Setup > Basic Setup, Host Name, Cisco, Device Name, WAP4410N - default ip address
 |
UPC - 745883583362
View all Cisco WAP4410N manuals
Add to My Manuals
Save this manual to your list of manuals |
Page 29 highlights
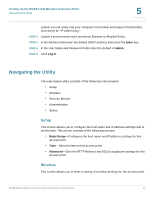
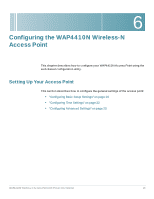
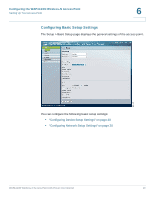
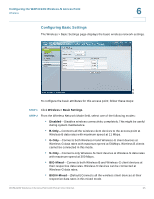
Configuring the WAP4410N Wireless-N Access Point Setting Up Your Access Point 6 Configuring Device Setup Settings To configure the device setup settings of the access point, follow these steps: STEP 1 Click Setup > Basic Setup. STEP 2 In the Device Setup section, enter the following information: • Host Name-Enter the host name of the access point. You can use the host name to access the web-based configuration utility through the network if a record of the host name exists in your DNS server. The access point publishes the host name to your DNS server if you configured the access point to acquire its IP address from a DHCP server. Follow your organization's policy when assigning this name. The default name is Cisco. • Device Name-Enter the device name for the access point. This name is identification purposes only. Unique, memorable names are helpful, especially if you are deploying multiple access points on the same network. This name helps you identify the access point after you log in. The default name is WAP4410N. STEP 3 Click Save. Configuring Network Setup Settings To configure the network setup settings of the access point, follow these steps: STEP 1 Click Setup > Basic Setup. STEP 2 From the IP Settings drop-down menu, select one of the following options: • Static IP Address-Select this option to assign a static or fixed IP address to the access point. • Automatic Configuration-Select this option to automatically configure the IPv4 network settings of the access point using a DHCP server on your network. Also select this option to automatically configure the IPv6 network settings of the access point using an IPv6 RADVD device enabled on your network. WAP4410N Wireless-N Access Point with Power Over Internet 20
-
 1
1 -
2
-
3
-
4
-
5
-
6
-
7
-
8
-
9
-
10
-
11
-
12
-
13
-
14
-
15
-
16
-
17
-
18
-
19
-
20
-
21
-
22
-
23
-
 24
24 -
 25
25 -
 26
26 -
 27
27 -
 28
28 -
 29
29 -
 30
30 -
 31
31 -
 32
32 -
 33
33 -
 34
34 -
35
-
36
-
37
-
38
-
39
-
40
-
41
-
42
-
43
-
44
-
45
-
46
-
47
-
48
-
49
-
50
-
51
-
52
-
53
-
54
-
55
-
56
-
57
-
58
-
59
-
60
-
61
-
62
-
63
-
64
-
65
-
66
-
67
-
68
-
69
-
70
-
71
-
72
-
73
-
74
-
75
-
76
-
77
-
78
-
79
-
80
-
81
-
82
-
83
-
84
-
85
-
86
-
87
-
88
-
89
-
90
-
91
-
92
 |
 |
