Cub Cadet XT2 SLX54 Operation Manual - Page 16
Engaging the PTO Blade EngageManual PTO tractors, Mowing, Using the Differential Lock If equipped
 |
View all Cub Cadet XT2 SLX54 manuals
Add to My Manuals
Save this manual to your list of manuals |
Page 16 highlights
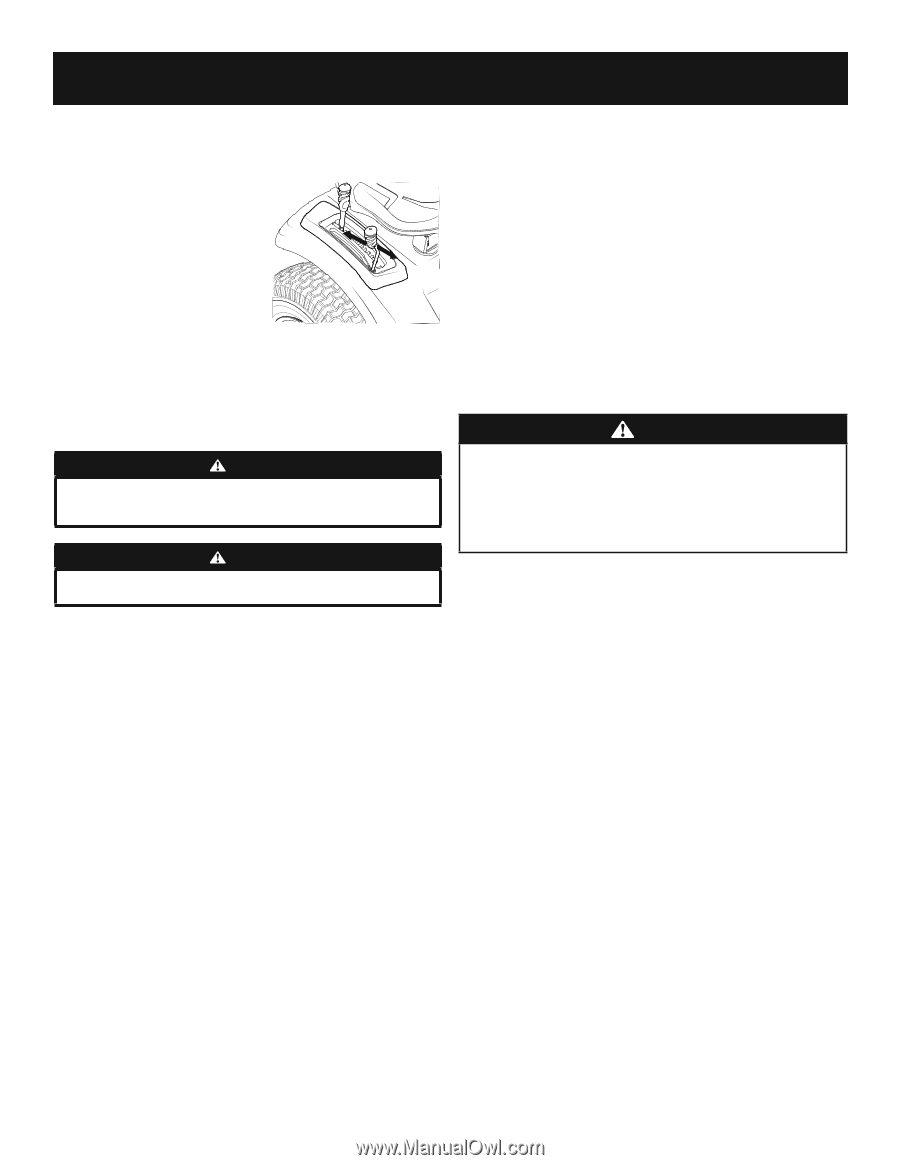
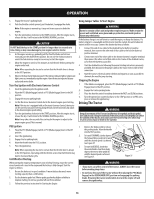
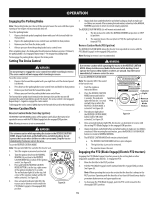
OPERATION Engaging the PTO (Blade Engage)(Manual PTO tractors) Engaging the PTO (Blade Engage) transfers power to the cutting deck. To engage the PTO: 1. Move the throttle to the FAST position. 2. Push the PTO (Blade Engage) lever forward into the engaged (ON) position. See Figure 30. Note: When operating the tractor be certain that the throttle is always in the FAST position. Operating with the throttle at less than full throttle may lead to premature battery wear and a poor quality cut. Figure 30 3. To disengage the PTO (Blade Engage), push the lever forward and to the right, out of the locked position, then release the lever into the disengaged (OFF) position. Mowing WARNING To help avoid blade contact or a thrown object injury, keep bystanders, helpers, children and pets at least 75 feet from the machine while it is in operation. Stop machine if anyone enters the area. WARNING Make certain the area to be mowed is free of debris, sticks, stones, wire or other objects that can be thrown by the rotating blades. Note: Do not engage the mower deck when lowered in grass. Premature wear and possible failure of the "V" belt and PTO clutch will result. Fully raise the deck or move to a non grassy area before engaging the mower deck. • Mow up and down slopes, not across. If mowing a slope, start at bottom and work upward to ensure turns are made uphill. • Do not mow at high ground speed, especially if a mulch kit or grass collector is installed. • Do not cut the grass too short. Short grass is prone to weed growth and yellows quickly in dry weather. • Always operate the tractor with the throttle in the FAST position while mowing. • On the first pass, pick a point on the opposite side of the area to be mowed. Follow the point to maintain a straight line. • Engage the PTO and move the throttle control or throttle/choke control to the FAST position. • Lower the mower deck to the desired height setting. • For best results it is recommended that the first two laps be cut with the discharge thrown towards the center. After the first two laps, reverse the direction to throw the discharge to the outside for the balance of cutting. This will give a better appearance to the lawn. Note: The speed of the tractor will affect the quality of the mower cut. Mowing at full speed will adversely affect the cut quality. • Your tractor is designed to cut normal residential grass of a height no more than 10" (25cm). Do not attempt to mow through unusually tall, dry grass (e.g., pasture) or piles of dry leaves. Dry grass or leaves may contact the engine exhaust and/or build up on the tractor. • Do NOT attempt to mow heavy brush and weeds or extremely tall grass. Your tractor is designed to mow lawns, NOT clear brush. • Keep the blades sharp and replace the blades when worn. • When approaching the other end of the strip, slow down or stop before turning. A three point turn is recommended. • Align the mower with an edge of the mowed strip and overlap approximately 3" (7.6 cm). • Direct the tractor on each subsequent strip to align with a previously cut strip. • To prevent rutting or grooving of the turf, if possible, change the direction that the strips are mowed by approximately 45° for the next and each subsequent mowing. When stopping the tractor for any reason while on a grass surface, always: • Engage the parking brake • Shut engine off and remove the ignition key. • Doing so will minimize the possibility of having your lawn ''browned'' by hot exhaust from your tractor's running engine. Using the Differential Lock (If equipped) WARNING • When the differential lock is on, be sure to allow for a larger turning radius and greater steering effort. • Engage the differential lock only when the vehicle is stationary. Do not use the differential lock when traveling downhill. • With or without the differential lock engaged, all Safe Operations Practices described in this manual must be followed. Note: The system should only be used when poor traction is encountered. It should be disengaged when traveling on solid surfaces. In some instances, the tractor may be driven in slippery or low-traction situations and it may be necessary to activate the differential lock. To use the differential lock proceed as follows. 1. Stop the motion of the tractor. 2. Depress the differential lock pedal to engage the differential lock. Note: The differential lock only works while the pedal is depressed. Note: Engagement may be delayed. The differential lock will engage when different wheel speeds are detected. Note: Disengagement may be delayed. The differential lock will disengage when the rear wheel speeds allow it to release. 3. To disengage the differential lock, release the pedal. 16
-
 1
1 -
2
-
3
-
4
-
5
-
6
-
7
-
8
-
9
-
10
-
 11
11 -
 12
12 -
 13
13 -
 14
14 -
 15
15 -
 16
16 -
 17
17 -
 18
18 -
 19
19 -
 20
20 -
 21
21 -
22
-
23
-
24
-
25
-
26
-
27
-
28
-
29
-
30
-
31
-
32
-
33
-
34
-
35
-
36
-
37
-
38
-
39
-
40
-
41
-
42
-
43
-
44
-
45
-
46
-
47
-
48
-
49
-
50
-
51
-
52
-
53
-
54
-
55
-
56
-
57
-
58
-
59
-
60
-
61
-
62
-
63
-
64
-
65
-
66
-
67
-
68
-
69
-
70
-
71
-
72
 |
 |