D-Link DHP-W307AV User Manual - Page 12
SET-UP DHP-W306AV - installation
 |
View all D-Link DHP-W307AV manuals
Add to My Manuals
Save this manual to your list of manuals |
Page 12 highlights
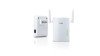
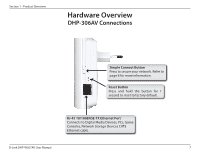
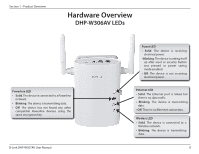
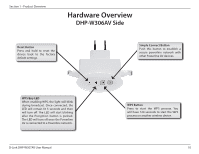
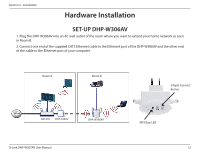
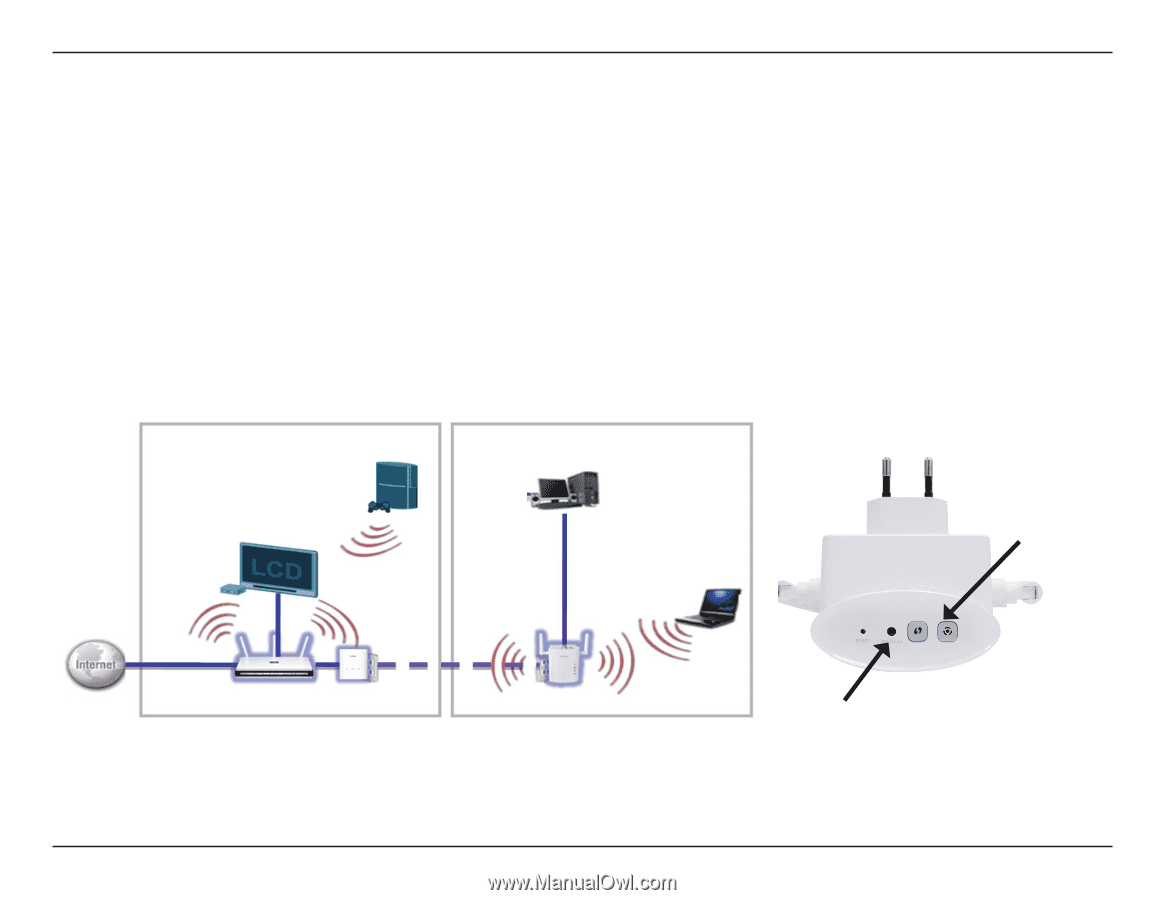
Section 2 - Installation Hardware Installation SET-UP DHP-W306AV 1. Plug the DHP-W306AV into an AC wall outlet of the room where you want to extend your home network as seen in Room B. 2. Connect one end of the supplied CAT5 Ethernet cable to the Ethernet port of the DHP-W306AV and the other end of the cable to the Ethernet port of your computer. Room A Room B Simple Connect Button DIR-655 DHP-306AV DHP-W306AV D-Link DHP-W307AV User Manual WPS/Eny LED 12
-
 1
1 -
2
-
3
-
4
-
5
-
6
-
 7
7 -
 8
8 -
 9
9 -
 10
10 -
 11
11 -
 12
12 -
 13
13 -
 14
14 -
 15
15 -
 16
16 -
 17
17 -
18
-
19
-
20
-
21
-
22
-
23
-
24
-
25
-
26
-
27
-
28
-
29
-
30
-
31
-
32
-
33
-
34
-
35
-
36
-
37
-
38
-
39
-
40
-
41
-
42
-
43
-
44
-
45
-
46
-
47
-
48
-
49
-
50
-
51
-
52
-
53
-
54
-
55
-
56
-
57
-
58
-
59
-
60
-
61
-
62
-
63
-
64
-
65
-
66
-
67
-
68
-
69
-
70
-
71
-
72
-
73
-
74
-
75
-
76
-
77
-
78
-
79
-
80
-
81
-
82
 |
 |
12
D-Link DHP-W307AV User Manual
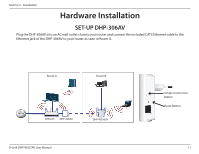
Section 2 - Installation
Hardware Installation
SET-UP DHP-W306AV
1. Plug the DHP-W306AV into an AC wall outlet of the room where you want to extend your home network as seen
in Room B.
2. Connect one end of the supplied CAT5 Ethernet cable to the Ethernet port of the DHP-W306AV and the other end
of the cable to the Ethernet port of your computer.
Simple Connect
Button
WPS/Eny LED
Room A
DIR-655
DHP-306AV
DHP-W306AV
Room B