Dell 2145cn User Guide - Page 30
Setting the paper size and type, System Setup, Paper Setup, Paper Size, Stop/Clear, Custom, Paper - paper tray
 |
View all Dell 2145cn manuals
Add to My Manuals
Save this manual to your list of manuals |
Page 30 highlights
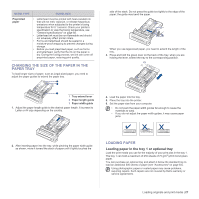
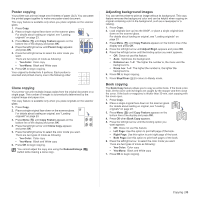
SETTING THE PAPER SIZE AND TYPE After loading paper in the paper tray, you need to set the paper size and type using the control panel buttons. These settings will apply to Copy and Fax modes. For printing from your computer, you need to select the paper size and type in the application program you use on your PC. 1. Press Menu ( ) until System Setup appears on the bottom line of the display and press OK. 2. Press the left/right arrow until Paper Setup appears and press OK. 3. Press OK when Paper Size appears. 4. Press the left/right arrow until the paper tray you want appears and press OK. 5. Press the left/right arrow until the paper size you are using appears and press OK. 6. Press Back ( ) to return to the upper level. 7. Press the left/right arrow until Paper Type appears and press OK. 8. Press the left/right arrow until the paper type you are using appears and press OK. 9. Press Stop/Clear ( ) to return to Ready mode. If you want to use special sized paper such as a billing paper, select Custom in the Paper tab in the printer propeties. See Software section. 30 | Loading originals and print media
-
 1
1 -
2
-
3
-
4
-
5
-
6
-
7
-
8
-
9
-
10
-
11
-
12
-
13
-
14
-
15
-
16
-
17
-
18
-
19
-
20
-
21
-
22
-
23
-
24
-
 25
25 -
 26
26 -
 27
27 -
 28
28 -
 29
29 -
 30
30 -
 31
31 -
 32
32 -
 33
33 -
 34
34 -
 35
35 -
36
-
37
-
38
-
39
-
40
-
41
-
42
-
43
-
44
-
45
-
46
-
47
-
48
-
49
-
50
-
51
-
52
-
53
-
54
-
55
-
56
-
57
-
58
-
59
-
60
-
61
-
62
-
63
-
64
-
65
-
66
-
67
-
68
-
69
-
70
-
71
-
72
-
73
-
74
-
75
-
76
-
77
-
78
-
79
-
80
-
81
-
82
-
83
-
84
-
85
-
86
-
87
-
88
-
89
-
90
-
91
-
92
-
93
-
94
-
95
-
96
-
97
-
98
-
99
-
100
-
101
-
102
-
103
-
104
-
105
-
106
-
107
-
108
-
109
-
110
-
111
-
112
-
113
-
114
-
115
-
116
-
117
-
118
-
119
-
120
-
121
-
122
-
123
-
124
-
125
-
126
-
127
-
128
-
129
-
130
-
131
-
132
-
133
-
134
-
135
-
136
-
137
-
138
-
139
-
140
-
141
 |
 |
