Dell 2145cn User Guide - Page 60
Clearing the Toner Empty message, Toner Empty, System Setup, Maintenance, CLR Empty Msg., Replace - parts for transfer belt
 |
View all Dell 2145cn manuals
Add to My Manuals
Save this manual to your list of manuals |
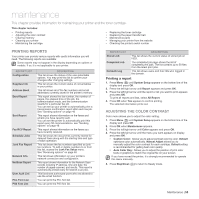
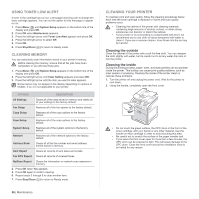
Page 60 highlights
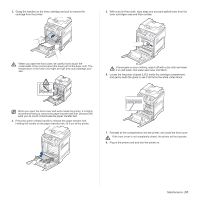
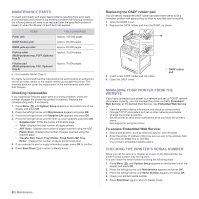
3. Grasp the handles on the toner cartridge and pull to remove the cartridge from the printer. 6. Place the toner cartridge on a flat surface, as shown, and remove the paper covering the toner cartridge by removing the tape. If toner gets on your clothing, wipe it off with a dry cloth and wash it in cold water. Hot water sets toner into fabric. 7. Ensure that the color of the toner cartridge matches the color slot and then grasp the handles on the toner cartridge. Insert the cartridge until it clicks into place. When you open the front cover, be careful not to touch the underneath of the control panel (the lower part of the fuser unit). The temperature of the fuser unit might be high and could damage your skin. When you open the front cover and work inside the printer, it is highly recommend that you remove the paper transfer belt first. Because the work you do could contaminate the paper transfer belt. 4. Take a new toner cartridge out of its package. • Do not use sharp objects, such as a knife or scissors, to open the toner cartridge package. You could damage the surface of the toner cartridge. • To prevent damage, do not expose the toner cartridge to light for more than a few minutes. Cover it with a piece of paper to protect it if necessary. 5. Holding both handles on the toner cartridge, thoroughly rock it from side to side to evenly distribute the toner. 8. Close the front cover. Ensure the cover is securely latched, and then turn the printer on. If the front cover is not completely closed, the printer will not operate. Clearing the Toner Empty message When the Toner Empty message appears you can configure not to see this message again not to disturb you. 1. Press Menu ( ) until System Setup appears on the bottom line of the display and press OK. 2. Press the Scroll buttons until Maintenance appears and press OK. 3. Press the Scroll buttons until CLR Empty Msg. appears and press OK. 4. Press the left/right arrow until the color menu you want appears on display and press OK. 5. Select On and press OK. 6. Now the Toner Empty message does not appear but the Replace Toner message will remain for reminding you that the new cartridge needs to be installed for quality. • Once you have selected On, this setting will be permanently written to the memory of the toner cartridge, and this menu will be disappeared from the Maintenance menu. • You can keep printing but the quality cannot be guaranteed, and the product support is no longer provided. 60 | Maintenance
-
 1
1 -
2
-
3
-
4
-
5
-
6
-
7
-
8
-
9
-
10
-
11
-
12
-
13
-
14
-
15
-
16
-
17
-
18
-
19
-
20
-
21
-
22
-
23
-
24
-
25
-
26
-
27
-
28
-
29
-
30
-
31
-
32
-
33
-
34
-
35
-
36
-
37
-
38
-
39
-
40
-
41
-
42
-
43
-
44
-
45
-
46
-
47
-
48
-
49
-
50
-
51
-
52
-
53
-
54
-
 55
55 -
 56
56 -
 57
57 -
 58
58 -
 59
59 -
 60
60 -
 61
61 -
 62
62 -
 63
63 -
 64
64 -
 65
65 -
66
-
67
-
68
-
69
-
70
-
71
-
72
-
73
-
74
-
75
-
76
-
77
-
78
-
79
-
80
-
81
-
82
-
83
-
84
-
85
-
86
-
87
-
88
-
89
-
90
-
91
-
92
-
93
-
94
-
95
-
96
-
97
-
98
-
99
-
100
-
101
-
102
-
103
-
104
-
105
-
106
-
107
-
108
-
109
-
110
-
111
-
112
-
113
-
114
-
115
-
116
-
117
-
118
-
119
-
120
-
121
-
122
-
123
-
124
-
125
-
126
-
127
-
128
-
129
-
130
-
131
-
132
-
133
-
134
-
135
-
136
-
137
-
138
-
139
-
140
-
141
 |
 |
