Dell 2145cn User Guide - Page 34
Margin shift, Edge erase, Gray enhance copying, Printing on both sides of paper - parts
 |
View all Dell 2145cn manuals
Add to My Manuals
Save this manual to your list of manuals |
Page 34 highlights
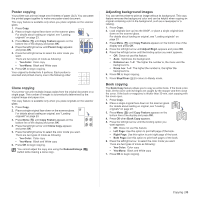
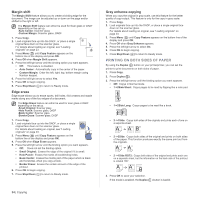
Margin shift The Margin Shift feature allows you to create a binding edge for the document. The image can be adjusted up or down on the page and/or shifted to the right or left. The Margin Shift feature can either be used for Scan glass or DADF depending on the set up. -Auto Center: Scanner glass -Custom Margin: Scanner glass, DADF 1. Press Copy. 2. Load originals face up into the DADF, or place a single original face down on the scanner glass. For details about loading an original, see "Loading originals" on page 23. 3. Press Menu ( ) until Copy Feature appears on the bottom line of the display and press OK. 4. Press OK when Margin Shift appears. 5. Press the left/right arrow until the binding option you want appears. • Off: This feature is disabled. • Auto Center: Automatically copy in the center of the paper. • Custom Margin: Enter the left, right, top, bottom margin using Number keypad. 6. Press the left/right arrow to select Yes. 7. Press OK to begin copying. 8. Press Stop/Clear ( ) to return to Ready mode. Edge erase Edge erase allows you to erase sports, drill holes, fold creases and staple marks along any of the four edges of a document. The Edge Erase feature can either be used for scan glass or DADF depending on the set up. -Small Original: Scanner glass -Hole Punch: Scanner glass, DADF -Book Center: Scanner glass -Border Erase: Scanner glass, DADF 1. Press Copy. 2. Load originals face up into the DADF, or place a single original face down on the scanner glass. For details about loading an original, see "Loading originals" on page 23. 3. Press Menu ( ) until Copy Feature appears on the bottom line of the display and press OK. 4. Press OK when Edge Erase appears. 5. Press the left/right arrow until the binding option you want appears. • Off: Does not set the binding option. • Small Original: Erases the edge of the original if it is small. • Hole Punch: Erases the marks of bookbinding holes. • Book Center: Erases the middle part of the paper which is black and horizontal, when you copy a book. • Border Erase: Erases the certain amount of the edge of the printout. 6. Press OK to begin copying. 7. Press Stop/Clear ( ) to return to Ready mode. 34 | Copying Gray enhance copying When you copy the original in gray scale, use this feature for the better quality of copy-output. This feature is only for the copy in gray scale. 1. Press Copy. 2. Load originals face up into the DADF, or place a single original face down on the scanner glass. For details about loading an original, see "Loading originals" on page 23. 3. Press Menu ( ) until Copy Feature appears on the bottom line of the display and press OK. 4. Press OK when Gray Enhance appears. 5. Press the left/right arrow to select On. 6. Press OK to begin copying. 7. Press Stop/Clear ( ) to return to Ready mode. PRINTING ON BOTH SIDES OF PAPER By using the Duplex ( ) button on your printerprinter, you can set the XY printer to print documents on both sides of paper. 1. Press Copy. 2. Press Duplex ( X Y ). 3. Press the left/right arrow until the binding option you want appears. • Off: Copys in Normal mode. • 1->2Side Short: Copys pages to be read by flipping like a note pad. • 1->2Side Long: Copys pages to be read like a book. • 2 ->1Side: Copys both sides of the originals and prints each of one on a separate sheet. • 2 ->2Side: Copys both sides of the original and prints on both sides of the paper. This function produces exactly the same print out from the originals. • 2 ->1Side ROT2: Copys both sides of the original and prints each one on a separate sheet, but the information on the back side of the printout is rotated 180°. 4. Press OK to save your selection. If the mode is enabled, the Duplex ( X Y ) button is backlit.
-
 1
1 -
2
-
3
-
4
-
5
-
6
-
7
-
8
-
9
-
10
-
11
-
12
-
13
-
14
-
15
-
16
-
17
-
18
-
19
-
20
-
21
-
22
-
23
-
24
-
25
-
26
-
27
-
28
-
 29
29 -
 30
30 -
 31
31 -
 32
32 -
 33
33 -
 34
34 -
 35
35 -
 36
36 -
 37
37 -
 38
38 -
 39
39 -
40
-
41
-
42
-
43
-
44
-
45
-
46
-
47
-
48
-
49
-
50
-
51
-
52
-
53
-
54
-
55
-
56
-
57
-
58
-
59
-
60
-
61
-
62
-
63
-
64
-
65
-
66
-
67
-
68
-
69
-
70
-
71
-
72
-
73
-
74
-
75
-
76
-
77
-
78
-
79
-
80
-
81
-
82
-
83
-
84
-
85
-
86
-
87
-
88
-
89
-
90
-
91
-
92
-
93
-
94
-
95
-
96
-
97
-
98
-
99
-
100
-
101
-
102
-
103
-
104
-
105
-
106
-
107
-
108
-
109
-
110
-
111
-
112
-
113
-
114
-
115
-
116
-
117
-
118
-
119
-
120
-
121
-
122
-
123
-
124
-
125
-
126
-
127
-
128
-
129
-
130
-
131
-
132
-
133
-
134
-
135
-
136
-
137
-
138
-
139
-
140
-
141
 |
 |
