Dell 2145cn User Guide - Page 31
Copying, Selecting the paper tray, Changing the settings for each copy, Darkness, Original type, - color all in one printer
 |
View all Dell 2145cn manuals
Add to My Manuals
Save this manual to your list of manuals |
Page 31 highlights
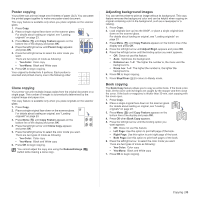
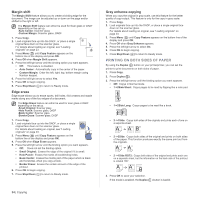
copying This chapter gives you step-by-step instructions for copying documents. This chapter includes: • Selecting the paper tray • Copying • Changing the settings for each copy • Changing the scan size settings • Changing the default copy settings • ID card copying • Using special copy features • Printing on both sides of paper • Setting copy timeout SELECTING THE PAPER TRAY After loading the print media for copy output, you must select the paper tray you will use for copy jobs. 1. Press Menu ( ) until System Setup appears on the bottom line of the display and press OK. 2. Press the left/right arrow until Paper Setup appears and press OK. 3. Press the left/right arrow until Paper Source appears and press OK. 4. Press OK when Copy Tray appears. 5. Press the left/right arrow until the paper tray you want appears and press OK. 6. Press Stop/Clear ( ) to return to Ready mode. COPYING 1. Press Copy. Ready to Copy appears on the top line of the display. 2. Load originals face up into the DADF, or place a single original face down on the scanner glass. For details about loading an original, see "Loading originals" on page 23. 3. Enter the number of copies using the number keypad, if necessary. 4. If you want to customize the copy settings including copy size, darkness, and original type, by using the control panel buttons. See the next section. If necessary, you can use special copy features, such as poster copying, 2- or 4-up copying. See "ID card copying" on page 32. 5. Press Color Start ( ) to begin color copying. Or, press Black Start ( ) to begin black and white copying. You can cancel the copy job during an operation. Press Stop/Clear ( ), and the copying will stop. CHANGING THE SETTINGS FOR EACH COPY Your printer provides default settings for copying so that you can quickly and easily make a copy. However, if you want to change the options for each copy, use the copy function buttons on the control panel. If you press Stop/Clear ( ) while setting the copy options, all of the options you have set for the current copy job will be canceled and returned to their default status. Or, they will automatically return to their default status after the printer completes the copy in progress. Darkness If you have an original containing faint markings and dark images, you can adjust the brightness to make a copy that is easier to read. To adjust the darkness of copies, press Darkness ( ). Each time you press the button, the following modes are available: • Lightest: Works well with darker print. • Light: Works well with dark print. • Normal: Works well with standard typed or printed originals. • Dark: Works well with light print. • Darkest: Works well with lighter print or faint pencil markings. Original type The original type setting is used to improve the copy quality by selecting the document type for the current copy job. To select the document type, press Original Type ( h ). Each time you press the button, the following modes are available: • Text: Use for originals containing mostly text. • Text/Photo: Use for originals with mixed text and photographs. • Photo: Use when the originals are photographs. • Magazine: Use when the originals are magazines. Reduced or enlarged copy By using the Reduce/Enlarge ( ) button, you can reduce or enlarge the size of a copied image from 25% to 400% when you copy original documents from the scanner glass, or from 25% to 100% from the DADF. To select from the predefined copy sizes: 1. Press Reduce/Enlarge ( ). 2. Press Reduce/Enlarge ( ) or the left/right arrow until the size setting you want appears and press OK. To scale the copy by directly entering the scale rate: 1. Press Reduce/Enlarge ( ). 2. Press Reduce/Enlarge ( ) or the left/right arrow until Custom appears and press OK. 3. Enter the scale rate and press OK to save the selection. When you make a reduced copy, black lines may appear at the bottom of your copy. Copying | 31
-
 1
1 -
2
-
3
-
4
-
5
-
6
-
7
-
8
-
9
-
10
-
11
-
12
-
13
-
14
-
15
-
16
-
17
-
18
-
19
-
20
-
21
-
22
-
23
-
24
-
25
-
 26
26 -
 27
27 -
 28
28 -
 29
29 -
 30
30 -
 31
31 -
 32
32 -
 33
33 -
 34
34 -
 35
35 -
 36
36 -
37
-
38
-
39
-
40
-
41
-
42
-
43
-
44
-
45
-
46
-
47
-
48
-
49
-
50
-
51
-
52
-
53
-
54
-
55
-
56
-
57
-
58
-
59
-
60
-
61
-
62
-
63
-
64
-
65
-
66
-
67
-
68
-
69
-
70
-
71
-
72
-
73
-
74
-
75
-
76
-
77
-
78
-
79
-
80
-
81
-
82
-
83
-
84
-
85
-
86
-
87
-
88
-
89
-
90
-
91
-
92
-
93
-
94
-
95
-
96
-
97
-
98
-
99
-
100
-
101
-
102
-
103
-
104
-
105
-
106
-
107
-
108
-
109
-
110
-
111
-
112
-
113
-
114
-
115
-
116
-
117
-
118
-
119
-
120
-
121
-
122
-
123
-
124
-
125
-
126
-
127
-
128
-
129
-
130
-
131
-
132
-
133
-
134
-
135
-
136
-
137
-
138
-
139
-
140
-
141
 |
 |