Dell 5330dn Workgroup User's Guide - Page 90
About Tab, Using a Favorite Setting
 |
View all Dell 5330dn Workgroup manuals
Add to My Manuals
Save this manual to your list of manuals |
Page 90 highlights
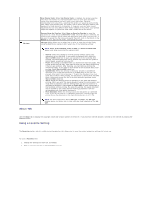
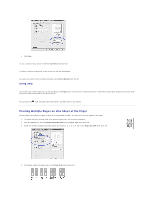
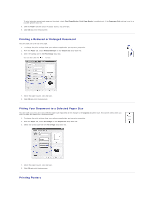
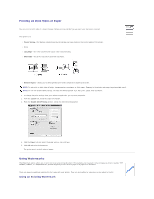
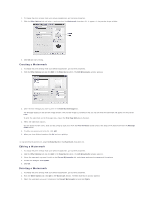
Job type About Tab User Printer Fonts: When Use Printer Fonts is checked, the printer uses the fonts that are stored in its memory(resident fonts) to print your document, rather than downloading the fonts used in your document. Because downloading fonts takes time, selecting this option can speed up your printing time. When using Printer fonts, the printer tries to match the fonts used in your document to those stored in its memory. If, however, you use fonts in your document that are very different from those resident in the printer, your printed output will appear very different from what it looks like on the screen. Save as Form for Overlay: Select Save as Form for Overlay to save the document as a form file (C:\FORMOVER\*.FOM). Once this option is selected, the printer driver requires the file name and destination path each time you print. If you want to preset the file name and specify the path, click on the button in the Output to area, type the file name, and specify the path. Job type dialog allows you to select how to print or save the printing file by using the RAM Disk or optional HDD. Select one of the following settings: NOTE: Store, Print Schedule, Store to HDD and Store to Public HDD appear only when you install the optional HDD. l Normal: Select this setting for normal printing without storing your documents in the RAM Disk. If you install the optional HDD, check the Store to HDD check box to save your document in the hard disk after printing. The saved document can be printed any time from the printer's control panel, as well as from your PC. l Proof: This setting is available when you make more than two copies. The printer prints the first copy, then waits so that you can check the printing if there is any problem. After checking, you can continue printing the remaining copies. If you want to save the file in the hard disk after proof printing, check Store to HDD check box. l Confidential: Select this setting to send your private or confidential document with a specified password to the RAM Disk so that you can prevent other users from accessing it. To print the document, you must enter the password. After printing, the document is cleared from the RAM Disk. If you want to save the file in the hard disk after printing, check Store to HDD check box. l Store: Select this setting to save a document in the hard disk without printing. When you print the saved document using the control panel, you must enter a password. Use this setting when you store a private or a confidential document. Check Store to Public HDD to save a document in the hard disk without printing. By using this setting, the saved document can be printed by any users without entering a password. Use this setting when you store public documents. l Print Schedule: Select this setting to print the document at a specified time. If you set the time for 11 PM when the printer is hardly used, the printer stores the document in the hard disk and prints it at 11 PM. NOTE: For more information about Job type, click Help. The Job type window opens and allows you to view onscreen help supplied on the Job type. Use the About tab to display the copyright notice and version number of the driver. If you have an Internet browser, connect to the Internet by clicking the website button. Using a Favorite Setting The Favorites option, which is visible on each properties tab, allows you to save the current properties settings for future use. To save a Favorites item: 1. Change the settings on each tab, as needed. 2. Enter a name for the item in the Favorites input box.
-
 1
1 -
2
-
3
-
4
-
5
-
6
-
7
-
8
-
9
-
10
-
11
-
12
-
13
-
14
-
15
-
16
-
17
-
18
-
19
-
20
-
21
-
22
-
23
-
24
-
25
-
26
-
27
-
28
-
29
-
30
-
31
-
32
-
33
-
34
-
35
-
36
-
37
-
38
-
39
-
40
-
41
-
42
-
43
-
44
-
45
-
46
-
47
-
48
-
49
-
50
-
51
-
52
-
53
-
54
-
55
-
56
-
57
-
58
-
59
-
60
-
61
-
62
-
63
-
64
-
65
-
66
-
67
-
68
-
69
-
70
-
71
-
72
-
73
-
74
-
75
-
76
-
77
-
78
-
79
-
80
-
81
-
82
-
83
-
84
-
 85
85 -
 86
86 -
 87
87 -
 88
88 -
 89
89 -
 90
90 -
 91
91 -
 92
92 -
 93
93 -
 94
94 -
 95
95 -
96
-
97
-
98
-
99
-
100
-
101
-
102
-
103
-
104
-
105
-
106
-
107
-
108
-
109
-
110
-
111
-
112
-
113
-
114
-
115
-
116
-
117
-
118
-
119
-
120
-
121
-
122
-
123
-
124
-
125
-
126
-
127
 |
 |
