Dell B5465dnf Mono Laser Printer MFP User's Guide - Page 274
Replace jammed originals if restarting job.
 |
View all Dell B5465dnf Mono Laser Printer MFP manuals
Add to My Manuals
Save this manual to your list of manuals |
Page 274 highlights
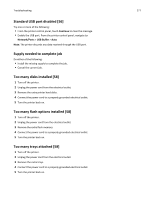
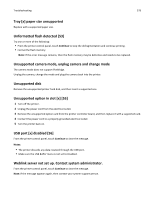
Troubleshooting 274 Replace jammed originals if restarting job. Try one or more of the following: • Touch Cancel job to clear the message and cancel the scan job. • Touch Scan from automatic feeder to continue scanning from the ADF immediately after the last successful scan job. • Touch Scan from flatbed to continue scanning from the scanner immediately after the last successful scan job. • Touch Finish job without further scanning to end the last successful scan job. • Touch Restart job to restart the scan job with the same settings from the previous scan job. Replace last scanned page and jammed originals if restarting job. Try one or more of the following: • Touch Cancel job to clear the message and cancel the scan job. • Touch Scan from automatic feeder to continue scanning from the ADF immediately after the last successful scan job. • Touch Scan from flatbed to continue scanning from the scanner immediately after the last successful scan job. • Touch Finish job without further scanning to end the last successful scan job. • Touch Restart job to restart the scan job with the same settings from the previous scan job. Replace maintenance kit, 0 estimated pages remain [80.xy] Contact technical support or your Dell printer dealer, and then report the message. The printer is scheduled for maintenance. Replace missing fuser [80.xx] 1 Install the missing fuser. For more information, see the instruction sheet that came with the replacement part. 2 From the printer control panel, touch Continue to clear the message. Replace separator pad Try one or more of the following: • Replace the separator pad. For more information, see the instruction sheet that came with the supply. • From the printer control panel, touch Ignore to clear the message. Replace unsupported cartridge [32.xy] Remove the toner cartridge, and then install a supported one to clear the message and continue printing. For more information, see the instruction sheet that came with the supply or see the "Replacing supplies" section of the User's Guide. Note: If you do not have a replacement cartridge, then see the "Ordering supplies" section of the User's Guide or visit our Web site.
-
 1
1 -
2
-
3
-
4
-
5
-
6
-
7
-
8
-
9
-
10
-
11
-
12
-
13
-
14
-
15
-
16
-
17
-
18
-
19
-
20
-
21
-
22
-
23
-
24
-
25
-
26
-
27
-
28
-
29
-
30
-
31
-
32
-
33
-
34
-
35
-
36
-
37
-
38
-
39
-
40
-
41
-
42
-
43
-
44
-
45
-
46
-
47
-
48
-
49
-
50
-
51
-
52
-
53
-
54
-
55
-
56
-
57
-
58
-
59
-
60
-
61
-
62
-
63
-
64
-
65
-
66
-
67
-
68
-
69
-
70
-
71
-
72
-
73
-
74
-
75
-
76
-
77
-
78
-
79
-
80
-
81
-
82
-
83
-
84
-
85
-
86
-
87
-
88
-
89
-
90
-
91
-
92
-
93
-
94
-
95
-
96
-
97
-
98
-
99
-
100
-
101
-
102
-
103
-
104
-
105
-
106
-
107
-
108
-
109
-
110
-
111
-
112
-
113
-
114
-
115
-
116
-
117
-
118
-
119
-
120
-
121
-
122
-
123
-
124
-
125
-
126
-
127
-
128
-
129
-
130
-
131
-
132
-
133
-
134
-
135
-
136
-
137
-
138
-
139
-
140
-
141
-
142
-
143
-
144
-
145
-
146
-
147
-
148
-
149
-
150
-
151
-
152
-
153
-
154
-
155
-
156
-
157
-
158
-
159
-
160
-
161
-
162
-
163
-
164
-
165
-
166
-
167
-
168
-
169
-
170
-
171
-
172
-
173
-
174
-
175
-
176
-
177
-
178
-
179
-
180
-
181
-
182
-
183
-
184
-
185
-
186
-
187
-
188
-
189
-
190
-
191
-
192
-
193
-
194
-
195
-
196
-
197
-
198
-
199
-
200
-
201
-
202
-
203
-
204
-
205
-
206
-
207
-
208
-
209
-
210
-
211
-
212
-
213
-
214
-
215
-
216
-
217
-
218
-
219
-
220
-
221
-
222
-
223
-
224
-
225
-
226
-
227
-
228
-
229
-
230
-
231
-
232
-
233
-
234
-
235
-
236
-
237
-
238
-
239
-
240
-
241
-
242
-
243
-
244
-
245
-
246
-
247
-
248
-
249
-
250
-
251
-
252
-
253
-
254
-
255
-
256
-
257
-
258
-
259
-
260
-
261
-
262
-
263
-
264
-
265
-
266
-
267
-
268
-
 269
269 -
 270
270 -
 271
271 -
 272
272 -
 273
273 -
 274
274 -
 275
275 -
 276
276 -
 277
277 -
 278
278 -
 279
279 -
280
-
281
-
282
-
283
-
284
-
285
-
286
-
287
-
288
-
289
-
290
-
291
-
292
-
293
-
294
-
295
-
296
-
297
-
298
-
299
-
300
-
301
-
302
-
303
-
304
-
305
-
306
-
307
-
308
-
309
-
310
-
311
-
312
-
313
-
314
-
315
-
316
-
317
-
318
-
319
-
320
-
321
-
322
-
323
-
324
-
325
-
326
-
327
-
328
-
329
-
330
-
331
-
332
-
333
-
334
-
335
-
336
-
337
-
338
-
339
-
340
-
341
 |
 |