Dell Brocade G620 Brocade 8.0.1 Fabric OS Administratiors Guide - Page 160
Remote authentication, Remote authentication configuration, Client/server model
 |
View all Dell Brocade G620 manuals
Add to My Manuals
Save this manual to your list of manuals |
Page 160 highlights
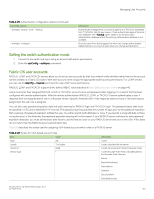
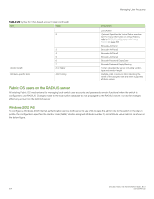
Managing User Accounts 3. Create a serial connection to the standby CP blade as described in Connecting to Fabric OS through the serial port on page 38. 4. Reboot the standby CP blade by sliding the On/Off switch on the ejector handle of the standby CP blade to Off , and then back to On . This causes the blade to reset. 5. Press Esc within four seconds after the message "Press escape within 4 seconds..."is displayed. 6. When prompted, enter 3 to enter the command shell. 7. Enter the passwd command at the shell prompt. The passwd command applies only to the boot PROM password when it is entered from the boot interface. 8. Enter the boot PROM password at the prompt, and then re-enter it when prompted. The password must be eight alphanumeric characters long (any additional characters are not recorded). Record this password for future use. 9. Enter the saveEnv command to save the new password. 10. Reboot the standby CP blade by entering the reset command. 11. Connect to the active CP blade over a serial or Telnet connection and enter the haEnable command to restore high availability, and then fail over the active CP blade by entering the haFailover command. Traffic resumes flowing through the newly active CP blade after it has completed rebooting. 12. Connect the serial cable to the serial port on the new standby CP blade (previously the active CP blade). 13. Repeat step 3 through step 10 for the new standby CP blade. 14. Connect to the active CP blade over a serial or Telnet connection and enter the haEnable command to restore high availability. NOTE To recover lost passwords, refer to the Fabric OS Troubleshooting and Diagnostics Guide. Remote authentication Fabric OS supports user authentication through the local user database or one of the following external authentication services: ∙ Remote authentication dial-in user service (RADIUS) ∙ Lightweight Directory Access Protocol (LDAP) using Microsoft Active Directory in Windows or OpenLDAP in Linux. ∙ LDAP is supported with Windows 2008-2012 running LDAP 2003-2008 schema. ∙ Terminal Access Controller Access-Control System Plus (TACACS+) Remote authentication configuration A switch can be configured to try one of the supported remote authentication services (RADIUS, LDAP, or TACACS+) and local switch authentication. The switch can also be configured to use only a remote authentication service, or only local switch authentication. Client/server model When configured to use one of the supported remote authentication services, the switch acts as a Network Access Server (NAS) and RADIUS, LDAP, or TACACS+ client. The switch sends all authentication, authorization, and accounting (AAA) service requests to the authentication server. The authentication server receives the request, validates the request, and sends its response back to the switch. The supported management access channels that integrate with RADIUS, LDAP, and TACACS+ include serial port, Telnet, SSH, and Web Tools. All these access channels require the switch IP address or name to connect. RADIUS, LDAP, and TACACS+ servers accept both IPv4 and IPv6 address formats. For accessing both the active and standby CP blades, and for the purpose of HA failover, both CP IP addresses of a Backbone should be included in the authentication server configuration. Brocade Fabric OS Administration Guide, 8.0.1 160 53-1004111-02
-
 1
1 -
2
-
3
-
4
-
5
-
6
-
7
-
8
-
9
-
10
-
11
-
12
-
13
-
14
-
15
-
16
-
17
-
18
-
19
-
20
-
21
-
22
-
23
-
24
-
25
-
26
-
27
-
28
-
29
-
30
-
31
-
32
-
33
-
34
-
35
-
36
-
37
-
38
-
39
-
40
-
41
-
42
-
43
-
44
-
45
-
46
-
47
-
48
-
49
-
50
-
51
-
52
-
53
-
54
-
55
-
56
-
57
-
58
-
59
-
60
-
61
-
62
-
63
-
64
-
65
-
66
-
67
-
68
-
69
-
70
-
71
-
72
-
73
-
74
-
75
-
76
-
77
-
78
-
79
-
80
-
81
-
82
-
83
-
84
-
85
-
86
-
87
-
88
-
89
-
90
-
91
-
92
-
93
-
94
-
95
-
96
-
97
-
98
-
99
-
100
-
101
-
102
-
103
-
104
-
105
-
106
-
107
-
108
-
109
-
110
-
111
-
112
-
113
-
114
-
115
-
116
-
117
-
118
-
119
-
120
-
121
-
122
-
123
-
124
-
125
-
126
-
127
-
128
-
129
-
130
-
131
-
132
-
133
-
134
-
135
-
136
-
137
-
138
-
139
-
140
-
141
-
142
-
143
-
144
-
145
-
146
-
147
-
148
-
149
-
150
-
151
-
152
-
153
-
154
-
 155
155 -
 156
156 -
 157
157 -
 158
158 -
 159
159 -
 160
160 -
 161
161 -
 162
162 -
 163
163 -
 164
164 -
 165
165 -
166
-
167
-
168
-
169
-
170
-
171
-
172
-
173
-
174
-
175
-
176
-
177
-
178
-
179
-
180
-
181
-
182
-
183
-
184
-
185
-
186
-
187
-
188
-
189
-
190
-
191
-
192
-
193
-
194
-
195
-
196
-
197
-
198
-
199
-
200
-
201
-
202
-
203
-
204
-
205
-
206
-
207
-
208
-
209
-
210
-
211
-
212
-
213
-
214
-
215
-
216
-
217
-
218
-
219
-
220
-
221
-
222
-
223
-
224
-
225
-
226
-
227
-
228
-
229
-
230
-
231
-
232
-
233
-
234
-
235
-
236
-
237
-
238
-
239
-
240
-
241
-
242
-
243
-
244
-
245
-
246
-
247
-
248
-
249
-
250
-
251
-
252
-
253
-
254
-
255
-
256
-
257
-
258
-
259
-
260
-
261
-
262
-
263
-
264
-
265
-
266
-
267
-
268
-
269
-
270
-
271
-
272
-
273
-
274
-
275
-
276
-
277
-
278
-
279
-
280
-
281
-
282
-
283
-
284
-
285
-
286
-
287
-
288
-
289
-
290
-
291
-
292
-
293
-
294
-
295
-
296
-
297
-
298
-
299
-
300
-
301
-
302
-
303
-
304
-
305
-
306
-
307
-
308
-
309
-
310
-
311
-
312
-
313
-
314
-
315
-
316
-
317
-
318
-
319
-
320
-
321
-
322
-
323
-
324
-
325
-
326
-
327
-
328
-
329
-
330
-
331
-
332
-
333
-
334
-
335
-
336
-
337
-
338
-
339
-
340
-
341
-
342
-
343
-
344
-
345
-
346
-
347
-
348
-
349
-
350
-
351
-
352
-
353
-
354
-
355
-
356
-
357
-
358
-
359
-
360
-
361
-
362
-
363
-
364
-
365
-
366
-
367
-
368
-
369
-
370
-
371
-
372
-
373
-
374
-
375
-
376
-
377
-
378
-
379
-
380
-
381
-
382
-
383
-
384
-
385
-
386
-
387
-
388
-
389
-
390
-
391
-
392
-
393
-
394
-
395
-
396
-
397
-
398
-
399
-
400
-
401
-
402
-
403
-
404
-
405
-
406
-
407
-
408
-
409
-
410
-
411
-
412
-
413
-
414
-
415
-
416
-
417
-
418
-
419
-
420
-
421
-
422
-
423
-
424
-
425
-
426
-
427
-
428
-
429
-
430
-
431
-
432
-
433
-
434
-
435
-
436
-
437
-
438
-
439
-
440
-
441
-
442
-
443
-
444
-
445
-
446
-
447
-
448
-
449
-
450
-
451
-
452
-
453
-
454
-
455
-
456
-
457
-
458
-
459
-
460
-
461
-
462
-
463
-
464
-
465
-
466
-
467
-
468
-
469
-
470
-
471
-
472
-
473
-
474
-
475
-
476
-
477
-
478
-
479
-
480
-
481
-
482
-
483
-
484
-
485
-
486
-
487
-
488
-
489
-
490
-
491
-
492
-
493
-
494
-
495
-
496
-
497
-
498
-
499
-
500
-
501
-
502
-
503
-
504
-
505
-
506
-
507
-
508
-
509
-
510
-
511
-
512
-
513
-
514
-
515
-
516
-
517
-
518
-
519
-
520
-
521
-
522
-
523
-
524
-
525
-
526
-
527
-
528
-
529
-
530
-
531
-
532
-
533
-
534
-
535
-
536
-
537
-
538
-
539
-
540
-
541
-
542
-
543
-
544
-
545
-
546
-
547
-
548
-
549
-
550
-
551
 |
 |
