Dell Brocade G620 Brocade 8.0.1 Fabric OS Administratiors Guide - Page 168
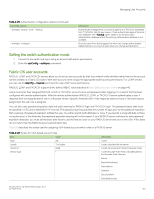
Enabling clients, Configuring RADIUS server support with Windows 2012
 |
View all Dell Brocade G620 manuals
Add to My Manuals
Save this manual to your list of manuals |
Page 168 highlights
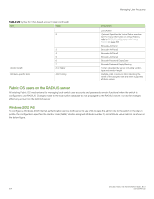
Managing User Accounts Example of adding a user name to the RADIUS authentication For example, to set up an account called JohnDoe with admin permissions with a password expiry date of May 28, 2008 and a warning period of 30 days: JohnDoe Auth-Type := Local User-Password == "johnPassword", Brocade-Auth-Role = "admin", Brocade-Passwd-ExpiryDate = "05/28/08", Brocade-Passwd-WarnPeriod = "30" Example of using the local system password to authenticate users The following example uses the local system password file to authenticate users. Auth-Type := System Brocade-Auth-Role = "admin", Brocade-AVPairs1 = "HomeLF=70", Brocade-AVPairs2 = "LFRoleList=admin:2,4-8,70,80,128", Brocade-AVPairs3 = "ChassisRole=switchadmin", Brocade-Passwd-ExpiryDate = "11/10/2008", Brocade-Passwd-WarnPeriod = "30" When you use network information service (NIS) for authentication, the only way to enable authentication with the password file is to force the Brocade switch to authenticate using Password Authentication Protocol (PAP); this requires the -a pap option with the aaaConfig command. Enabling clients Clients are the switches that will use the RADIUS server; each client must be defined. By default, all IP addresses are blocked. The Brocade Backbones send their RADIUS requests using the IP address of the active CP. When adding clients, add both the active and standby CP IP addresses so that, in the event of a failover, users can still log in to the switch. 1. Open the $PREFIX/etc/raddb/client.config file in a text editor and add the switches that are to be configured as RADIUS clients. For example, to configure the switch at IP address 10.32.170.59 as a client: client 10.32.170.59 secret = Secret shortname = Testing Switch nastype = other In this example, shortname is an alias used to easily identify the client. Secret is the shared secret between the client and server. Make sure the shared secret matches that configured on the switch (refer to Adding an authentication server to the switch configuration on page 182). 2. Save the file $PREFIX/etc/raddb/client.config , and then start the RADIUS server as follows: $PREFIX/sbin/radiusd Configuring RADIUS server support with Windows 2012 The instructions for setting up RADIUS on a Windows 2012 server are listed here for your convenience but are not guaranteed to be accurate for your network environment. Always check with your system administrator before proceeding with setup. NOTE All instructions involving Microsoft Windows 2012 can be obtained from www.microsoft.com or your Microsoft documentation. Confer with your system or network administrator prior to configuration for any special needs your network environment may have. Brocade Fabric OS Administration Guide, 8.0.1 168 53-1004111-02
-
 1
1 -
2
-
3
-
4
-
5
-
6
-
7
-
8
-
9
-
10
-
11
-
12
-
13
-
14
-
15
-
16
-
17
-
18
-
19
-
20
-
21
-
22
-
23
-
24
-
25
-
26
-
27
-
28
-
29
-
30
-
31
-
32
-
33
-
34
-
35
-
36
-
37
-
38
-
39
-
40
-
41
-
42
-
43
-
44
-
45
-
46
-
47
-
48
-
49
-
50
-
51
-
52
-
53
-
54
-
55
-
56
-
57
-
58
-
59
-
60
-
61
-
62
-
63
-
64
-
65
-
66
-
67
-
68
-
69
-
70
-
71
-
72
-
73
-
74
-
75
-
76
-
77
-
78
-
79
-
80
-
81
-
82
-
83
-
84
-
85
-
86
-
87
-
88
-
89
-
90
-
91
-
92
-
93
-
94
-
95
-
96
-
97
-
98
-
99
-
100
-
101
-
102
-
103
-
104
-
105
-
106
-
107
-
108
-
109
-
110
-
111
-
112
-
113
-
114
-
115
-
116
-
117
-
118
-
119
-
120
-
121
-
122
-
123
-
124
-
125
-
126
-
127
-
128
-
129
-
130
-
131
-
132
-
133
-
134
-
135
-
136
-
137
-
138
-
139
-
140
-
141
-
142
-
143
-
144
-
145
-
146
-
147
-
148
-
149
-
150
-
151
-
152
-
153
-
154
-
155
-
156
-
157
-
158
-
159
-
160
-
161
-
162
-
 163
163 -
 164
164 -
 165
165 -
 166
166 -
 167
167 -
 168
168 -
 169
169 -
 170
170 -
 171
171 -
 172
172 -
 173
173 -
174
-
175
-
176
-
177
-
178
-
179
-
180
-
181
-
182
-
183
-
184
-
185
-
186
-
187
-
188
-
189
-
190
-
191
-
192
-
193
-
194
-
195
-
196
-
197
-
198
-
199
-
200
-
201
-
202
-
203
-
204
-
205
-
206
-
207
-
208
-
209
-
210
-
211
-
212
-
213
-
214
-
215
-
216
-
217
-
218
-
219
-
220
-
221
-
222
-
223
-
224
-
225
-
226
-
227
-
228
-
229
-
230
-
231
-
232
-
233
-
234
-
235
-
236
-
237
-
238
-
239
-
240
-
241
-
242
-
243
-
244
-
245
-
246
-
247
-
248
-
249
-
250
-
251
-
252
-
253
-
254
-
255
-
256
-
257
-
258
-
259
-
260
-
261
-
262
-
263
-
264
-
265
-
266
-
267
-
268
-
269
-
270
-
271
-
272
-
273
-
274
-
275
-
276
-
277
-
278
-
279
-
280
-
281
-
282
-
283
-
284
-
285
-
286
-
287
-
288
-
289
-
290
-
291
-
292
-
293
-
294
-
295
-
296
-
297
-
298
-
299
-
300
-
301
-
302
-
303
-
304
-
305
-
306
-
307
-
308
-
309
-
310
-
311
-
312
-
313
-
314
-
315
-
316
-
317
-
318
-
319
-
320
-
321
-
322
-
323
-
324
-
325
-
326
-
327
-
328
-
329
-
330
-
331
-
332
-
333
-
334
-
335
-
336
-
337
-
338
-
339
-
340
-
341
-
342
-
343
-
344
-
345
-
346
-
347
-
348
-
349
-
350
-
351
-
352
-
353
-
354
-
355
-
356
-
357
-
358
-
359
-
360
-
361
-
362
-
363
-
364
-
365
-
366
-
367
-
368
-
369
-
370
-
371
-
372
-
373
-
374
-
375
-
376
-
377
-
378
-
379
-
380
-
381
-
382
-
383
-
384
-
385
-
386
-
387
-
388
-
389
-
390
-
391
-
392
-
393
-
394
-
395
-
396
-
397
-
398
-
399
-
400
-
401
-
402
-
403
-
404
-
405
-
406
-
407
-
408
-
409
-
410
-
411
-
412
-
413
-
414
-
415
-
416
-
417
-
418
-
419
-
420
-
421
-
422
-
423
-
424
-
425
-
426
-
427
-
428
-
429
-
430
-
431
-
432
-
433
-
434
-
435
-
436
-
437
-
438
-
439
-
440
-
441
-
442
-
443
-
444
-
445
-
446
-
447
-
448
-
449
-
450
-
451
-
452
-
453
-
454
-
455
-
456
-
457
-
458
-
459
-
460
-
461
-
462
-
463
-
464
-
465
-
466
-
467
-
468
-
469
-
470
-
471
-
472
-
473
-
474
-
475
-
476
-
477
-
478
-
479
-
480
-
481
-
482
-
483
-
484
-
485
-
486
-
487
-
488
-
489
-
490
-
491
-
492
-
493
-
494
-
495
-
496
-
497
-
498
-
499
-
500
-
501
-
502
-
503
-
504
-
505
-
506
-
507
-
508
-
509
-
510
-
511
-
512
-
513
-
514
-
515
-
516
-
517
-
518
-
519
-
520
-
521
-
522
-
523
-
524
-
525
-
526
-
527
-
528
-
529
-
530
-
531
-
532
-
533
-
534
-
535
-
536
-
537
-
538
-
539
-
540
-
541
-
542
-
543
-
544
-
545
-
546
-
547
-
548
-
549
-
550
-
551
 |
 |
