Dell EqualLogic PS6210S EqualLogic Auto-Snapshot Manager/Microsoft Edition Ver - Page 66
Checksum Verification and Soft Recovery Logging and Notification, Create Exchange Smart Copies
 |
View all Dell EqualLogic PS6210S manuals
Add to My Manuals
Save this manual to your list of manuals |
Page 66 highlights
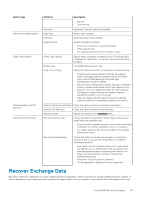
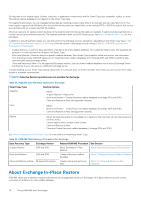
Checksum Verification and Soft Recovery Logging and Notification Your notification preferences for Smart Copy creation also apply to Checksum Verification and Soft Recovery operations. However, you have the option to combine the Checksum Verification notification and the Soft Recovery notification emails into a single message, or receive two separate notifications. Use the ASM/ME Notification Settings tab to configure this option. See Notification Settings. If you configure notification email, a partial log from the most recent run is attached to the email. Any errors that occur during Checksum Verification and Soft Recovery operations are logged in the event log. A running log is maintained by the verifier at the following location: Program Files\Equallogic\Logs\EqlExVerifier.log To avoid consuming excessive disk space, ASM/ME creates a new log file when the current file exceeds 10MB. The old log file is saved at the following location: Program Files\Equallogic\Logs\EqlExVerifier_0.log ASM/ME maintains two log files: • current log • preceding log If you need to retain older logs, use the Windows Task Scheduler to copy the log to another location. Create Exchange Smart Copies You can create Smart Copies of mailbox databases (for Exchange 2013 and 2016), volumes, and collections. For help understanding options in the Create Smart Copy wizard, see Table 22. Exchange Smart Copy Options. 1. Expand the Applications, Volumes, or Collections node. 2. Right-click an Exchange component and click Create Smart Copy. The Create Smart Copy dialog box opens. 3. Select a Smart Copy type and Backup type. (Optionally) Provide a description. NOTE: If you are creating a Smart Copy of an Exchange application component, only the Smart Copy backup type is supported. 4. Click Next. • If you are creating a snapshot or a clone of an Exchange application component, ASM/ME displays the Data Verification and Soft Recovery Options dialog box. Proceed to step 5. • If you are creating a replica of an Exchange application component, ASM/ME displays the Exchange Replica Verification Options dialog box. Select the verification method (Clone and Verify, Promote and Verify, or Defer Verification) and click Next. For a detailed description of each of these options, see Checksum Verification and Soft Recovery for Replicas. 5. Select from the options in the Data Verification and Soft Recovery Options dialog box. a) Select the Checksum Verification option, the Soft Recovery option, or both options. b) Verify the eseUtil.exe location. Select when to perform the tasks and click Next. The Summary dialog box opens. c) If you deselect both the Checksum Verification and Soft Recovery options, the dialog box appears dimmed. Click Next and proceed to step 6. d) If you are creating a replica Smart Copy, the options in this dialog box are selectable or dimmed depending on which option you chose in step 4. For example, when you chose the Defer Verification option, all options in this dialog box will appear dimmed and you can just click Next. e) If you need to change the remote Global Verification window, you must change it on the remote computer. 6. Verify the settings displayed in the Summary screen. If the information is correct, click Create. Exchange Smart Copy Options The following table describes the different options for Exchange from the Create Smart Copy wizard. 66 Using ASM/ME with Exchange
-
 1
1 -
2
-
3
-
4
-
5
-
6
-
7
-
8
-
9
-
10
-
11
-
12
-
13
-
14
-
15
-
16
-
17
-
18
-
19
-
20
-
21
-
22
-
23
-
24
-
25
-
26
-
27
-
28
-
29
-
30
-
31
-
32
-
33
-
34
-
35
-
36
-
37
-
38
-
39
-
40
-
41
-
42
-
43
-
44
-
45
-
46
-
47
-
48
-
49
-
50
-
51
-
52
-
53
-
54
-
55
-
56
-
57
-
58
-
59
-
60
-
 61
61 -
 62
62 -
 63
63 -
 64
64 -
 65
65 -
 66
66 -
 67
67 -
 68
68 -
 69
69 -
 70
70 -
 71
71 -
72
-
73
-
74
-
75
-
76
-
77
-
78
-
79
-
80
-
81
-
82
-
83
-
84
-
85
-
86
-
87
-
88
-
89
-
90
-
91
-
92
-
93
-
94
-
95
-
96
-
97
-
98
-
99
-
100
-
101
-
102
-
103
-
104
-
105
-
106
-
107
-
108
-
109
-
110
-
111
-
112
-
113
-
114
-
115
-
116
-
117
-
118
-
119
-
120
-
121
-
122
-
123
-
124
-
125
-
126
-
127
-
128
-
129
-
130
-
131
-
132
-
133
-
134
 |
 |
