Dell Force10 S55T Installing the S55 System - Page 32
Replace a fan module, Grab Handle, Optional, Module
 |
View all Dell Force10 S55T manuals
Add to My Manuals
Save this manual to your list of manuals |
Page 32 highlights
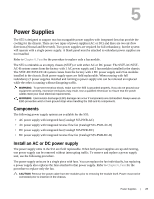
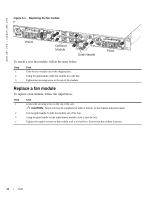
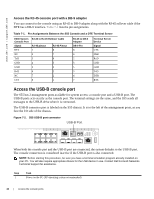
www.dell.com | support.dell.com Figure 6-1. Replacing the fan module PSU0 Optional Module Grab Handle To install a new fan module, follow the steps below: Step Task 1 Take the fan module out of the shipping box. 2 Using the grab handle, slide the module in to the bay. 3 Tighten the securing screw at the top of the module. PSU1 Replace a fan module To replace a fan module, follow the steps below. Step 1 2 3 4 Task Loosen the securing screw at the top of the unit. CAUTION: Steps 2-3 must be completed in within 1 minute, or the chassis will power down. Use the grab handle to slide the module out of the bay. Using the grab handle on the replacement module, slide it into the bay. Tighten the captive screws on the module with a screwdriver. Ensure that the module is secure. 32 | Fans
-
 1
1 -
2
-
3
-
4
-
5
-
6
-
7
-
8
-
9
-
10
-
11
-
12
-
13
-
14
-
15
-
16
-
17
-
18
-
19
-
20
-
21
-
22
-
23
-
24
-
25
-
26
-
 27
27 -
 28
28 -
 29
29 -
 30
30 -
 31
31 -
 32
32 -
 33
33 -
 34
34 -
 35
35 -
 36
36 -
 37
37 -
38
-
39
-
40
-
41
-
42
-
43
-
44
-
45
-
46
-
47
-
48
-
49
-
50
 |
 |
