Dell Inspiron 2600 Solutions Guide - Page 86
Operating System
 |
View all Dell Inspiron 2600 manuals
Add to My Manuals
Save this manual to your list of manuals |
Page 86 highlights
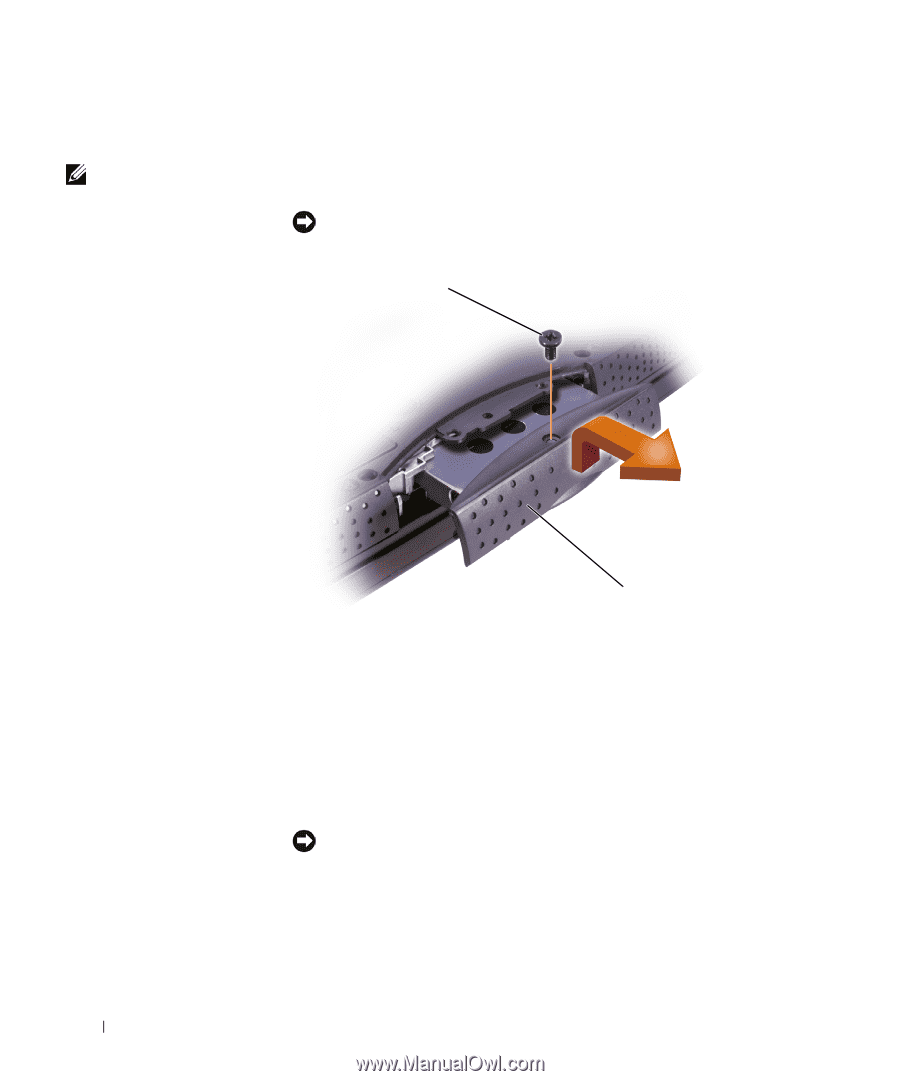
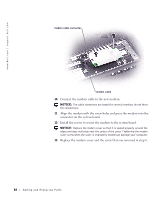
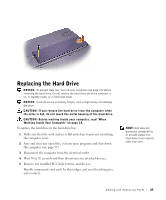
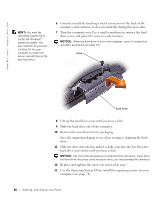
www.dell.com | support.dell.com HINT: You need the Operating System CD to install the Windows® operating system. You also need the Drivers and Utilities CD for your computer to install the drivers and utilities on the new hard drive. 6 Ground yourself by touching a metal connector on the back of the computer, and continue to do so periodically during this procedure. 7 Turn the computer over. Use a small screwdriver to remove the hard drive screw, and place the screw in a safe location. NOTICE: When the hard drive is not in the computer, store it in protective antistatic packaging (see page 15). screw hard drive 8 Lift up the hard drive cover until you hear a click. 9 Slide the hard drive out of the computer. 10 Remove the new drive from its packaging. Save the original packaging to use when storing or shipping the hard drive. 11 Slide the drive into the bay until it is fully seated in the bay. Press the hard drive cover down until you hear a click. NOTICE: Use firm and even pressure to slide the drive into place. If you force the hard drive into place using excessive force, you may damage the connector. 12 Replace and tighten the screw you removed in step 7. 13 Use the Operating System CD to install the operating system for your computer (see page 74). 86 Adding and Replacing Pa rts
-
 1
1 -
2
-
3
-
4
-
5
-
6
-
7
-
8
-
9
-
10
-
11
-
12
-
13
-
14
-
15
-
16
-
17
-
18
-
19
-
20
-
21
-
22
-
23
-
24
-
25
-
26
-
27
-
28
-
29
-
30
-
31
-
32
-
33
-
34
-
35
-
36
-
37
-
38
-
39
-
40
-
41
-
42
-
43
-
44
-
45
-
46
-
47
-
48
-
49
-
50
-
51
-
52
-
53
-
54
-
55
-
56
-
57
-
58
-
59
-
60
-
61
-
62
-
63
-
64
-
65
-
66
-
67
-
68
-
69
-
70
-
71
-
72
-
73
-
74
-
75
-
76
-
77
-
78
-
79
-
80
-
 81
81 -
 82
82 -
 83
83 -
 84
84 -
 85
85 -
 86
86 -
 87
87 -
 88
88 -
 89
89 -
 90
90 -
 91
91 -
92
-
93
-
94
-
95
-
96
-
97
-
98
-
99
-
100
-
101
-
102
-
103
-
104
-
105
-
106
-
107
-
108
-
109
-
110
-
111
-
112
-
113
-
114
-
115
-
116
-
117
-
118
-
119
-
120
-
121
-
122
-
123
-
124
-
125
-
126
-
127
-
128
-
129
-
130
-
131
-
132
-
133
-
134
 |
 |