Dell Inspiron 546s Service Manual - Page 22
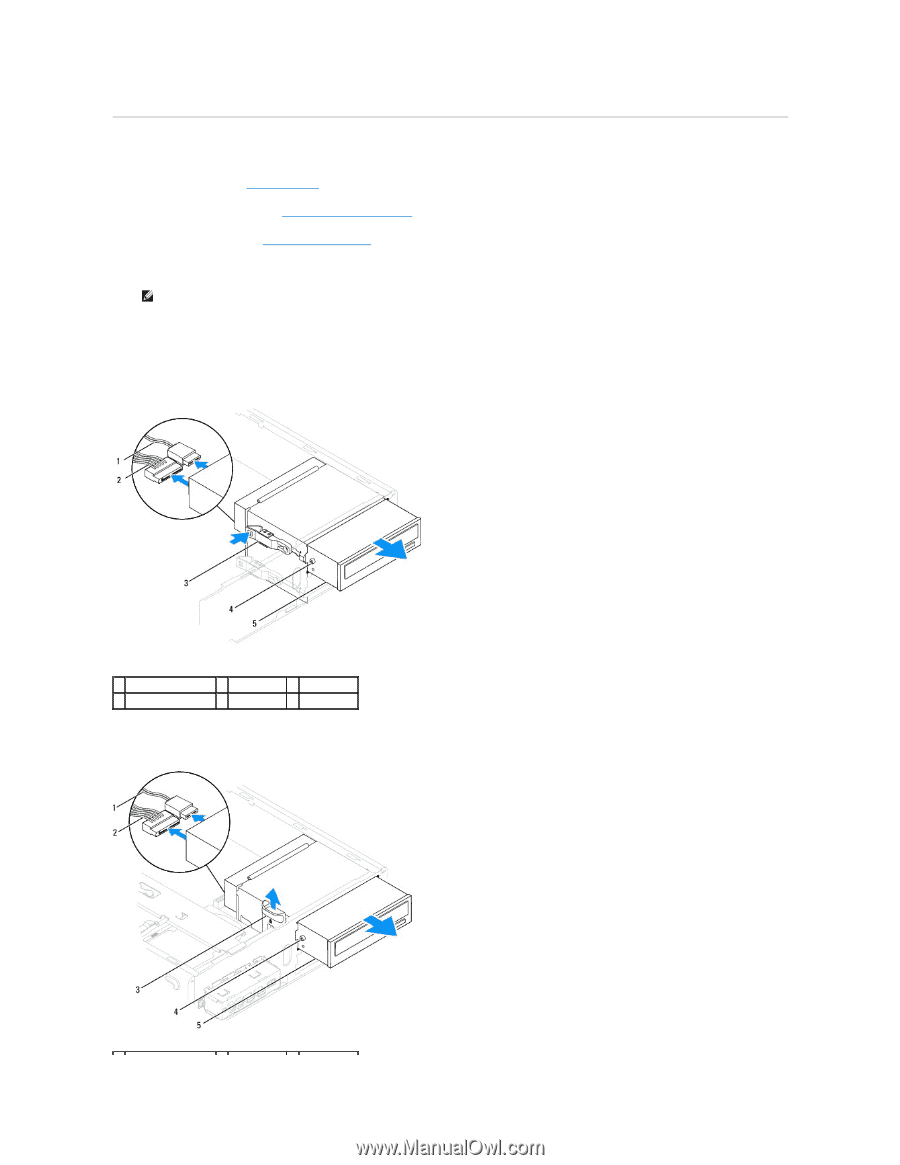
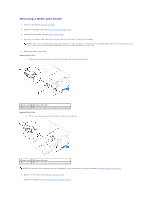
Removing an Optical Drive
 |
View all Dell Inspiron 546s manuals
Add to My Manuals
Save this manual to your list of manuals |
Page 22 highlights
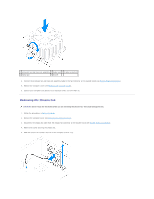
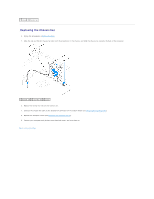
Removing an Optical Drive 1. Follow the procedures in Before You Begin. 2. Remove the computer cover (see Removing the Computer Cover). 3. Remove the front bezel (see Removing the Front Bezel). 4. Disconnect the power cable and the data cable from the back of the optical drive. NOTE: If you are not replacing the optical drive at this time, disconnect the other end of the data cable from the system board and set it aside. You can use the data cable to install an optical drive at a later time. 5. Remove the optical drive. Inspiron 535s/537s a. Press in on the securing tab on the side of the optical drive and slide it out. 1 data cable 2 power cable 3 securing tab 4 shoulder screws (2) 5 optical drive Inspiron 545s/546s a. Pull the securing tab upwards and slide the optical drive out.
-
 1
1 -
2
-
3
-
4
-
5
-
6
-
7
-
8
-
9
-
10
-
11
-
12
-
13
-
14
-
15
-
16
-
 17
17 -
 18
18 -
 19
19 -
 20
20 -
 21
21 -
 22
22 -
 23
23 -
 24
24 -
 25
25 -
 26
26 -
 27
27 -
28
-
29
-
30
-
31
-
32
-
33
-
34
-
35
-
36
-
37
-
38
-
39
-
40
-
41
-
42
-
43
-
44
-
45
-
46
-
47
-
48
-
49
 |
 |