Dell Inspiron 546s Service Manual - Page 45
Replacing the System Board
 |
View all Dell Inspiron 546s manuals
Add to My Manuals
Save this manual to your list of manuals |
Page 45 highlights
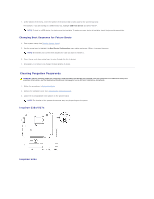
1 screws (8) 2 system board Compare the system board that you just removed with the replacement system board to ensure that they are identical. Replacing the System Board 1. Gently align the system board into the chassis and slide it towards the back of the computer. CAUTION: Ensure that the port retention springs are not damaged while replacing the sytem board. Inspiron 535s/537s 1 back of the computer 2 port retention spring Inspiron 545s/546s 1 back of the computer 2 port retention springs (3)
-
 1
1 -
2
-
3
-
4
-
5
-
6
-
7
-
8
-
9
-
10
-
11
-
12
-
13
-
14
-
15
-
16
-
17
-
18
-
19
-
20
-
21
-
22
-
23
-
24
-
25
-
26
-
27
-
28
-
29
-
30
-
31
-
32
-
33
-
34
-
35
-
36
-
37
-
38
-
39
-
 40
40 -
 41
41 -
 42
42 -
 43
43 -
 44
44 -
 45
45 -
 46
46 -
 47
47 -
 48
48 -
 49
49
 |
 |
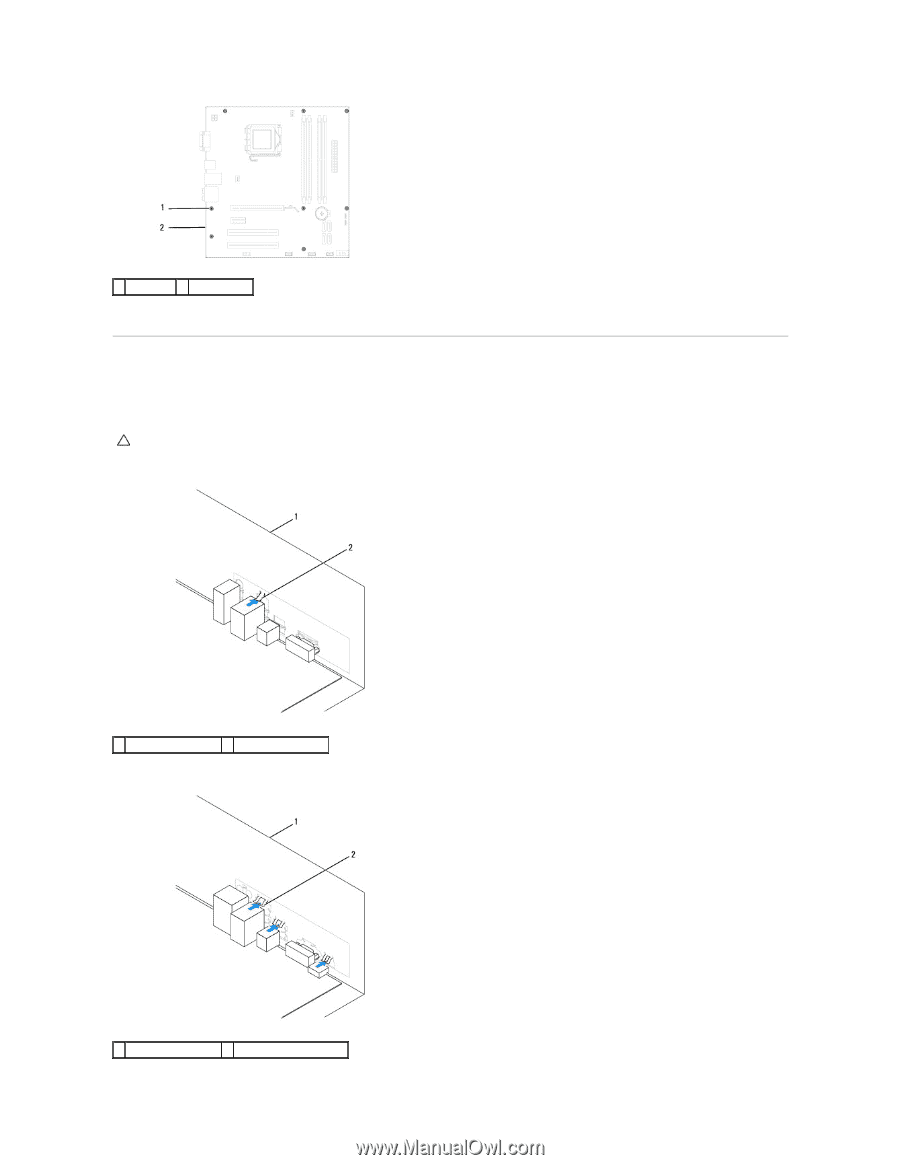
Compare the system board that you just removed with the replacement system board to ensure that they are identical.
Replacing the System Board
1.
Gently align the system board into the chassis and slide it towards the back of the computer.
Inspiron 535s/537s
Inspiron 545s/546s
1
screws (8)
2
system board
CAUTION:
Ensure that the port retention springs are not damaged while replacing the sytem board.
1
back of the computer
2
port retention spring
1
back of the computer
2
port retention springs (3)